Lets start. Open Photoshop and get the image you want to puppetize. This is a very easy tutorial and all you need to now is to use the transform option in photoshop that is in the edit menu. It's nothing to be afraid of. If you don't know what image to use feel free to use mine:

Create a new layer and start making ellipse. We are making a ellipse shape for the ends of all the parts you are going to cut. Don't worry if you don't understand now, just see the image below.
Now, create a duplicate of this image. Next what you need to do is to determine the places where you are going to cut the person in your image. If you are using my image below you can see where i cut my image on the map:

Go to your duplicated layer that we made in the above step. Get your clone tool and start cloning the background of your image, shown on the map above. This is what you should have:

We are starting to see the general look of the puppet. Now create a new layer and with the pencil tool size 2 and black color connect the ellipses. Then on a new layer with the brush tool size 3 and black color create the nails that hold the lines, and on another layer create the lines that control the puppet. And here how it should look:
In this next step will add wooden texture, if you don't have one use google to find one, just write wooden texture. Then add the texture on the skin of your image, just the skin and change the blend mode of the wooden image. Here is what I have so far:
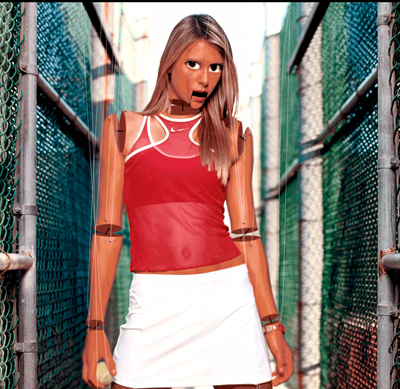
Getting close. Don't get upset of the look, because i had to reduce the quality of my image. Any way, moving on. Lets create the eyes and the mouth. Create a selection around the eyes and duplicate them. Now enlarge the eyes, each, color the pupils black a bit more to make them larger and if the white in the eyes is fading color that too with white color. Here is mine result:

And the last step is the mouth. Make a selection around the mouth like the shape below. With that selection still active copy the mouth. Under the mouth create a layer and with the selection still active fill the layer with black. Go to the mouth that you copy and nudge it down about 5 pixels or what ever you want. And that's it. Here is my final result: