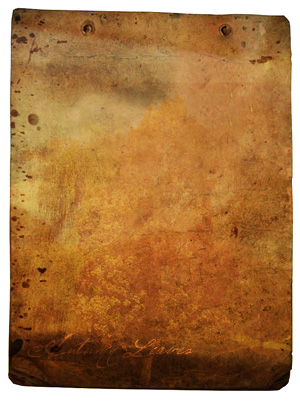
1. We'll need old piece of paper. I found this one, it's great -> Old Paper
2. Open it in Photoshop and resize if you want, it's too big for me.
3. It's a little bit blurry, apply Filter -> Sharpen -> Sharpen, then CTRL+F to apply it once again.
4. Add more contrast. Image -> Adjustment -> Brightness / Contrast, -30/45.
5. Now add an image we want to apply on it. I love trees so I used this one -> Tree
6. Copy it to a new layer and resize, because tree is now much bigger than piece of paper.
7. Now change blending mode of the new layer to Overlay. You should have something like this:
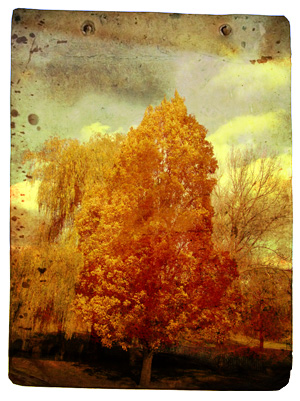
8. Reduce this layer's Opacity to about 40%.
You can quickly change Opacity by selecting layer and press any number on your numeric keyboard, for 40% it's only 4.
9. Filter -> Sharpen -> Sharpen.
10. Let's add some dirty things. There are two ways to do that. First is by erasing some parts using specific brush, the second is to paint something in dark colors. Anyway, look at these brushes -> deviantart.com
11. Download them and start erasing some parts of the image using these brushes or found another. Just search "Dirty Brushes" on DeviantArt
12. OK, maybe we'll add some text. I found a nice font -> Olho de Boi
13. Download it and copy to your Windows/Fonts folder.
14. Write something, I wrote "Autumn Leaves" on the bottom.
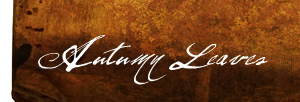
15. Set text layer's blending mode to Overlay
16. You know basics now, go do something more complex ;) Good luck.