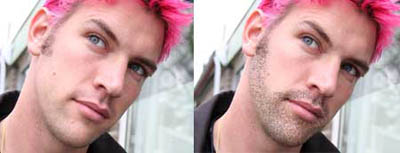
This photoshop tutorial will show you how you can easily add beards and stubble to a portrait. Here's my before and after photos..
- Adobe Photoshop CS6 Classroom in a Book
- Photoshop CS6: Visual QuickStart Guide
- Photoshop CS6 For Dummies
- Adobe Photoshop CS6 Digital Classroom
- Photoshop CS6: The Missing Manual
- The Adobe Photoshop CS6 Book for Digital Photographers
- Adobe Master Class: Photoshop Inspiring artwork and tutorials by established and emerging artists
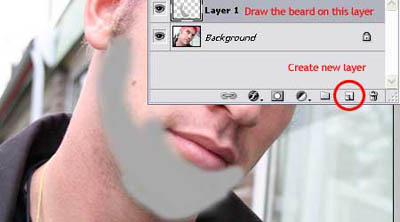
Step 1: Create new layer, and paint the beard area using a midtone gray using a soft-edged brush.
Step 2: Apply gaussian noise filter ( filter >> noise >> add noise) to your the gray you've just painted on the new layer. The amount of noise used will depend on the size of the image you're working on.
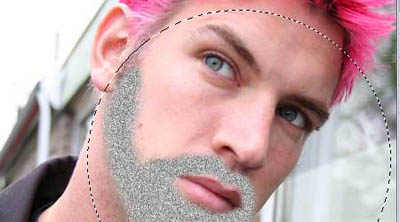
Step 3: Now apply the Radial Blur to make the stubble. First, we must set the midpoint for the blur by hold on 'alt' as you draw an elliptical marquee from the center out. Starting from the bridge of the nose and enclosing the whole beard area.
Step 4: Chose radial blur (filter > blur > radial blur: zoom, best).
Step 5: Now change the layer mode to hard light to make the stubble transparent.
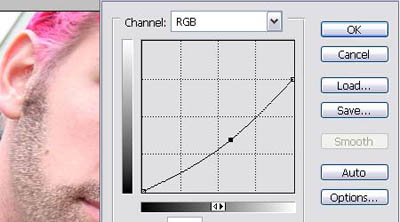
Step 6: To make the beard darker, you can lower the brightness by using the Curves Adjustment (Image > Adjustment > Curves)
Done!
Related Posts:
- How to Create a Porcelain Skin Effect in Adobe Photshop CS6
- Pure an Energetic Photomanipulation
- Vintage Yourself! The Easiest Way to Create Vintage Photo Effect
- St Valentine's Day Photo Manipulation (Exclusive Tutorial)
- Night of Spells(Exclusive Tutorial)
- When the Dreams Come True(Exclusive Tutorial)
- Na vi avatar photo manipulation exclusive tutorial