1. Create a new document (800*600).
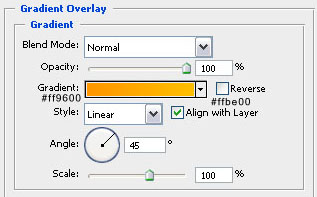
2. Fill the background with #ffffff and add a gradient using the blending options. Use the following settings like shown in the screenshot below. The second screenshot should be your outcome after you've adjusted the blending options of this layer.

3. Now create a new layer (layer - new layer) and use you pen tool (I hope you all know how to use it, if not, click here and follow one of those tutorials to start learning how to use the pen tool) and create something like this. Also, change your foreground color to #7f2a2d before you start.

4. Create another new layer and use some nice brushes to create a few flowers and lines, shapes, anything you like in the middle of your design! The colors I used are #f1f29a (yellow), #ffffff (white) and #7f2a2d (dark red). I used 5 sets of brushes (set 1, set2, set3, set4, set5)... The fourth step is totally up to you! You can just randomly ad some brushes like I did or do something else... Anyway, this is what I ended up with!

5. Create a new layer (layer - new layer) and use your rectangular marquee tool to select a square of 200*200px. Fill the selection with #c33b40 using your paint bucket tool.
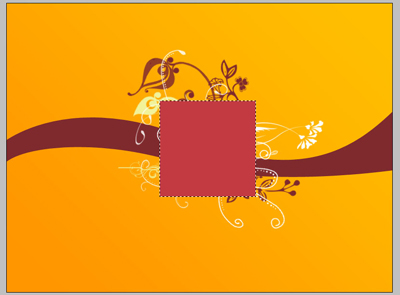
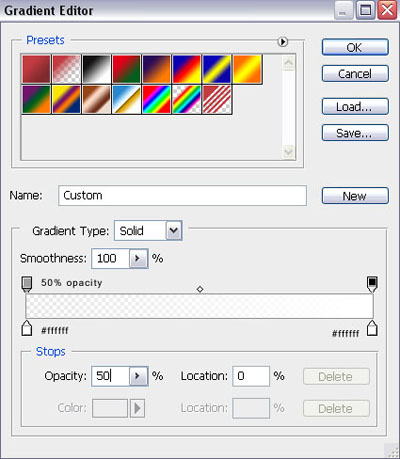
6. Now use your elliptical marquee tool to select a round shape above the box we've created in step 5 (first screenshot below)... Create another new layer and use your gradient tool with the settings seen in screenshot 2 to add a gradient to the red box from step 5! The outcome can be seen in the third screenshot below...


7. Of course we want to remove the part of the white gradient that's not on our red box so go to the layer of the red box and use your magic wand tool to select it! After that go to (select - inverse). Now select your gradient layer from step 6 and press delete or go to (edit - clear)...

8. Now the time has come to add some text so go ahead and type something in the box... There are unlimited possibilities!

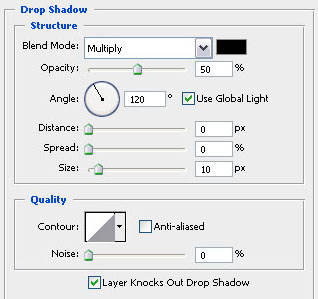
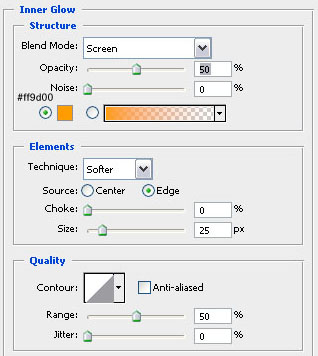
9. I've also decided to make the red box a little more interesting... So go to the blending options of that layer and add a drop shadow and an inner glow with the following settings!
10. And there you go, this tutorial is done and so is your wallpaper/card/... Look at the finished image below!