

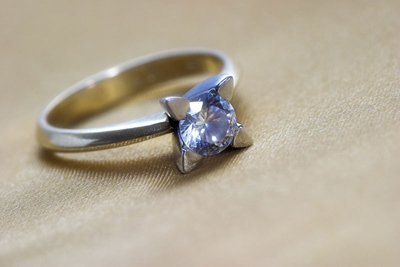
Step 1. Open our photo.
Step 2. Now we have to make a star. So we have to create a new document. So press Ctrl + N, and set width and height to 500px. Fill background with black. You can use Paint bucket tool or you can press D on keyboard and then Alt + Backspace.
Step 3. Create new layer and name it "shape". Now pick Path tool and draw a very sharp triangle, select foreground color to be white and then go to the Paths palette and click Load path as selection.
Now we have transformed our path into a selection.
Now go and pick Gradient tool (G), and select Foreground to Transparent from presets and set white for foreground. Now draw gradient from bottom to top. It should look like this.
Now press Ctrl + D to deselect and then Ctrl + T and scale down this layer. It should look like this
Step 4. Now we have to make 3 copies of this layer so pres 3 times Ctrl + J. Rotate them until you get a star shape. Something like this picture below.
Now click on the first copy press and hold Shift and click on the last one. Press Ctrl + E to merge this layer into one. Now copy this layer (Ctrl + J) and scale down this one. Make more copies of this layer, and rotate them as you see fit. Don't forget to merge them all at the end. I finished with this shape at the end.
Step 5. Now pick Move tool (V) and drag and drop this layer our photo that we opened in Step 1. Position it over the rock. You can close our star document because we won't need it any more.
Step 6. I advise you now to turn visibility of the star off (simple click on the eye icon in front of its layer). We now have to work on the ring so we don't want to be disturbed by this layer.
We now have to bring all the details on that rock.
Click on the "background" layer and copy it (Ctrl + J). Now pick eraser tool and erase everything on the photo except the rock on the ring. You can see the result on the picture below (note: when I removing background from photo I usually create new layer below and fill it with some color so I can easily determine the edges; later on I delete this layer).
Now go to the Filter - Sharpen - Smart sharpen and set these values.
Step 7. This step is optional but I like to do this on this kind of photo to bring some more effect to it.
So go and create new layer. Pick Elliptical Marquee tool (M) and draw an ellipse around our ring.
Go to Select - Feather and enter some big value. I entered 30px. Now go to Select - Inverse and fill it with black. Set blending mode for this layer to be Overlay and change Opacity to around 50%.
Step 8. And now to our star (flare). Turn On visibility for this layer. Now everything in this step is around position and perspective of this flare. So you use Transform tool and Perspective tool (Edit - Transform - Perspective) until you get the result you want. And in the end change Blending mode for this layer to Soft light or you can simply change opacity of this layer.
Here is the final photo:
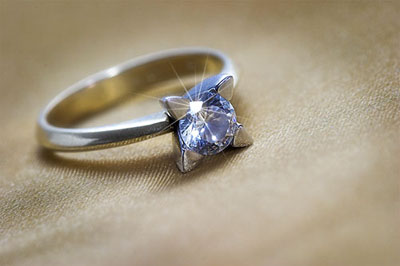
See you!