Begin by creating the file (File>New) that would have 1024x768 px and 72 dpi. Applying the Paint Bucket Tool (G), it's possible to fill the new layer with color #450716

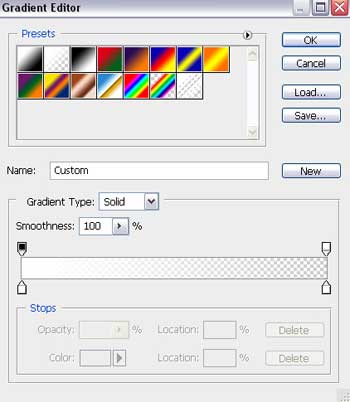
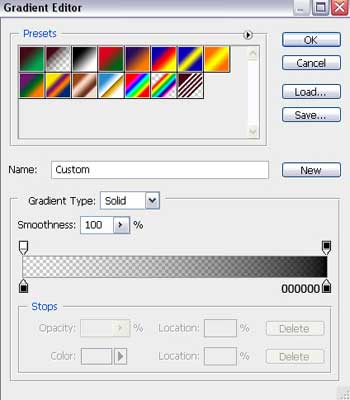
Choose the next parameters by making a mouse click on the processed layer on the layers' panel.
Blending Options>Gradient Overlay
Gradient's parameters:

Create a new layer and select after that the Paint Bucket Tool (G) to fill the layer in the next presented color: #39010C

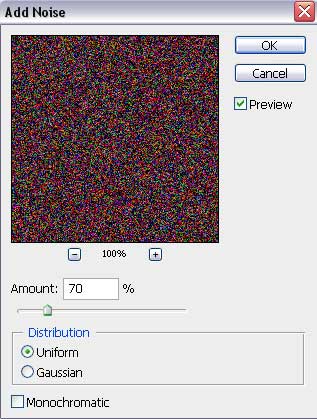
Select for the new layer: Filter>Noise>Add Noise

Apply for the layer the next parameters: Fill 50%
Blending mode-Darken

Create again a new layer (Create new layer) and use on it the standard brush that will be helpful in representing many dots of white color.


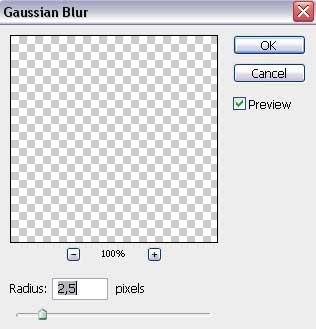
Make a copy of the last made layer. After that apply the next option for the original layer: Filter>Blur>Gaussian Blur
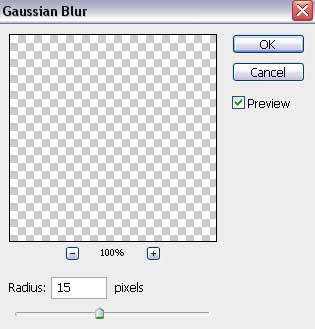

For the copy we'll select the next option: Filter>Blur>Gaussian Blur and the next parameters:
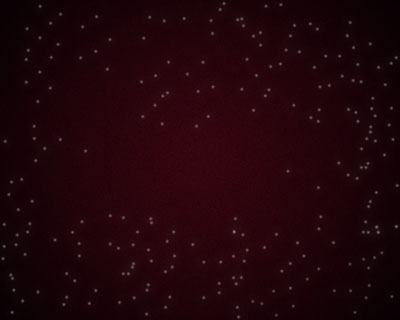
Select next parameters for the layer: Fill 70%
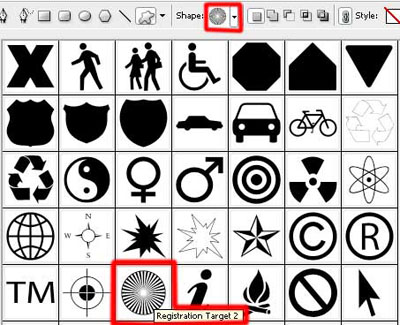
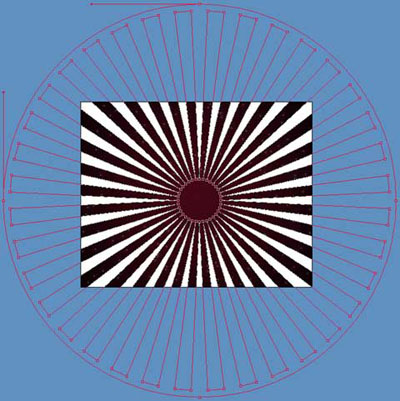
Using the Custom Shape Tool (U), try to represent now several rays of white color:
Press next combination of buttons Ctrl+E on the same layer. Use also the next selection for the same layer: Filter>Blur>Gaussian Blur


The layer's parameters: Fill 20%
Blending mode-Soft Light

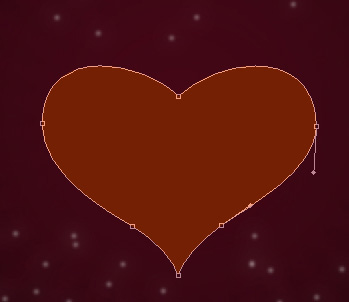
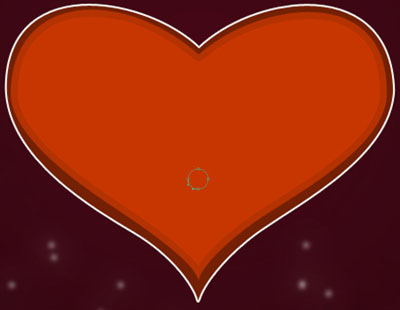
Using the Custom Shape Tool (U), it's possible to represent on the next stage a heart's silhouette, colored with #742004. Applying the Convert Point Tool, try to make some corrections on the heart's sizes:

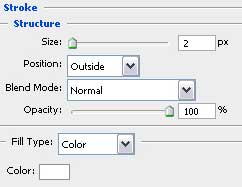
The layer's parameters: Blending Options>Stroke

Make a copy of the same layer and apply the Free Transform selection to make the copy smaller. This time we'll use also the next color #C73601

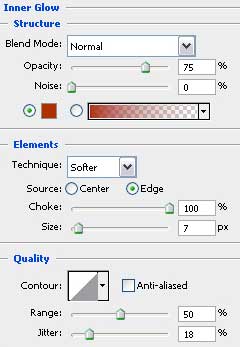
The layer's parameters: Blending Options>Inner Glow

Select now the Ellipse Tool (U) for picturing a small circle: Fill 0%
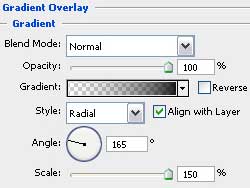
The layer's parameters: Blending Options>Gradient Overlay
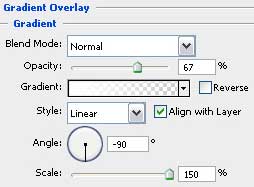
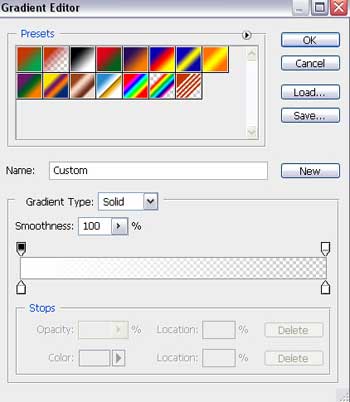
Gradient's parameters:

Make many copies of the last made circle and select the Free Transform option to place the copies as it is indicated below. The coming outside the circles' contours may be erased with the Eraser Tool (E).

For our convenience, we have to combine in a group all the layers composing the circles (hold on Ctrl button to mark out the corresponding layers and keep pressed the left mouse's button while taking the marked layers on Create a new group option). Using the same instrument we have used when representing the heart's silhouette, try to make a highlight on the heart's figure. Make some corrections on the heart's shape with the Convert Point Tool.
Fill 0%

The layer's parameters: Blending Options>Gradient Overlay
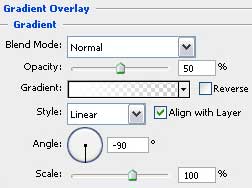
Gradient's parameters:


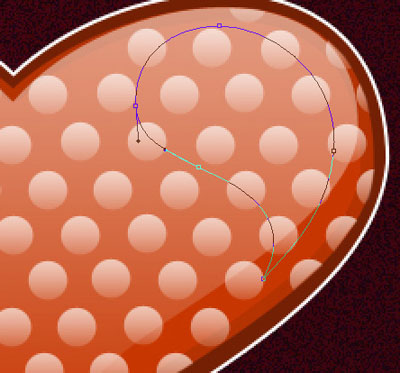
Using the Pen Tool (P), it's possible to represent another highlight on the heart, which shape may be corrected with the Convert Point Tool.
Fill 0%
The layer's parameters: Blending Options>Gradient Overlay
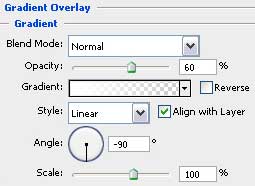
Gradient's parameters: