

When you are taking photos on cars that are on the track and you have cheaper digital camera then it is very hard to get so called Panning effect on your photos. In this tutorial I'll show you how to get this effect very easy.
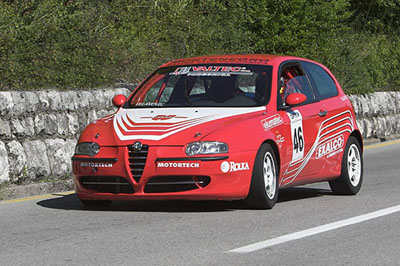
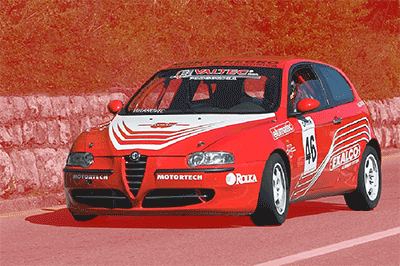
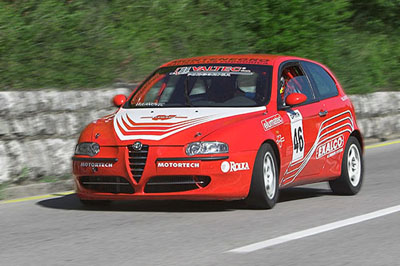
Step 1. Open our photo of sport car.
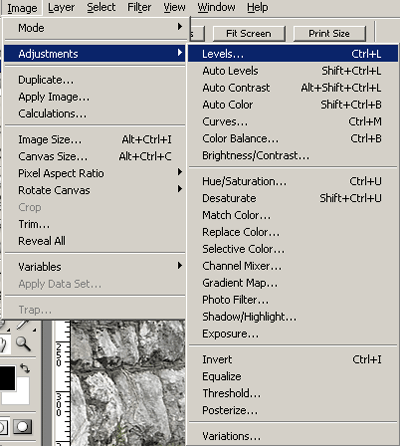
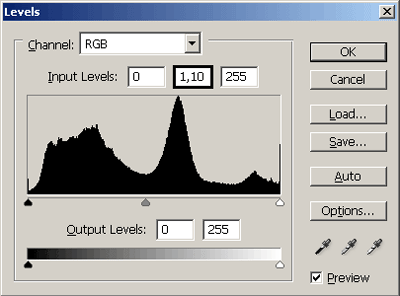
Step 2. Copy "background" layer and name it "copy". We can see that colors are a little bit "washed out" so we have to correct that. First go to Image - Adjustments - Levels (or simply press Ctrl + L)
and set these values
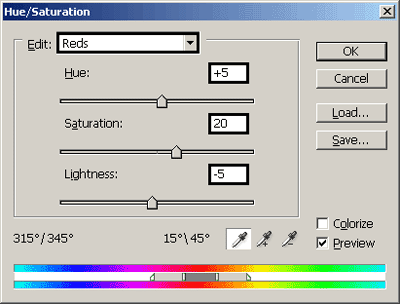
Step 3. Now go to the Image - Adjustments - Hue/Saturation (or simply press Ctrl + U on the keyboard). We have to correct red and green color. So pick reds and then click somewhere on the car (try to click on the area that we want to change). Now set these values for reds.
Now don't select green but yellow. Then click somewhere on that bushes behind the car. When done select these values for yellows.
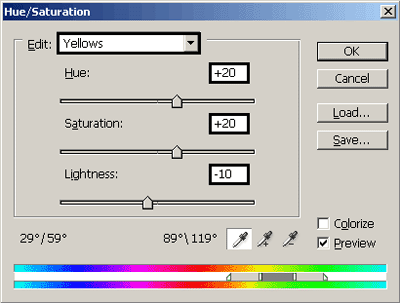
Now select Master and set these values.
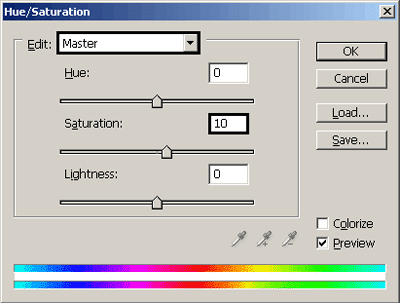
Click OK.
Step 4. Now we have to select car. You can do this in a couple of ways. Try using Magnetic Lasso (M) and after selecting car press Q on keyboard to enter Quick mask Tool and fine tune selection by adding and erasing some parts that are or aren't selected.
Press Q once again and you are out of Quick Mask mode. Copy selection on to a new layer using Ctrl + J on keyboard. Name that new layer "car".
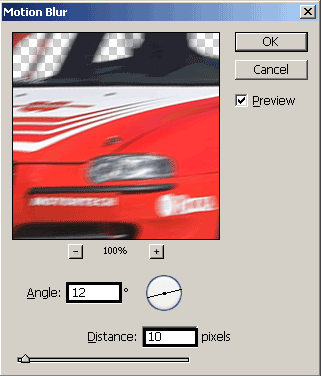
Step 5. Now let's add some motion to the background. Click on "copy" layer and go to the Filter - Blur - Motion Blur and set these values for blur.
Press OK.
Step 6. We have to add some radial blur and on the wheels. We are going to use one trick here. First go to Marquee tool and select Elliptical Marquee Tool. Click on the "car" layer. Now zoom on the front wheel and draw selection around it (something like I did on the picture below).
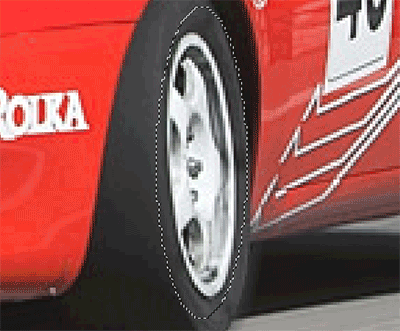
Now press Ctrl + J to copy this selection onto a new layer. Now press Ctrl + T to go to transform mode. Transform wheel so its shape becomes something like a normal wheel.
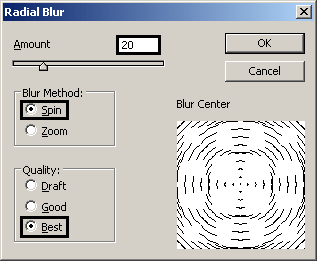
Press enter, then press and hold Ctrl on the keyboard and click on this new layer (this will select only that layer and the blur will occur only on this layer). Now go to the Filter - Blur - Radial Blur and set these values.
Now once again press Ctrl+ T and transform back this wheel to a previous position. Press Enter. Do this procedure and on the rear wheel.
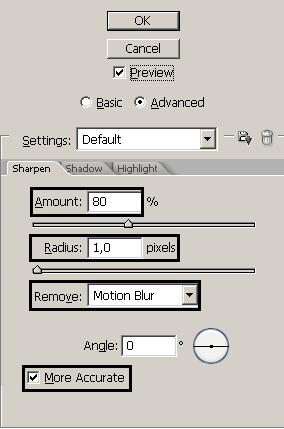
Step 7. In our last step we are going to sharpen a little bit only the car, so click on the "car" layer and go to the Filter - Sharpen - Smart Sharpen and set these values.
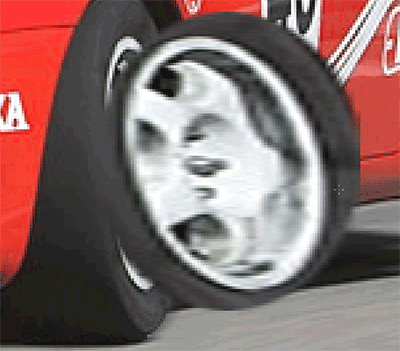
And our final photo looks like this
See you!