

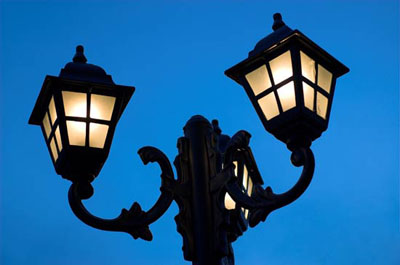
1. First we'll have to work on photo called "lamps". So go ahead and load it into your Photoshop. Our task in this step is to make a selection of those lamps. There are few different ways of achieving this goal and I'll use the slowest but the far best approach, which is calculations command. But first we have to remove those threes in the bottom of the photo. For this I'll use combination of two tools, Clone Stamp Tool and Healing Brush Tool. Go and pick Clone Stamp Tool (or press S on the keyboard). Alt click on the sky near those threes and roughly removes it. Then pick Healing Brush Tool and "heal" those rough parts. Result should look like this:
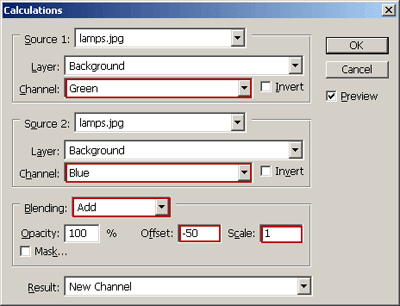
Now we have to somehow select lamps. As I said there are many different methods but we'll work with the calculations command. This command will use two different channels to make an alpha channel which we'll than slightly modify to make a perfect selection. So go and click Images - Calculations. You'll get dialog window and you have to make it like I did below.
Now click on channels palette and there is our Alpha channel. Rename it to lamp_selection. Now we have a perfect edge selection. Now we have to color everything inside these lamps to black. So, click on the lamp_selection, pick Brush tool and select black as the foreground color and start coloring every white and grey surface inside lamps. When you are finished result should look like this:

Final step is to invert this photo by pressing Ctrl + I or by going on Image - Aajustments - Invert. By the way, if you see some grey areas in bottom of the picture pick Brush Tool (B) and black color and color it in black.
Now we have our selection of lamps saved as a channel so we can use it again.
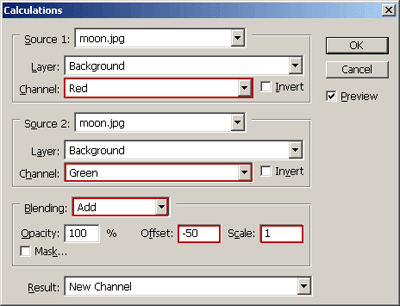
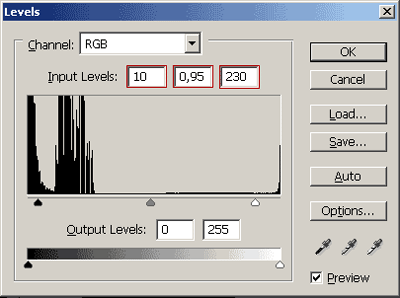
2. Now open up second photo called "moon". Using same methods as in the previous step we have to select only the moon, without its background. I once again used Calculations command and this time I used red and green channel with subtract like in the picture below
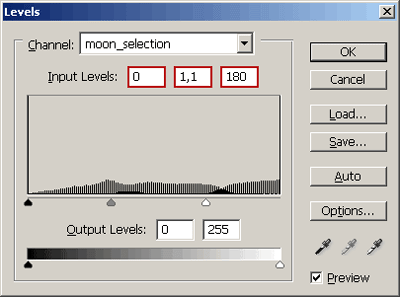
I renamed Alpha1 into moon_selection. To ease our work with selection I now applied Levels command (Ctrl + L) and set these values
Now pick Brush tool, select white for foreground color and make that grey areas inside moon white.
And now we have our selection saved as a channel. Let's go to the next step
3. We are still in moon.jpg. If you are not in the channels palette click on it. Then press and hold Ctrl and right click on the moon_selection. This will load selection. Now click on the layer palette, pick marquee toll, press and hold Ctrl and drag and drop moon onto a lamps.jpg file on which we worked in the beginning (you didn't close it didn't you?). Click on lamps.jpg file and position moon where ever you would like it to be. Everything until now was easy, now we are getting to the really hard stuff.
4. Rename layer with the moon on it to "moon". Now click on the background layer and duplicate this layer (Ctrl + J). Name this layer "base" and click on it. Now click on the Create new adjustment layer and set values as I did
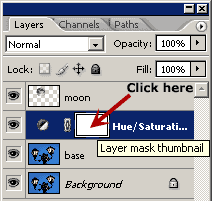
Now we have the dark color of the night sky but our lamps are also dark. So we have to mask areas where we want to see the light. So go on and click on layer mask
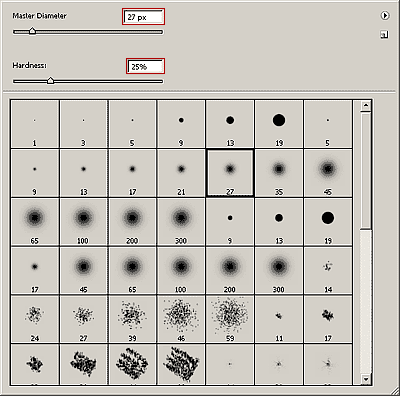
Then go and pick a black brush, medium size with small hardness and start painting over the lamps
When finished you should end with this kind of a result
5. Assuming that you are still on the Hue/Saturation layer click again on the create new adjustment layer and select Levels. Set values as I did.
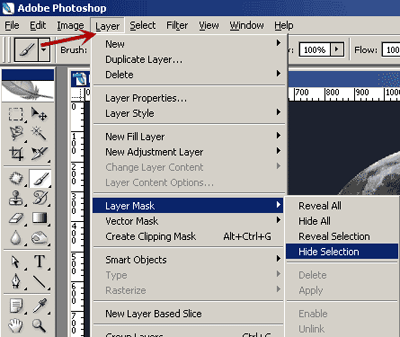
6. Now we have to hide moon behind the lamps. It's really simple. Go to the Select - Load Selection and for the channel select "lamp_selection". This will load lamp selection that we made earlier. Now go to Layer - Layer Mask - Hide Selection. And that is it. Simple.
7. Now let's add color dynamics to this image. Click and drag "lamp" layer just below "moon" layer. Duplicate "lamps" layer using Ctrl + J on keyboard. Name this new layer "lamps_light". Set Blending mode for "lamps" layer to Multiply and for "lamps_light" to Luminosity and opacity for this layer to 45%. Click on "lamps_light" layer and create layer mask. Now click on mask, pick Gradient Tool (G), press D on keyboard, and select this gradient type

and select Reverse.
Now point your cursor in the middle of image and drag left or right for about 1/4 of the photo width. Now pick Brush Tool (B), select white color and reveal some spots on the lamps where should be some light.
8. If we want this photo to be as realistic as we can we have to blur this moon just a little bit. So, click on the "moon" layer and pick Elliptical Marquee tool (M). Make a selection around moon (or you can Ctrl click on the "moon" layer) and then go to the Filter - Blur - Gaussian Blur and pick value that you think is OK.
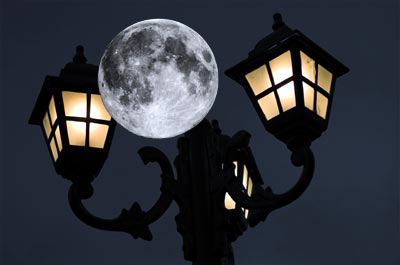
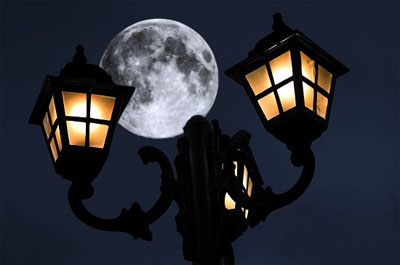
Here is the photo without last step

and the photo after step 8.
See you!