Step 1. First we choose something to be our background for the work, in my case, I chose a wooden table I have in my office. After that get a business card or a square piece of paper to use as reference and take a picture. Without moving the camera, get rid of the piece of paper and take another picture.
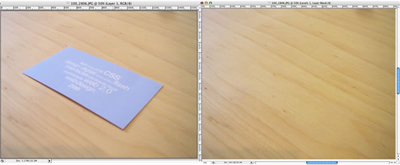
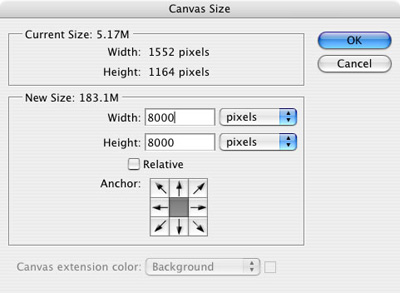
Step 2. Open your photos in Photoshop and place them in 2 layers. Now lets make our Canvas Size much bigger, we do this to utilize our guides.
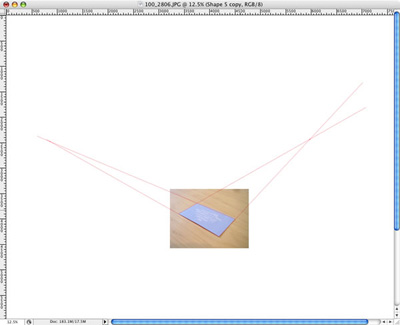
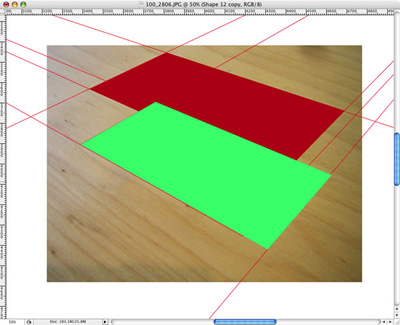
Step 3. Here we will find the vanishing points (what is that?). They will be necessary to create a convincing perspective to our folder. Using the Line Tool (U) draw lines following the edges of our reference, like the photo below. The one from the left side and the one from the right side all the way up until they crossed each other. Repeat the same for the one on the top and on the bottom.
Step 4. Now that you have the 2 vanishing points, we can place our object anywhere with the right perspective. However I first created a rectangle, with the Rectangle Tool (U), to find the best place for my folder on the grid. To do that use the Direct Selection Tool (A) and move the vertices of our rectangle.

Step 5. Repeating basically the same actions for the Step 4, lets place the other side of our folder.
Step 6. Here we will use the real images of our folder.
Paste the images in new layers
Using the Distort tool (Edit>Transform Path>Distort) just move the vertices to the same position as the rectangle we used as reference.
Repeat that for the other side of the folder.
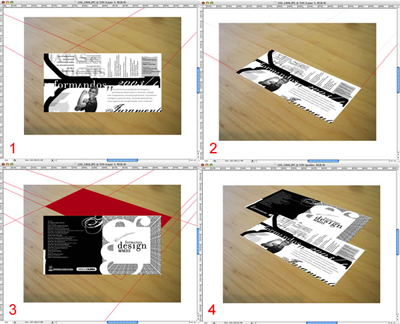
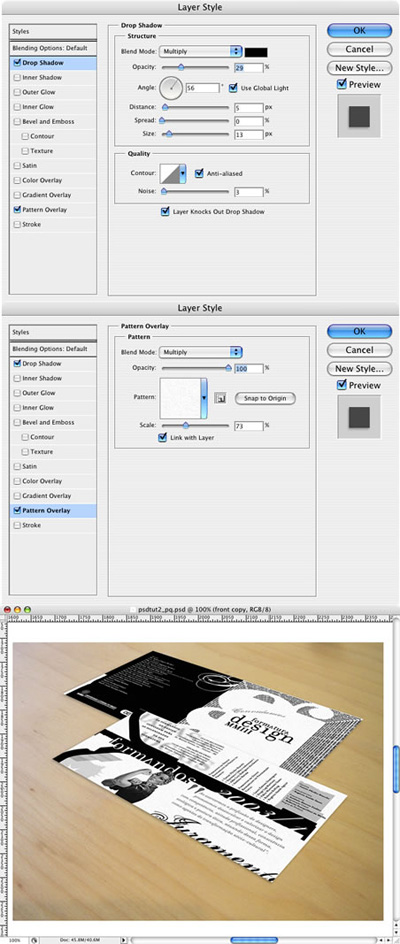
Step 7. To make our folder more real we will use the Layer Styles. Lets add some Drop Shadows and a Pattern Overlay to the front side of the folder.
Clicking with the right button of the mouse on the layer, copy the layer style and paste it to the other side of the folder's layer.
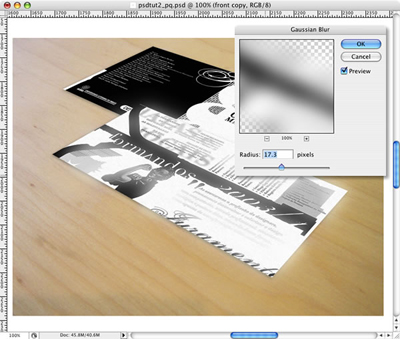
Step 8. Select the one of our sides, duplicate the layer and convert it to Smart Objects. Add a Gaussian Blur (Filters>Blur>Gaussian Blur). If you are not using the CS3 version just forget about converting to Smart Objects. Now just change the Blending Mode to Lighten.
Repeat the same steps for the other image.
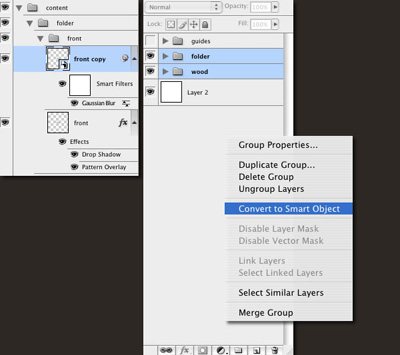
Step 9. Lets organize our document. Try to use layer names that you will remember and group them in folders. After that select everything, but the guides, group them again and name it "content". Duplicate the group an and convert it to Smart Objects.
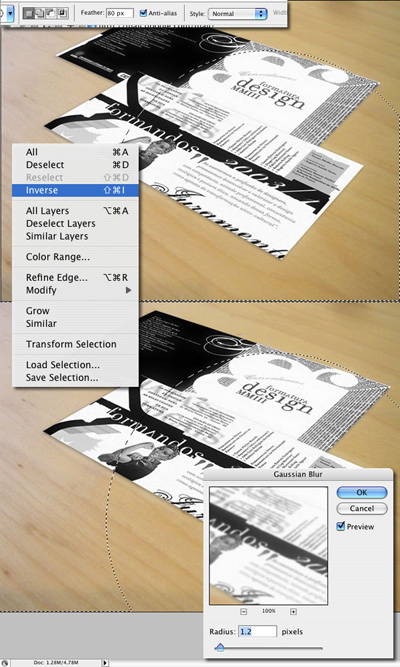
Step 10. Here we will add some Depth of Field (DOF) to our image. With our Content Smart Objected selected, use the Elliptical Marquee Tool (M).
- Change the Feather Options to 80px and Anti-alias.
- Create a elliptical selection like the one I did. Invert the selection (Select>Inverse).
- Now Apply a Gaussian Blur again.
We will notice that this will create that distance focus effect, everything gets blurry the further they get from the focal point.
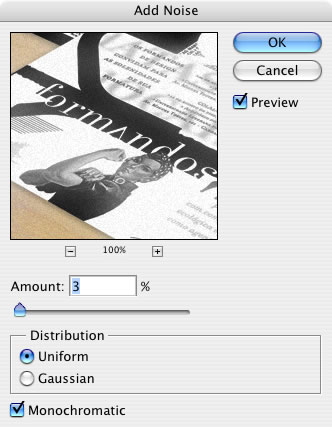
Step 11. Add a Noise (Filter>Noise>Add Noise) to make it a bit darker.
Conclusion
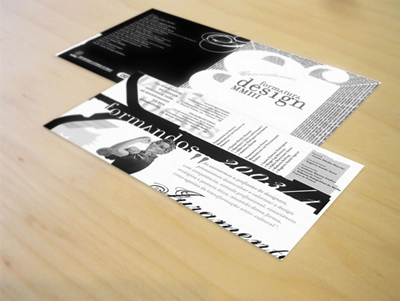
Even though we sort of applied a perspective, I want to say that it's not a totally real perspective. The idea here is to create a better look for our images using only Photoshop. So we will have to trust in our eyes. Observe the photo we took with the reference object and try to reproduce it. The more time we spend observing the more we will learn how to make our image look more realistic.