Create a new file (File>New) having 800x600 px and 72 dpi. Choose after that the Rectangle Tool (U) to represent the primary background's layer.
The layer's parameters:
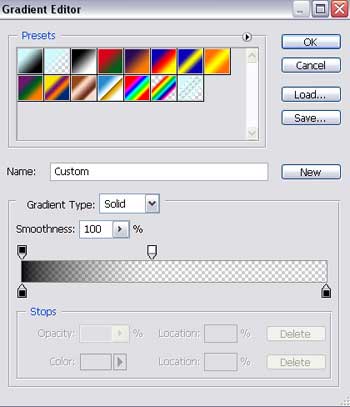
Blending Options>Gradient Overlay
Gradient's parameters:

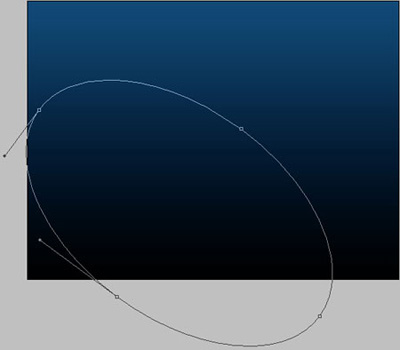
Select then the Ellipse Tool (U) and draw a flare on the background reserved for representing the site.
The layer's parameters:
Fill 0% on the layers.
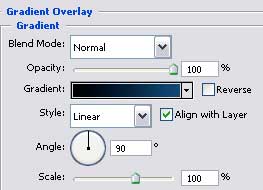
Blending Options>Gradient Overlay
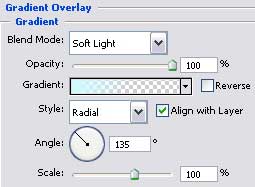
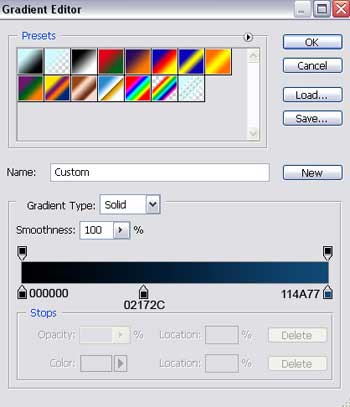
Gradient's parameters:


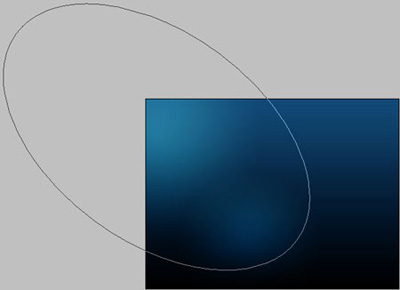
Make a copy of the last made layer and select the Free Transform option to enlarge the copy and place it the way it is shown below.

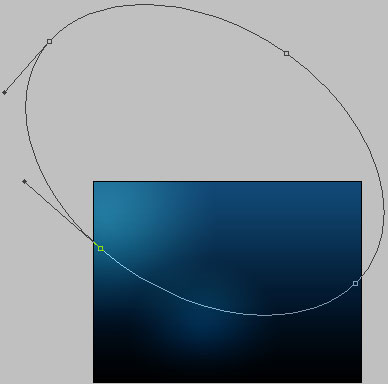
Applying the same instrument, we need to represent a kind of illumination effect on the background's top.
The layer's parameters:
Fill 0% on the layers.
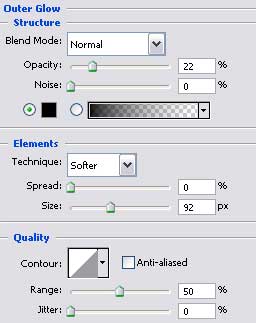
Blending Options>Outer Glow
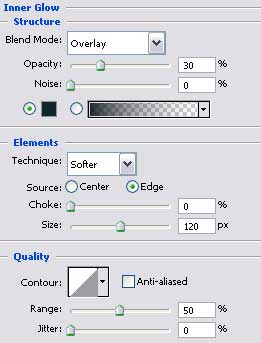
Blending Options>Inner Glow
Blending Options>Gradient Overlay
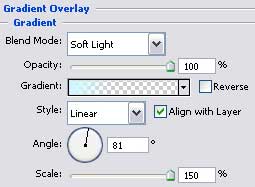
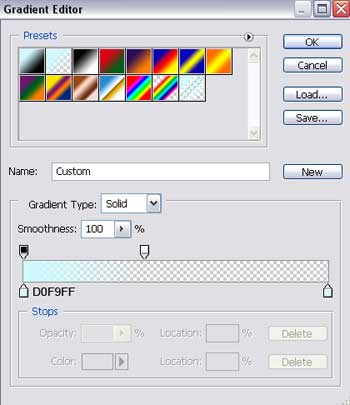
Gradient's parameters:

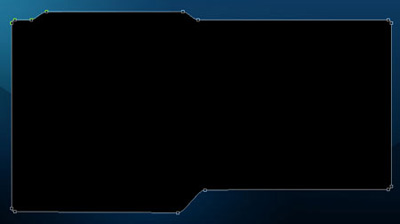
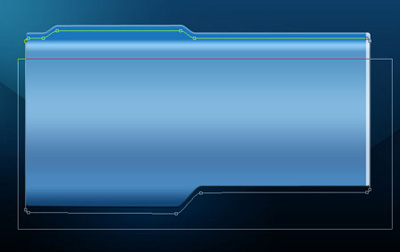
Create now the primary layer of the site's sections, choosing the Rounded Rectangle Tool (U) and adding several tops also with the Add Anchor Point Tool. The shape should be corrected with the Convert Point Tool.
![]()
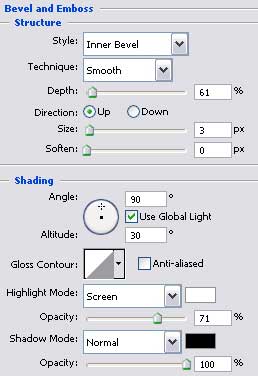
The layer's parameters:
Blending Options>Bevel and Emboss
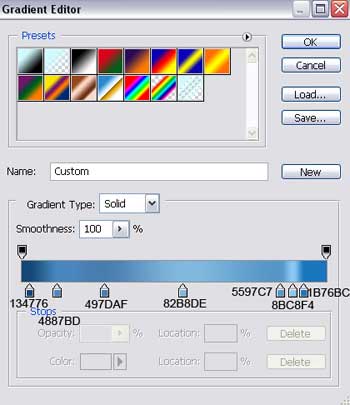
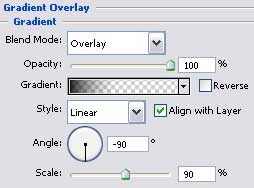
Blending Options>Gradient Overlay
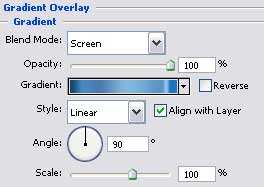
Gradient's parameters:

We need to represent on the picture's right side a layer reserved for the buttons of the mobile menu. The layer should have the white color. The operation may be done with the Rectangle Tool (U).

The layer's parameters:
Fill 65% on the layers.

Press on the Alt button and make a mouse's click between the layers and the recently made will lay over the previous one.

Make a copy of the earlier made layer designed for the site's sections, placing it on the top of the layers' palette. Select the Free Transform option to move the copy downside. Using the Rectangle Tool (U) and holding simultaneously the Alt button we need to cut out partially the copy.
The layer's parameters:
Fill 0% on the layers.
Blending Options>Gradient Overlay
Gradient's parameters: