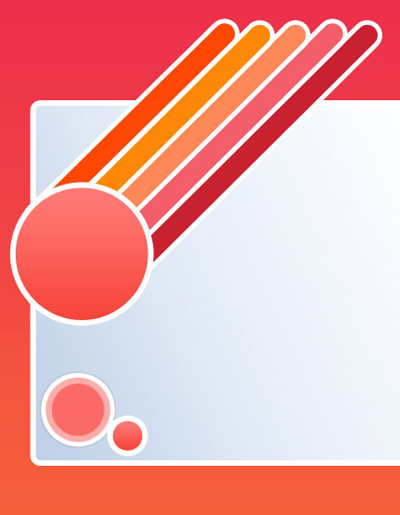
Select File>New option with 800x720 px and 72 dpi. Select the Rectangle Tool (U) to represent the background of the site to be next:

Make the necessary adjustments on the layer's parameters in the layers' panel:
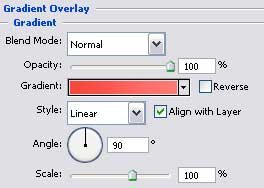
Blending Options>Gradient Overlay
Gradient's parameters:
Using the Rounded Rectangle Tool (U), try to represent the primary layer reserved for the site's panel:

The layer's parameters:
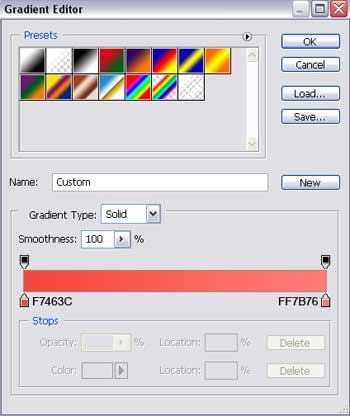
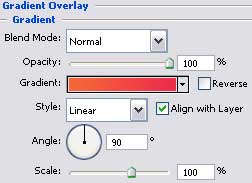
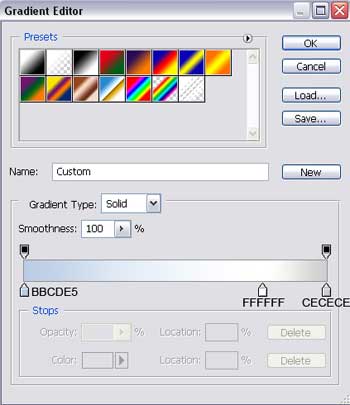
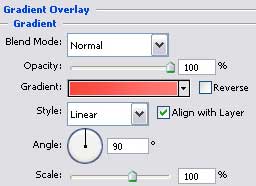
Blending Options>Gradient Overlay
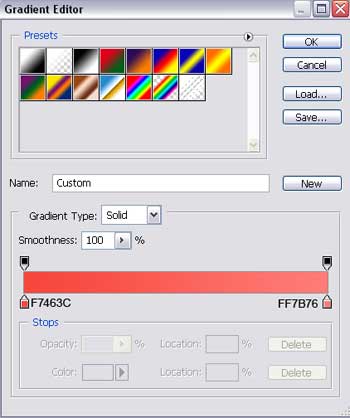
Gradient's parameters:
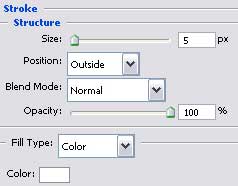
Blending Options>Stroke
Choosing the same Rounded Rectangle Tool (U), we have to represent a button on the menu's panel on the site's header which needs to be turned over with Free Transform option. The button's color must be C92130.

The layer's parameters:
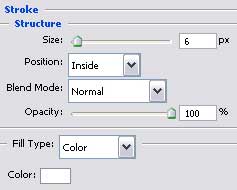
Blending Options>Stroke
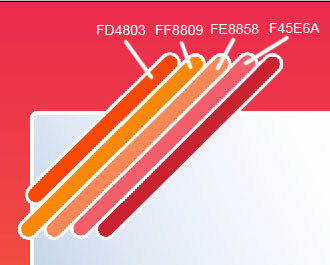
Make four copies of the new made button's layer and change each button's color:
Select the Ellipse Tool (U) to draw the necessary element for the menu's buttons:

Apply the next parameters on the layers' panel:
Fill 0%
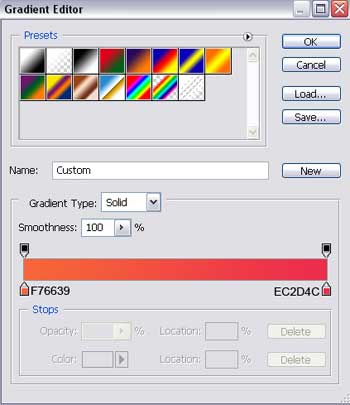
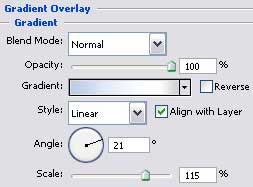
Blending Options>Gradient Overlay
Gradient's parameters:
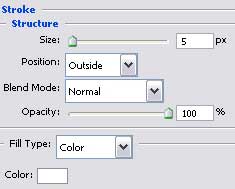
Blending Options>Stroke

Using the same instrument, try to make a small circle on the lowest part of the site's panel:

The layer's parameters:
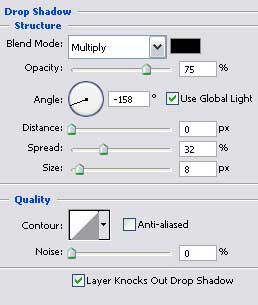
Blending Options>Drop Shadow
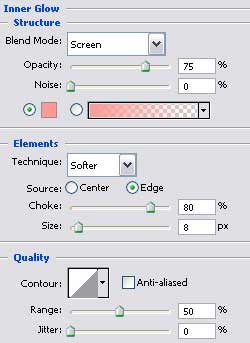
Blending Options>Inner Glow
Blending Options>Stroke
Selecting the previous instrument, it's possible to draw several more circles on the lowest part of the site's panel:
The layer's parameters:
Blending Options>Gradient Overlay
Gradient's parameters: