Open a new document in photoshop
Size: 760 x770 pixels
Color: #333333
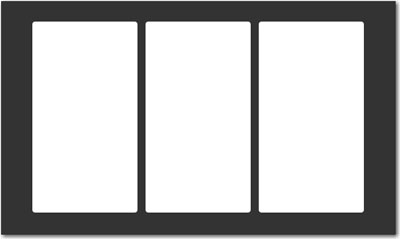
Grab the Rounded Rectangle Tool, and start creating 3 shapes. All must have the same size. the best way is to create one then duplicate 2 times
When you select the rounded rectangle tool please set the radius to 5 pixels
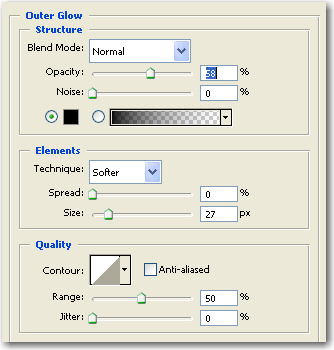
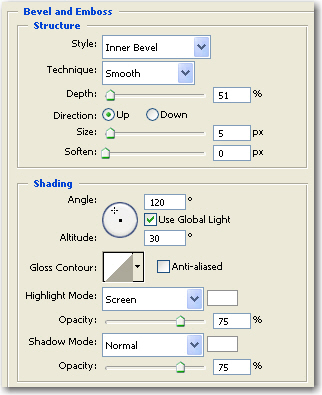
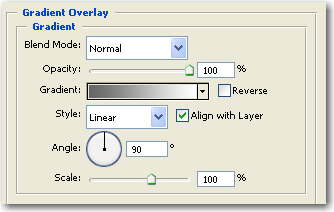
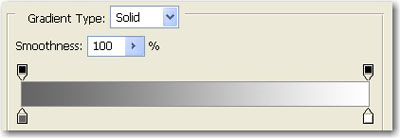
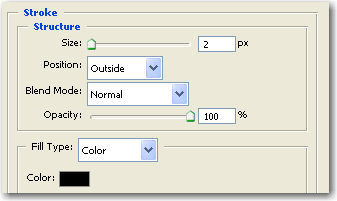
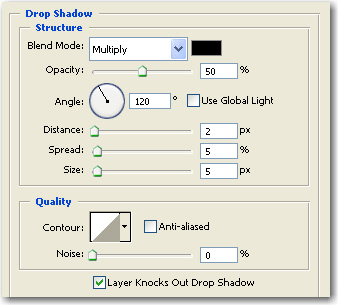
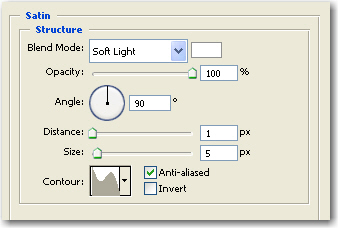
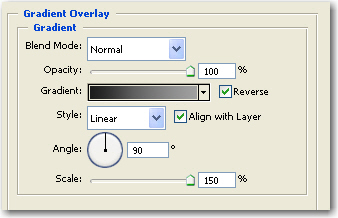
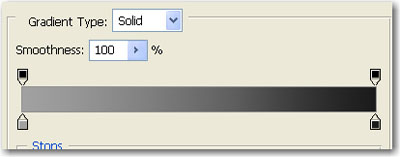
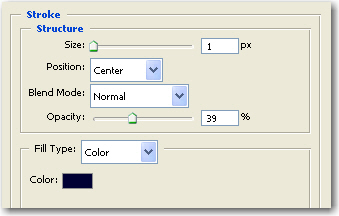
Then Add the following layer styles for all the shapes
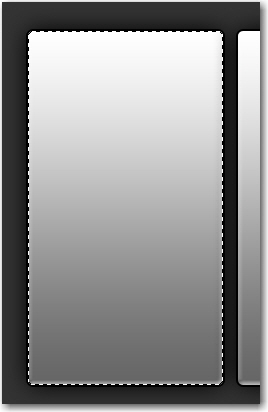
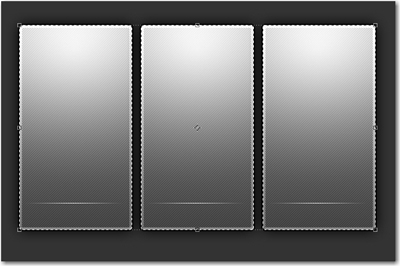
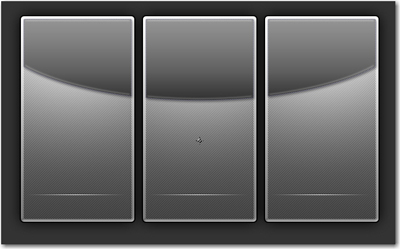
This is the result

Rasterize all the shapes . To rasterize a layer please go to Layer > Rasterize > Shape
Then select the left rectangle, and go to Select > Load selection
You will notice that your left rectangle will be selected
Now Create another document: ( we will create a pattern )
Zoom this document to 1600% and with the Pencil Tool Draw 3 points:

After that go to Edit > Define Pattern...
Choose a name for your pattern and press OK
To learn more about patterns , please visit the following link www.talk-mania.com
After you have created this pattern please return to the layout.
Go to Select > Modify > contract ( and choose contract by 5 pixels )
Grab the Paint Bucket Tool and use the following settings
Now create a new layer ( press Ctrl+Alt+Shift+N ) and fill the selection with the pattern
Press Ctrl+D to deselect
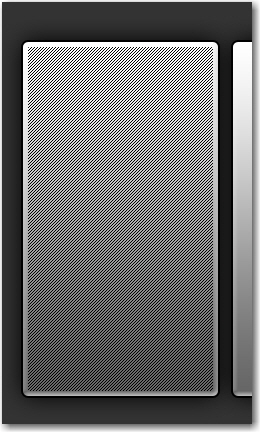
Then Press on the " Add layer mask " Button
Select Gradient tool
Press On Radial Gradient button
And draw a line like in the following image
Then Duplicate this layer and place it on the other 2 shapes

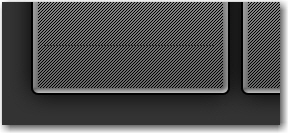
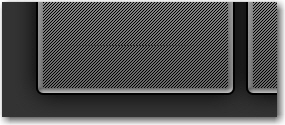
Then Select Line Tool ( set the weight of the line to 1 pixel ) and make a line with a dark color
Press on the " Add layer mask button "
Select Gradient Tool
Press on the Reflected Gradient
( be sure you have the foreground color - White , and the background color Black )
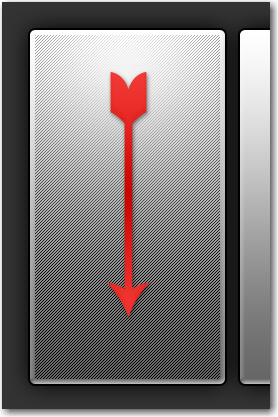
Then draw a line from the middle of the line to the exterior of the line
This will be your result
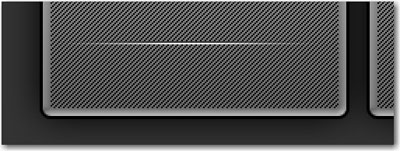
Then duplicate this line, Change the color to white, and press on the down arrow key to place the white line under the black one
Duplicate all the lines, and place it on the other 2 shapes

Select all your shapes
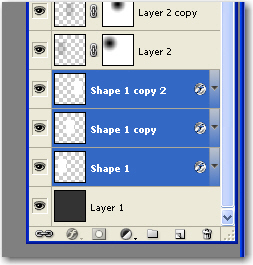
Then hold down the Ctrl+Shift and press on the each layer thumbnail
You will see that all your layers will be all selected
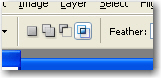
Select Elliptical Marquee Tool
Press on Intersect With selection
Then make a big oval selection like this
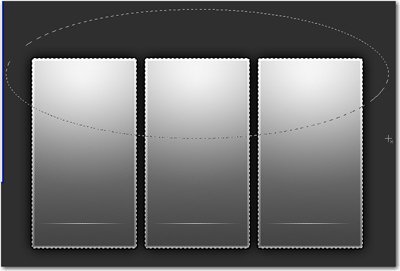
After you will release the mouse button you will have the following selection
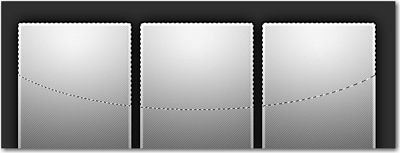
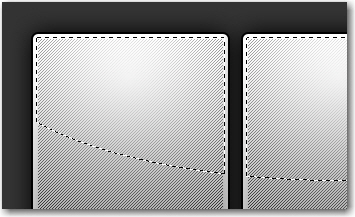
Then go to Select > Modify > contract ( choose contract by 5 pixels )
Create a New Layer ( press Ctrl+Shift+Alt+N )
Select paint Bucket tool and fill the selection with white
After you will fill the selection press on Ctrl+D to deselect
Then add the following layer styles
This is my result
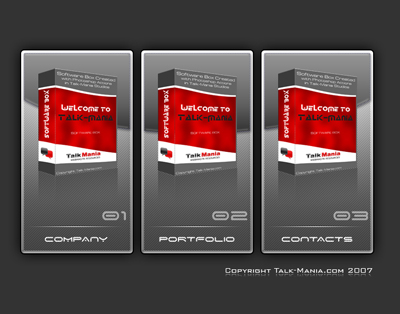
Then add some images on this layout. I will add some 3D boxes. You can use any image you want.
If you want to see how i have created this 3D box please follow this tutorial: link
If you are lazy you can download a photoshop action which will make the 3D software box only with 2 clicks
You can download from the following link
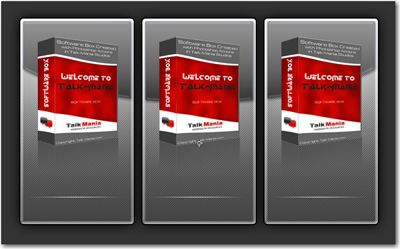
This is my result with my 3D software box images
Then add some text
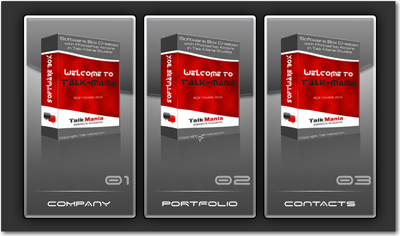
This is my final image.