


So let's start with a new document
Size 760x770 pixels
Background color: #3a3a3a
Select Rounded Rectangle Tool and make a big shape
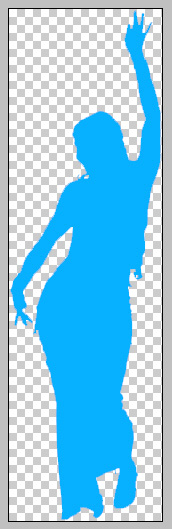
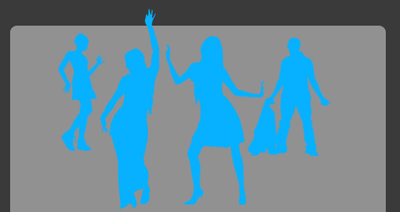
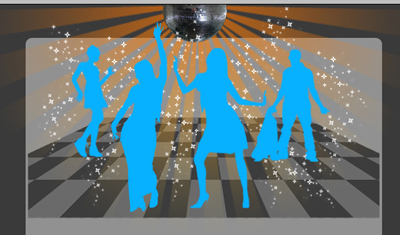
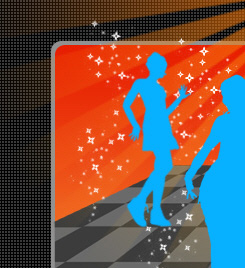
Then open the following image in photoshop
This image is a PNG image without background. be sure you have the same images when you want to create something like that

Set the foreground color to #00b4ff
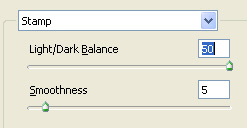
Now go to Filter > Sketch > Stamp and use the following settings
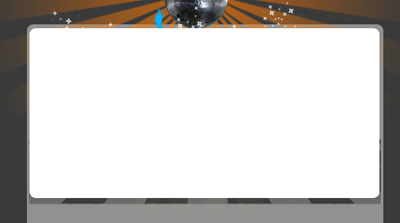
This is the result
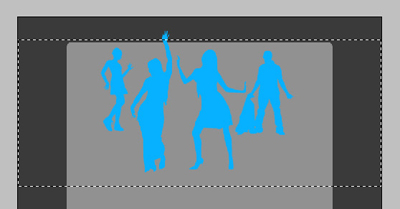
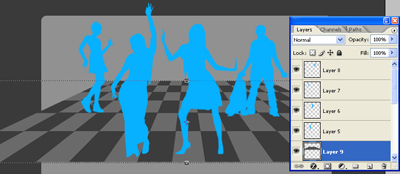
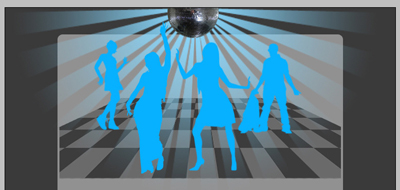
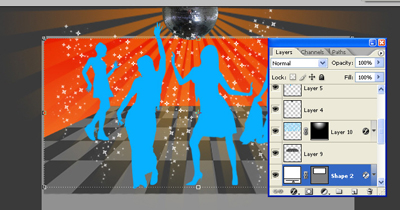
Now drag the girl on your canvas
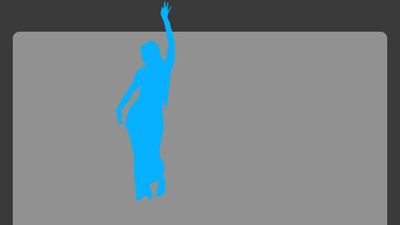
Then with the same methods find some other images and add then on your layout
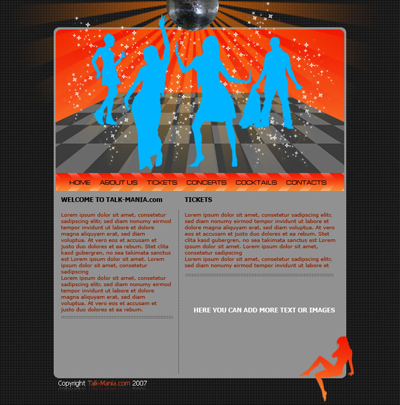
This is my result
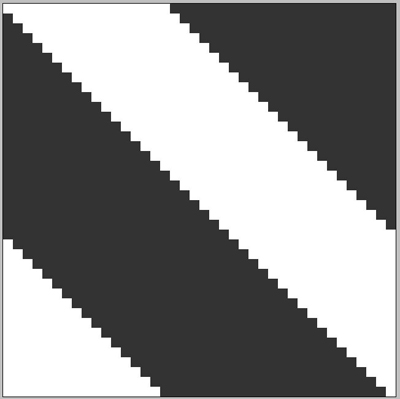
Now create a new document ( size should be 100 x 100 pixels )
With pencil Tool, create something like this
Then go to Edit > Define pattern
Choose a name for your pattern and click OK
Now go back to your layout
Create a new layer ( press Ctrl+Alt+Shift+N )
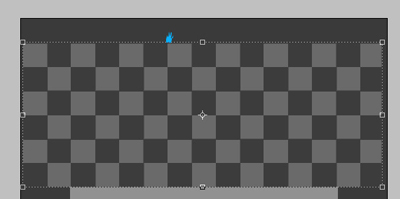
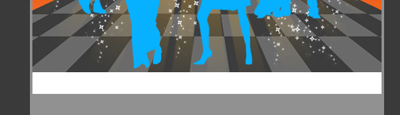
Select rectangular marquee tool, and make a selection like mine
Select paint Bucket Tool , use the following settings
![]()
Then click one time inside the selection
Press Ctrl+D to deselect
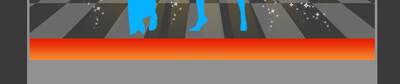
Now go to Edit > Transform > Perspective
Move the right top corner of your image to modify the horizontal skew
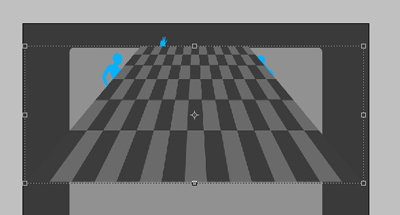
Then you can change also the vertical scale of that layer, and drag under the blue girls layers in layer palette.
Grab eraser Tool, use a square brush, and start deleting some parts of the floor
You can add in the same time a disco ball image

Select pen Tool, and start creating something like me
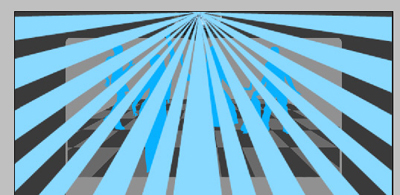
Then select all this layers which you have created with pen tool and merge down all this layers into a single one
To merge the layers be sure you have selected the layers, then press Ctrl+E
Drag this layer under the other layers with disco ball and with blue shapes
With this layer selected, press on " Add layer mask button "
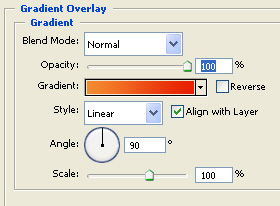
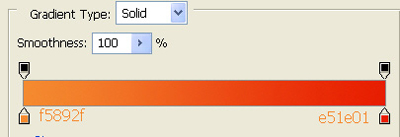
Select Gradient Tool and use the following settings
![]()
Then draw a simple line from the middle of the disco ball to the end of the rays
This is the result
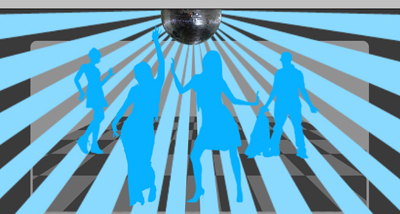
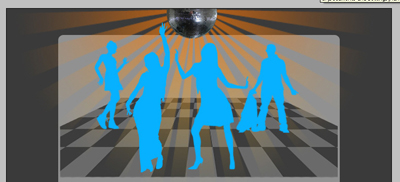
Now for this rays add the following layer style
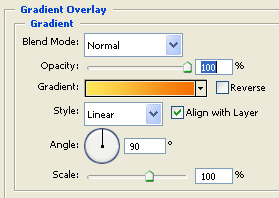
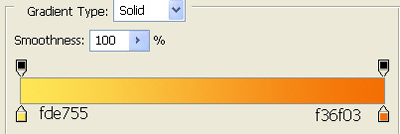
This is the result
Now find some brushes with small stars , and make some rendom stars on your layout
Now create another rounded rectangle
Then add the following layer style
Drag this layer under the floor layer, This is my result
Now grab rectangle Tool , and draw a simple rectangle for a navigation bar
Then add the following layer styles
This is the result
We will create a new pattern
Open a new document in Photoshop
This document should be 40x40 pixels with a transparent background.
Now create a new layer ( Press Ctrl+Shift+Alt+N )
Select Paint Bucket Tool and fill this layer with black
Now zoom your document to 1600 %
Create another layer ( press Ctrl+Shift+Alt+N )
Select Pencil tool. Change the brush size to 1 pixel and make the following drawing with a white color.
The next image is zoomed by 1600 %
Delete the black layer
Then Go to Edit > define pattern
Chose a name for your pattern and click ok
Now let's come back to our layout
Make a selection like mine

Then Create a new layer ( press Ctrl+Alt+Shift+N )
Select paint bucket tool and select the pattern we have created
Press one time inside the selection

Press Ctrl+D to deselect, then press on " add layer mask " button from the bottom of the layer palette
Select Gradient tool.
Please use the following settings
![]()
Then with gradient tool , make a small line ( follow the green line from the next image )

Now duplicate this layer, ( press Ctrl+J )
Then go to Edit > Transform > Flip Vertical
This is my result

Now add alone some text on your layout, and also some image

Now with a small font, create some dots on your layout, rasterize the type layer, and place the dots like me ( or you can use patterns for this small dots ) Please see my other tutorials
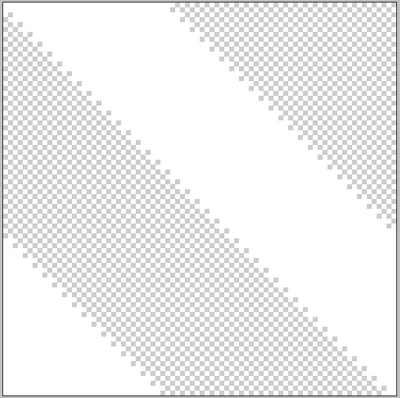
Now create a new document
Size should be 3 x 3 pixels with a transparent background
Zoom your document to 1600 pixels , and with the pencil toll create the following drawing

Go to Edit > define pattern
Choose a name for your pattern and click ok
Now create a new layer above the background layer, Grab paint bucket tool and fill this layer with the pattern from above
This is the result
And here is my final result
I hope you like it