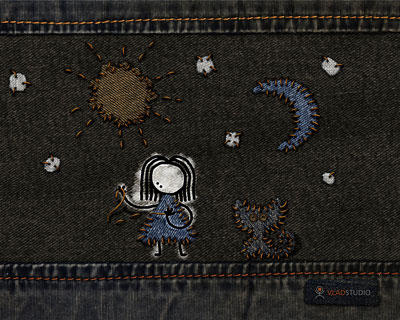
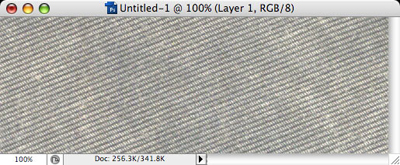
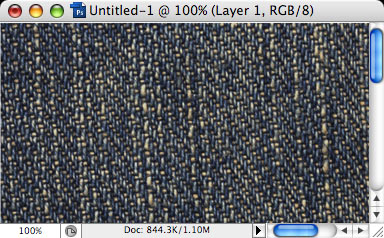
This artwork was especially fun to do. I had clear idea of what I want to achieve, and used couple of Photoshop tricks to do that. To start, take your old jeans (new will not do :-) and scan them. Here is what I got in scanned image.
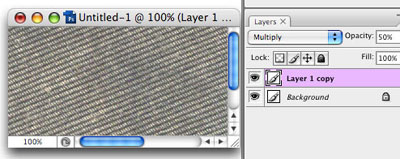
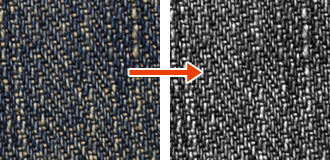
Even though my jeans are dark-brown, scanned image is way too light. To make it darker, select layer with scanned image, duplicate it, set new layer blend mode to 'Multiply' and opacity to about 50%.
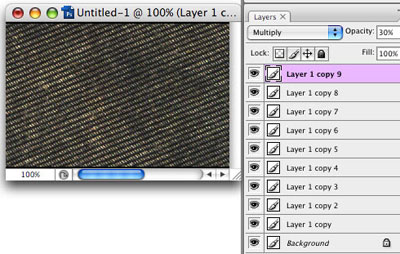
It is a bit darker now but not enough! Simply duplicate layer again and again, until jeans texture is dark enough. From my screenshot, you can see there are 10 copies of original layer, all with blend mode set to Multiply. Do not forget to 'Merge' layers (Ctrl-Shift-E) - we'll need this image as single layer.
This jeans texture is our background, now find some other jeans with different color. For this new texture, repeat the same steps to make it dark enough - but a bit lighter than our very first background jeans. Copy this image to your original file, so that first jeans is one layer and this second jeans is another layer in same file.
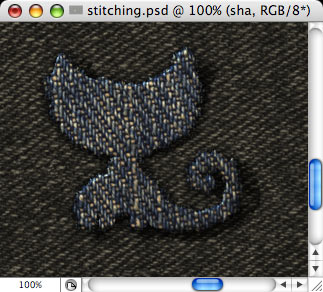
Now, create new layer, and with hard black brush, draw the silhouette of an object - for me, it was a cat. Do not be very careful drawing straight lines - in fact, we are going to make them quite rough! Then, use Magic Wand tool (W key) to select the layer content.
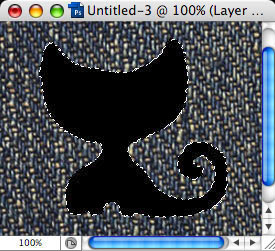
Now tricky part - delete layer with black silhouette (but keep selection!), make sure layer with 2nd jeans is selected, then go to Layer menu - Layer Mark - Reveal selection. Now we have the cat made of jeans on surface of another jeans! not bad but more needs to be done...
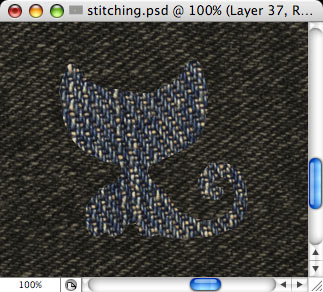
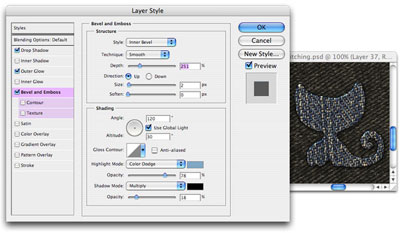
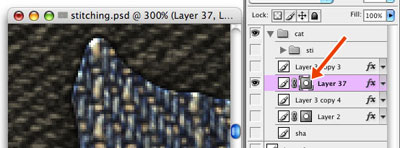
Go to Layer - Layer style - Blending Options, and apply the following effects: Drop shadow (black, with size = 8px), Outer glow (black, blend mode = Multiply, size = 3), Bevel and Emboss (settings as shown on screenshot).
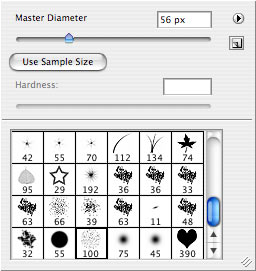
Our cat still looks not too realistic, because something cut from jeans cannot have straight edges - we need to add some threads here and there. To make them, set white foreground color, select Brush tool (B), then open Brushes tool window, and from default brushes, select 4th brush from the end (it has 100px default diameter, but we need to make is about 50px).
Now, the shape of cat is stored in layer mask, so we need to draw with white brush inside the mask. click mask icon, to make sure you will draw mask, not actual layer.
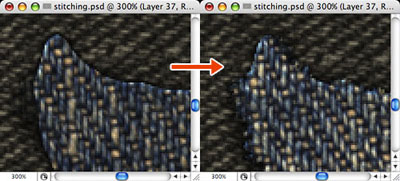
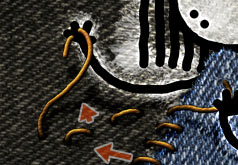
Then, with small, chaotic movements, draw on edges of the cat - and look! threads start to fall out of jeans!
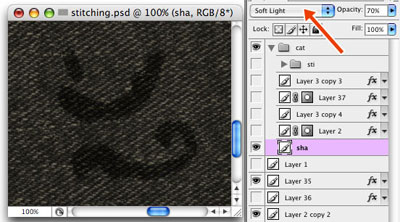
One more thing we need is nice shadow. Create new layer UNDER layer with cat, set its blend mode to Soft light, change color to black, and draw shadow as you like (keep layer with cat visible, it is hidden on screenshot so that you can see the shadow I made).
Voila! :-)
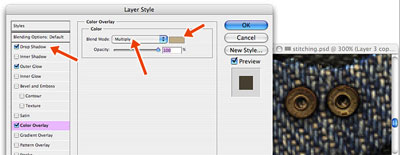
Scan jeans button, cut it with Round Selection tool (Shift-M), and resize (Ctrl-Shift-I) so that it is small enough.
Then, paste to our original file, and apply the following layer effects: Drop Shadow (black), Outer glow (also black, little opacity), Color overlay (light brown, blend mode = multiply).
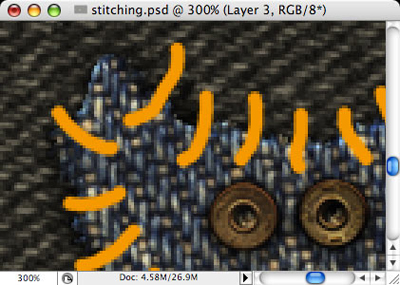
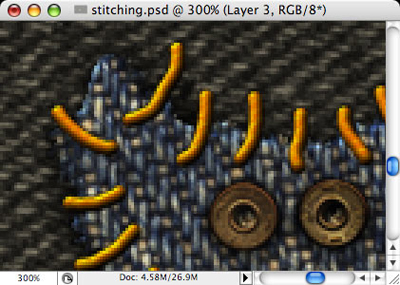
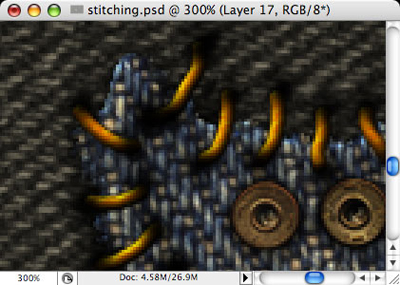
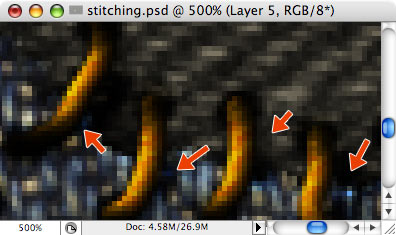
Here goes the trickiest part - the threads that actually stitch! Choose the color (I chose orange), and with hard round brush, paint the threads (be careful this time! draw slowly curved lines)
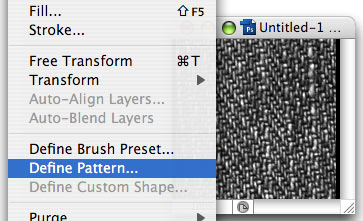
For these threads, we also need jeans texture. Open recently scanned image, make it greyscale (Ctrl-Shift-U), and apply Auto Levels (Ctrl-Shift-L).
Then, select all, and in Edit menu, choose Define Pattern. Click OK in opened dialog window, then you can close this image without saving. Return to our original file.
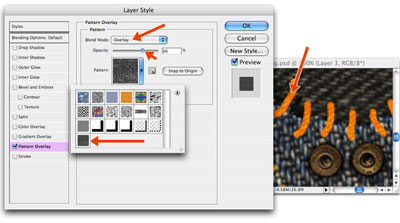
Make sure layer with threads is selected, open its Layer style, check Pattern overlay, set pattern blend mode to Overlay, then open Pattern selection dropdown list, and choose the very last one - it is the one that you just created!
More layer effects for this layer: Bevel and Emboss (blend mode = overlay), Outer Glow (black, blend mode = multiply).
Create new layer, set foreground color to black, select Soft brush, and put dotes on ends of each thread.
Go to Layer menu - Create Clipping Mask (Ctrl-Shift-G), so that black dots are 'masked' by the layer under them.
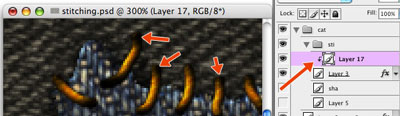
Shadows are very important in this image, so create new layer below the layer with threads, and put more black dots where threads are supposed to touch the jeans.

Create another new layer, set its blend mode to Soft light, and with the same black brush, draw shadow that falls from threads.
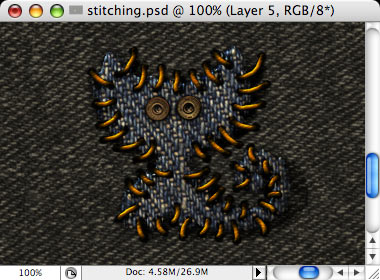
Ta-da! Our cat is ready! The steps to draw girl, moon and stars are exactly the same.
Once again, pay attention to the shadows, you can use shadows here to make objects appear higher - for example, see this screenshot, where the girl holds the thread with her arm.
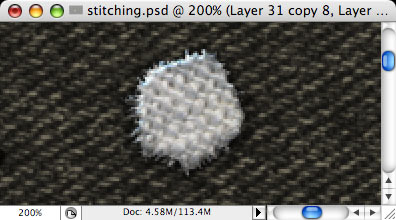
One more example of using layer mask to achieve "rough" look of cutten jeans. To make a star, I scanned a piece of white textile.
Then, I pasted it to my file, and added Layer mask to it (Layer menu - Layer mask - Hide all). Then I selected the "Rough Round Bristle" brush (see screenshot) - if I used this brush to draw inside actua LAYER - it would look like this screenshot ...

But when I draw with this brush inside layer MASK - I reveal or hide parts of image with black or white brush! Here is the result.
Lastly, I scanned another piece of jeans, and used it for top and bottom. That's all! Thanks for reading!
![]()