


Flash CS3 comes with an exciting new feature that will make both developers and designers very happy. A designer will typically create animations using the Flash Timeline with keyframes and layers. This becomes problematic for developers, as they usually have to attempt to translate those animations into code so they're dynamic. In CS3, designers can now instantly transform a Timeline animation into code that a developer can use. This is a huge Step in helping designers and developers to work better together to produce the best possible output.
In this tutorial, we'll create a simple motion graphics piece on the Timeline and convert into code, producing exactly the same results. [For a preview of this project, click here at www.layersmagazine.com/. All files are for personal use only.]
Step 1 Open the FLA File
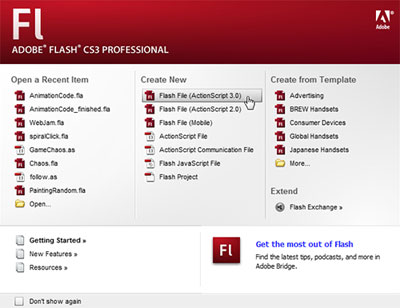
Open Flash CS3 and from the Start screen, choose Flash File (ActionScript 3.0). The new animation feature that we'll be using is only available in ActionScript 3. In the Properties panel, click the Size button to open the Document Properties dialog. Set the Frame Rate to 30 fps, change the Background to black, change the Size of the movie to 800 pixels (Width) and 600 pixels (Height), and click OK. Double-click the first layer in the Timeline, rename it "actions," and lock it.
Step 2 Import and Convert the Phone
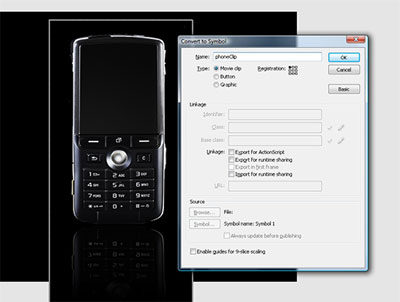
Click the Insert Layer icon to create a new layer above the actions layer and name it "phone." This will be the layer that contains the image of our cell phone. With the first keyframe selected, press Command-R (PC: Ctrl-R) to open the Import dialog. Select the image file and choose Import. Select the image on the Stage and press the F8 key to open the Convert to Symbol dialog. Choose Movie Clip, give it a name of "phoneClip," and click OK. Select the phone Movie Clip and give it an instance name of "phone" in the Properties panel.
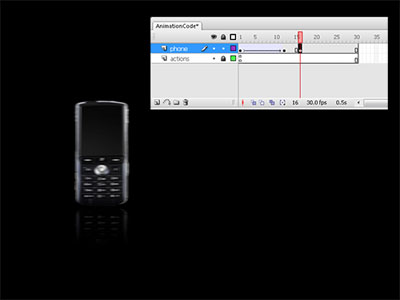
Step 3 Set Up the Timeline
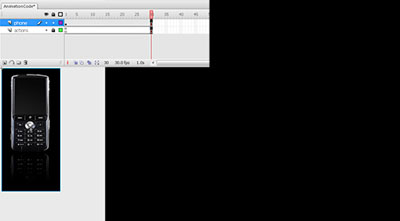
Now we need to add some frames to the Timeline to hold the animation. Select frame 30 in both layers by clicking-and-dragging across the two frames, and then hit the F5 key to insert the new frames. Now select frame 1 on the phone layer. We'll be creating an animation where the phone slides in from the left of the screen and then scales up. In the Properties panel, move the phone Movie Clip to x: -360. Now go to the Transform panel (Window>Transform) and scale down the clip to 50% on both the x and y axis.
Step 4 Slide In
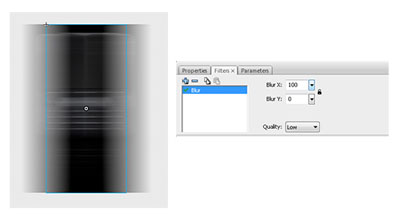
Select Frame 12 on the phone layer and press the F6 key to insert a new keyframe. Now select the phone clip and position it to x: 159 in the Properties panel. Control-click (PC: Right-click) between the two keyframes on the phone layer and choose Create Motion Tween. Set the Ease slider in the Properties panel to 100. Select the first keyframe on the phone layer and then the phone clip on the Stage. Open the Filters panel and click the plus sign and in the pop-up menu, choose Blur. Set Blur X to 100 and Blur Y to 0.
Step 5 Make It Pause
Test the movie by pressing Command-Return (PC: Ctrl-Enter) and you should see a nice slide-in animation from the left of the screen. After this animation happens, we want to let the phone pause for a moment before scaling up. Select Frame 16 on the phone layer and press F6 to insert a new keyframe. This will give a 4-frame pause before the rest of the animation continues. There's no need to create a Motion Tween because nothing is changing on these frames.
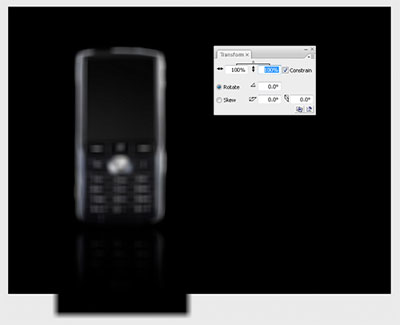
Step 6 Scale It Up
Select frame 30 on the phone layer and press F6 to insert a new keyframe. Select the phone clip, open the Transform panel, and set the scale on both axes back to 100%. Control-click (PC: Right-click) anywhere between frames 16 and 30 on the phone layer and choose Create Motion Tween. Set the Ease slider in the Properties panel to 100. Now select frame 23 and insert another keyframe. Add some blur to the phone by going to the Filters panel and setting both the Blur X and Blur Y values to 15.
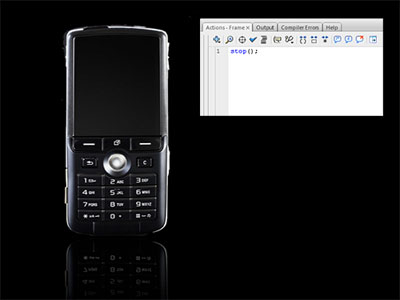
Step 7 Finish Up the Animation
Test the movie and you should now see a nice animation effect. The last thing we need to do is to insert a stop action at the end of the Timeline so the animation doesn't loop. Select frame 30 in the actions layer and press F6 to insert a new keyframe. With that keyframe selected, open the Actions panel (Window>Actions) and type in a stop command (as shown above). Test the movie again to see the finished animation.
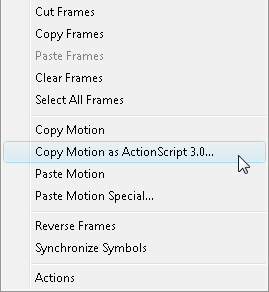
Step 8 Convert To Code
Now it's time to convert your Timeline animation into ActionScript code. Select all of the frames on the phone layer by clicking-and-dragging a selection over all 30 frames. Control-click (PC: Right-click) on the selected frames and choose Copy Motion as ActionScript 3.0. This will open a window asking you for the instance name of the animation. Enter "phone" and click OK.
Step 9 Paste the Code
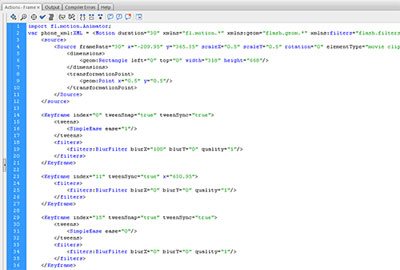
Select the first keyframe in the actions layer and open the Actions panel. Paste the generated code into the editor by pressing Command-V (PC: Ctrl-V). You should now see 55 lines of ActionScript code - equivalent of the animation that we created on the Timeline. It's a combination of regular ActionScript code and a new XML format that was created specifically for animation in CS3.
Step 10 Delete Your Work
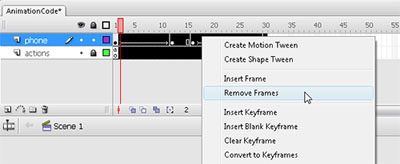
The ActionScript code that you pasted into the Actions panel is now going to handle animating our phone so we can delete all of the Timeline animation that we did previously. To do that, select all of the frames in both layers except for frame 1. Now Control-click (PC: Right-click) and choose Remove Frames to delete all of the selected frames. Test the movie now to see the code-driven animation. It should look identical to the Timeline animation that you created earlier.
Step 11 Understanding the Code
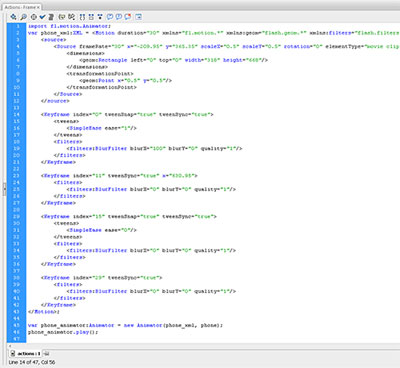
On line 1 of the code, Flash is simply importing the necessary code library into our project so it's available to us. A new XML object is created on line 2 which will hold all of our animation XML code. There are two main sections to this XML data: There's some code that describes the object being animated; and then, starting on line 14, you can see all of the keyframe data that we created on the Timeline. After the XML code, a new Animator object is created using the XML, and the last line of code begins the animation.
Step 12 Keyframe Data
If you look over the keyframe tags in the XML data, you'll see that it has an attribute called "index." This represents the frame number where that keyframe occurs. You've probably noticed that it seems to always be short by 1 frame - because in-code indexes always start at 0 not 1. All that's required to change the timing of the animation is to adjust the index values; for example, you could change the index value on line 23 to 5 to double the speed of the animation.

Step 13 Changing the Animation
You may notice that some values in the code seem different than they were on the Timeline. This is expected and it doesn't signify that anything's wrong with the code. Let's make a change so that the phone slides in from the right instead of the left:
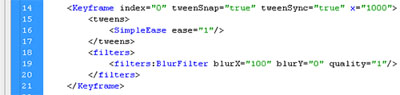
Go to the first keyframe tag on line 14, add a new x attribute, and set it to 1000 (as shown here). This will position the phone off to the right of the Stage at the beginning of the animation. Test the movie to see the change.
Step 14 Next Steps
In this example, we really haven't done much with our newly generated animation code, but there are endless tweaks that can be made to create all kinds of different effects. To learn about all of the possibilities, you'll want to look in the Help files.
This generated animation code can now be delivered to a developer who can then make any or all of these values dynamic. Finally, designers and developers can work together easily in Flash to create compelling animations. Kudos Adobe!
