Make anew file with 1024x768 px and 100 dpi. Take the following instrument
 to create a background with the next color – FECA5C, the right side's color is FEAC03, the gradient's direction – from left to the right side.

Take the instrument
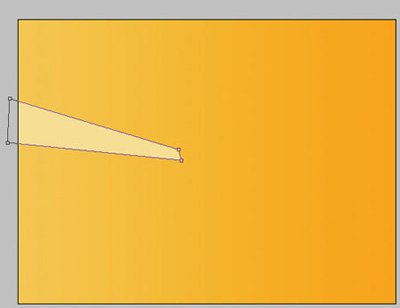
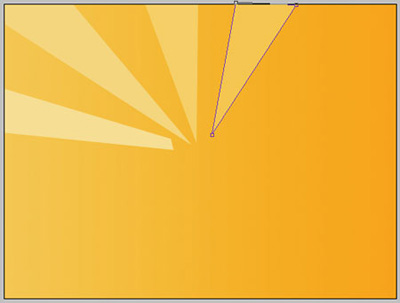
 to represent a figure with the indicated parameters. The color must be FFE0A2.
Take the same instrument to create one more with the color FED98D.
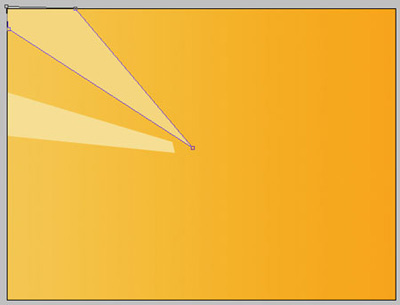
Take the same instrument to create one more figure, having the color FFD275
The same instrument and one more figure – FFCA5A.
The previous instrument and another figure – FEBE36.
Create one more figure then with the indicated color – FDBF38 with the known instrument.
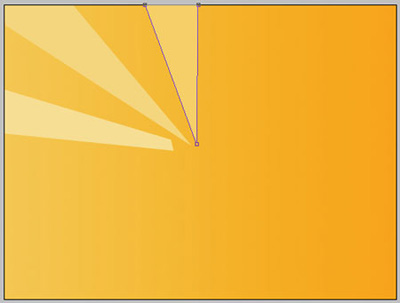
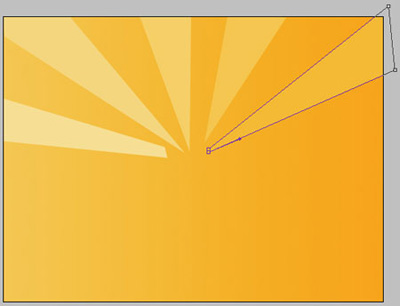
Represent the same way more figures with the same instrument, like it is done in the next picture.

Take the instrument
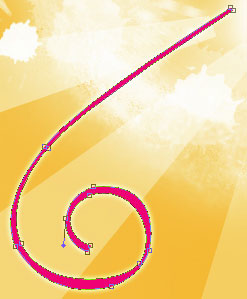
to represent a heart with the color – EE1878 with the indicated parameters below.

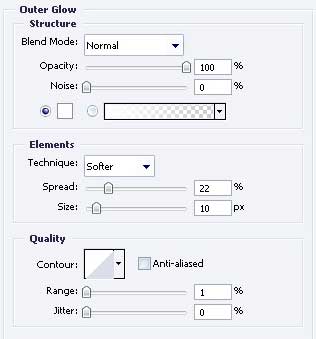
Blending Options-Outer Glow
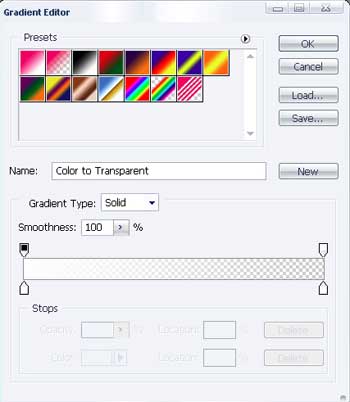
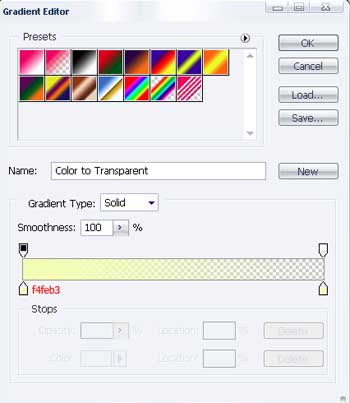
Gradient's parameters
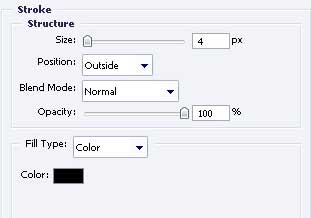
Blending Options-Stroke
Represent a highlight now on this heart, applying the next tool
of the white color.

Copy the recently created layer using Free Transform option and minimize it (pressing on Shift button), turn it around and place it exactly like it is demonstrated in the picture.

Don't forget to place correctly the layers.
For your convenience, merge all the hearts' layers in a group. Hide for a while the hearts' group.
Continue. Take the instrument
 of the white color with unclear edges and Opacity of 20%.
Create the next.

Take the instrument
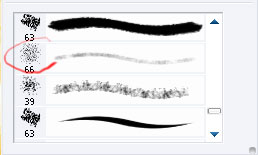
 and choose the brush's style with the right mouse's button
Opacity – 10%, above the design left by the brush. Make sharply moving and we'll get.

Now choose
 and represent a patch.Apply then the next instrument
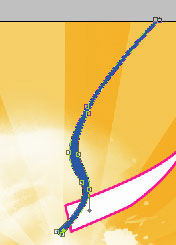
 to paint the marked zone. Inside the marked zone, choose Transform selection with the right button.
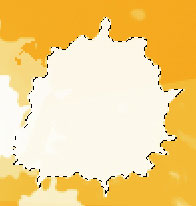
Move a little the marked place so many times as we need
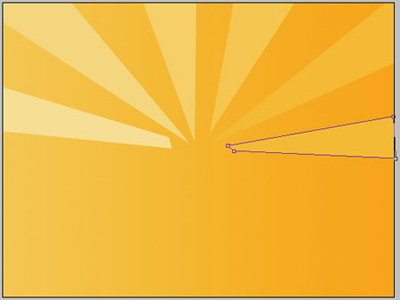
We'll get the next:

Use the following instrument
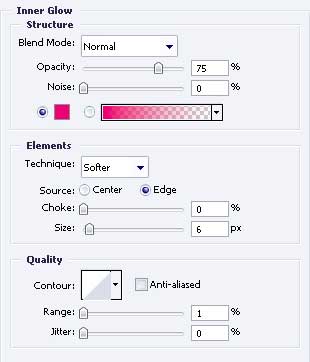
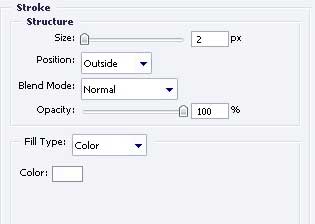
to represent a picture with ED1C7A with the parameters below.


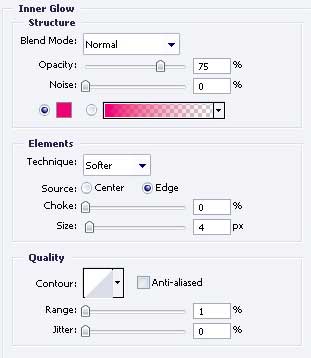
Blending Options-Inner Glow
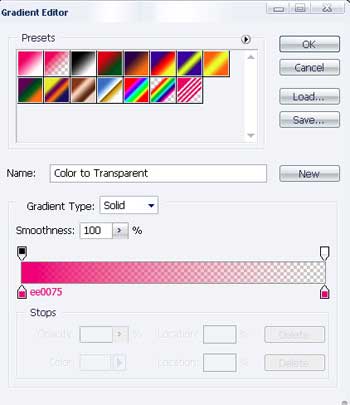
Gradient's parameters.

Blending Options-Stroke
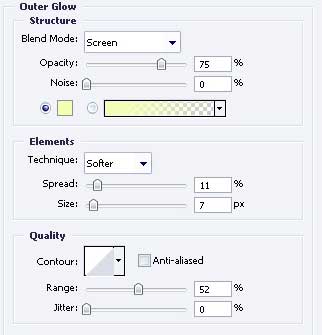
Use the previous instrument to represent one more design under the recently pitured with the next sizes.

Blending Options-Outer Glow
Gradient's parameters
For your convenience, merge all the layers, forming both designs' parts in a group. Copy the new group and apply Free Transform to turn it around like it is shown in the image below.

Create one more figure with the previous instrument with the indicated parameters.

Blending Options-Inner Glow
Gradient's parameters.
Take the instrument
to picture a figure with 0375B6.