
Make a new file with 693x693 px and 72 dpi. Then using the instrument
 (Radius – 70 px) make a figure, like in the picture. The color code should be a40102.

Using the instrument
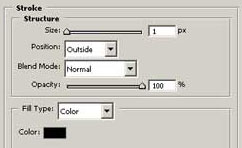
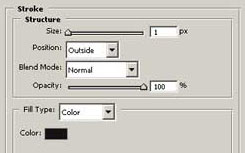
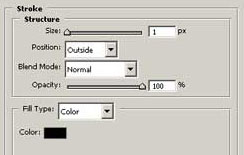
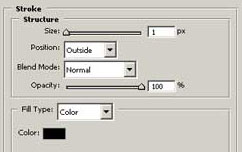
 make a basis for the box with the color code f6eb8f. Then outline it with the black color. Choose Blending Options /Stroke/Size – 1px.

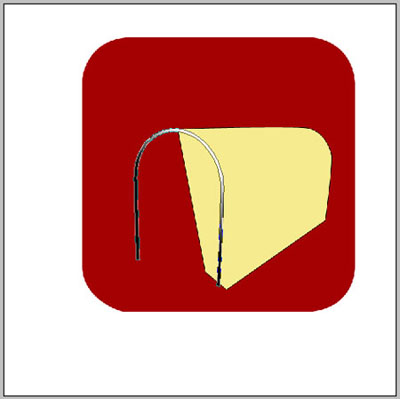
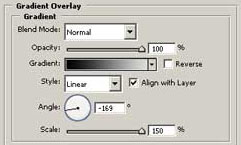
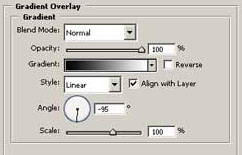
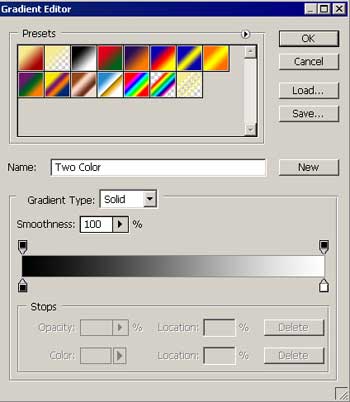
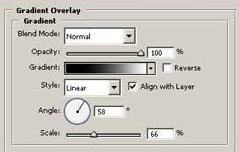
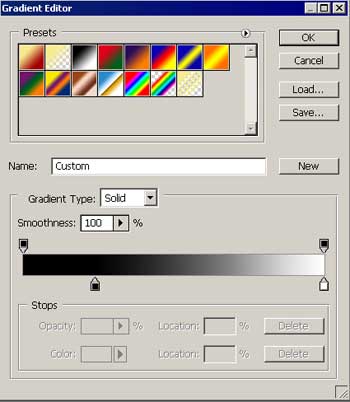
Using the previous instrument, make a front aperture for the letters, but take into account the parameters indicated below.
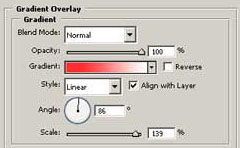
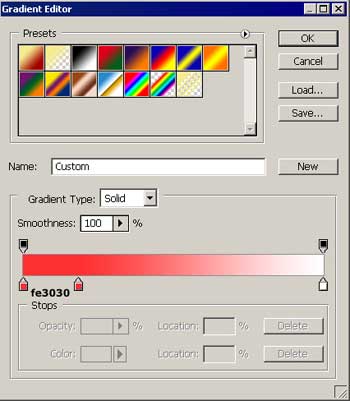
Blending Options-Gradient Overlay
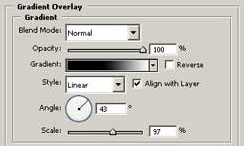
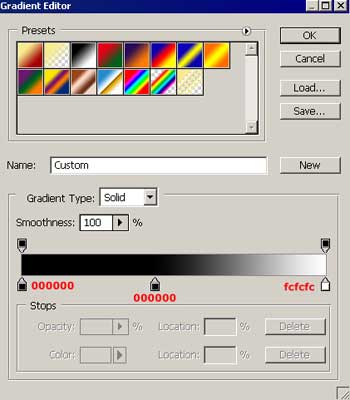
Gradient's parameters
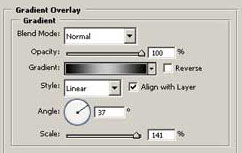
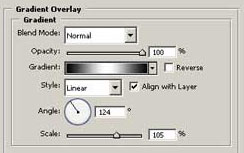
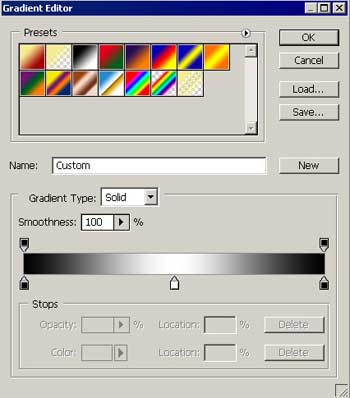
Continue using the instrument
and draw the front aperture for the letters with the indicated parameters below:

Blending Options-Gradient Overlay
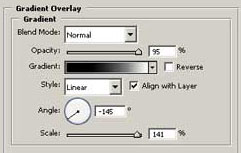
Gradient's parameters
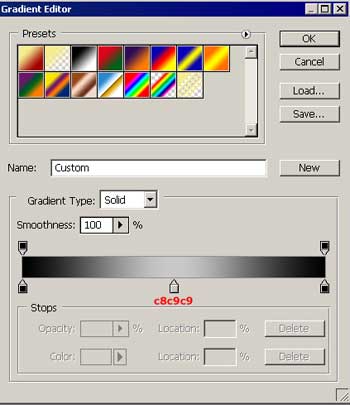
Using the already known instrument draw a flatness inside the mailbox. Use the parameters shown below:
Blending Options-Gradient Overlay
Gradient's parameters

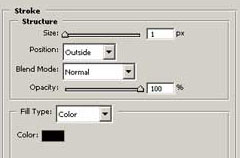
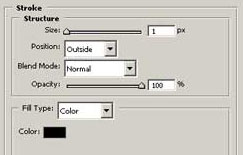
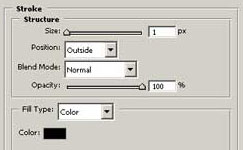
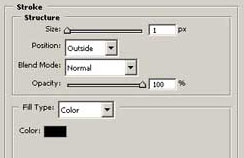
Blending Options-Stroke
The same instrument will help to draw a shelf's end inside the mailbox. Use the parameters below.

Blending Options-Gradient Overlay
Gradient's parameters
Blending Options-Stroke
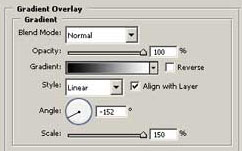
Use the same instrument to draw a part of the mailbox's cover. The parameters are shown below:

Blending Options-Gradient Overlay
Gradient's parameters
Blending Options-Stroke
Use the instrument
to draw the mailbox's cover. Use the indicated parameters:

Blending Options-Gradient Overlay
Gradient's parameters
Blending Options-Stroke
Take the instrument
and draw a part of the mailbox's cover. The parameters are shown:
Blending Options-Gradient Overlay
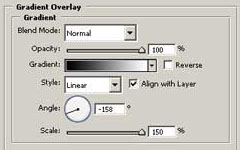
Gradient's parameters

Blending Options-Stroke
Use the previous instrument to make a part of the mailbox's cover with the indicated parameters below:

Blending Options-Gradient Overlay
Gradient's parameters
Take the same instrument to draw a part of the mailbox's cover with the black color:

The instrument
will help to represent an element of the mailbox's backside. The parameters are shown:

Blending Options-Gradient Overlay
Gradient's parameters
Take the already known instrument to represent a highlight on the lateral mailbox's side with the white color:

The same instrument will help to create a small flag on the lateral side of the mailbox. Use the parameters indicated below.

Blending Options-Gradient Overlay
Gradient's parameters
Blending Options-Stroke
Take the following instrument
 to represent on the flag a round element. Apply the color FE0000 and the demonstrated parameters:

Blending Options-Stroke
The previous instrument
will help to draw on the small flag a round element with the shown parameters:
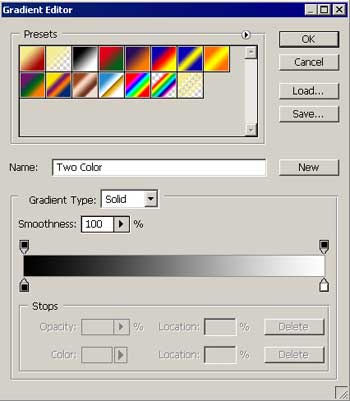
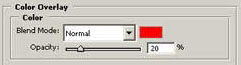
Blending Options-Color Overlay
Blending Options-Gradient Overlay
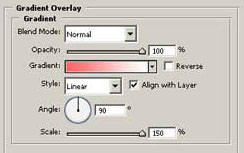
Gradient's parameters
Blending Options-Stroke
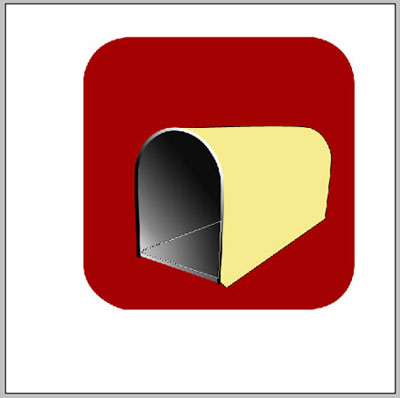
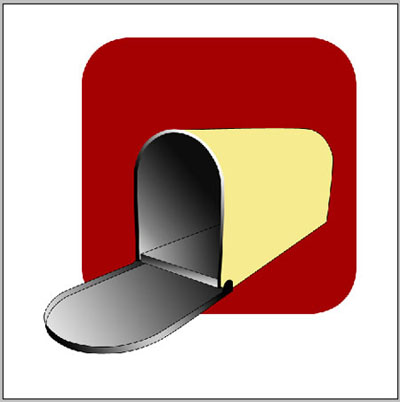
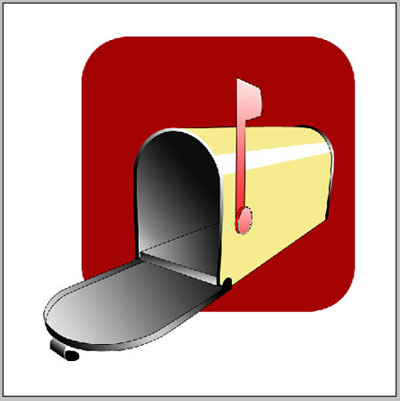
If everything was done correctly, we'll get:<?xml:namespace prefix = o ns = "urn:schemas-microsoft-com:office:office" /><o:p></o:p>
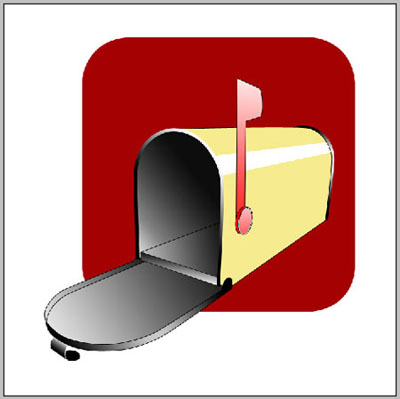
The final result!