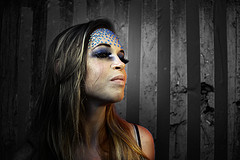
For my most recent work I wanted to create bubbles that would reflect my subject in a believable yet magical way. To do this I started by duplicating the main photo Layer >> Duplicate Layer.
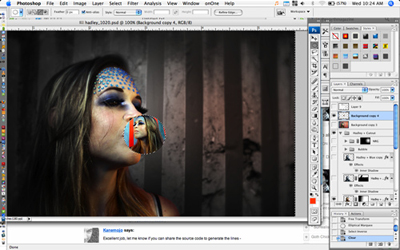
Next I scaled the duplicate to 25% of it's original size. Edit >> Transform >> Scale. We also need to distort the duplicate. First I flipped it Edit >> Transform >> Flip Horizontal or Vertical, then I distorted it further by adjusting the perspective. Edit >> Transform >> Perspective

Still doesn't look like a bubble does it? Here comes the fun part. Select the elliptical tool (M) and draw out an area that's a perfect sphere (by holding shift). We want to get rid of everything outside of the bubble, now. So go to the to menu and choose "Select" then "Inverse" (Select >> Inverse) then press delete. You've now deleted everything on the layer that will not be in the bubble.
Press Command + D to deselect everything then Command click on the layer of the bubble. You should now have only the sphere selected.
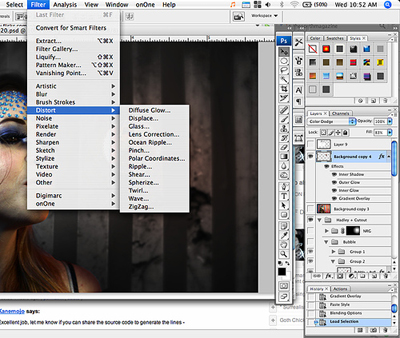
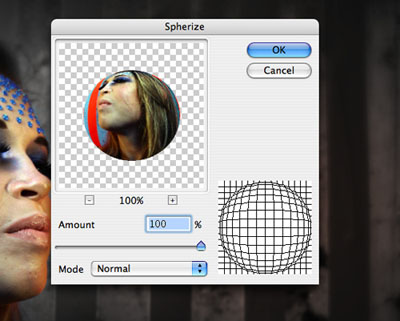
Now, the most important part of the process, distorting your image to be a sphere by using the "Spherize" option. select Filter >> Distort >> Spherize. Use a setting of 100%.
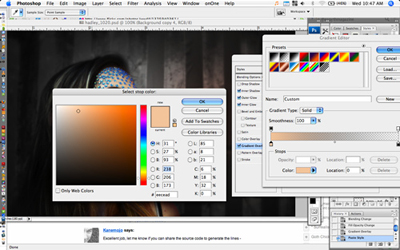
Now, click on your color window. You want to change your foreground color to a lighter color that is close to white on the color scale. You can use a darker color if you want but to give the illusion of transparency I chose a lighter color, and accented it with darker ones in the steps that follow.
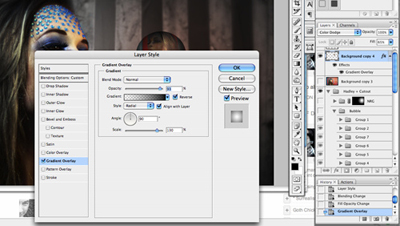
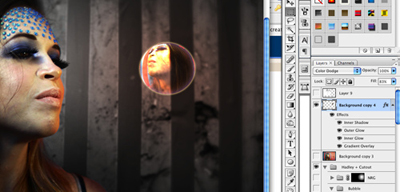
Now we're going to turn the "Sphere" layer into a more believable bubble. We do this by adjusting the "Layer Style" (Layer >> Layer Style). Select "Gradient Overlay" from the list and activate it. Click on the Gradient window and select "Foreground to Transparent" set the opacity to "Soft Light". Reduce Opacity by 7% down to 93%. Directly to the right of that window select "Reverse" and then change the Style to "Radial". Adjust the scale to your liking.
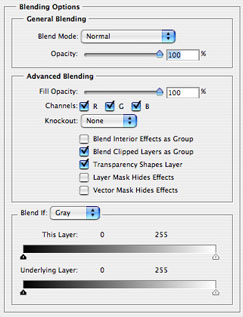
Next go up to "Blend Options". Change the type to "Color Dodge" (or whatever looks best for your picture). At this point I also adjust the overall "Fill" of the layer to 65%.
Now select "Inner Shadow". This step helps us define the 'spheriness' (I know it's not a word, shut up) of the bubble. In the "Structure" area set the "Blend Mode" to 'Soft Light'. I used the following settings Distance >> 22px, Choke >> 54% and Size >> 45px but experiment and find what works best for you.
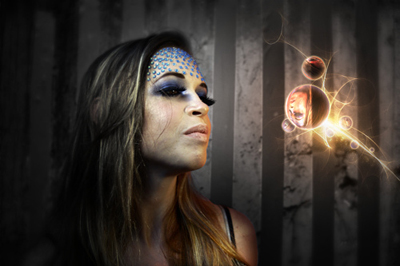
For my particular image I needed to create a magical aura around the bubbles. I did this by adjusting my Outer Glow and Inner Glow settings. I also duplicated my bubble several times to create more bubbles. These settings are not relevant to creating a believable bubble so I won't go over them here but the best way to figure out how to get an image like the one below is to experiment.
So there you have it, a finished bubble with a the reflection of your background image!