Create a new file (File>New) that would have 788x1000 px and 72 dpi.
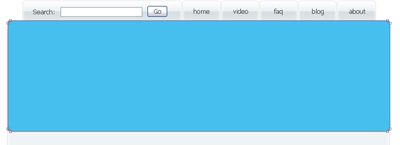
Using the Rectangle Tool (U), try to draw the basic layer reserved for a site's page. The layer's color is #EFF2F5
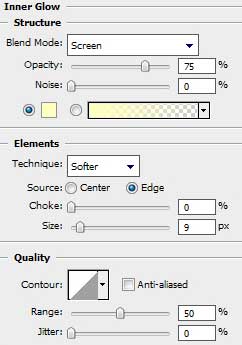
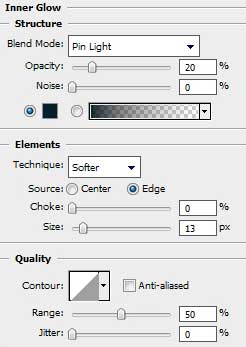
Select the next demonstrated parameters by making a mouse click on the processed layer on the layers' palette: Blending Options>Inner Glow
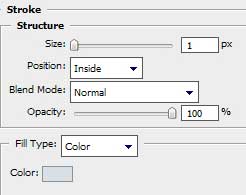
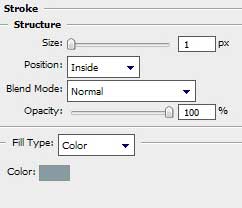
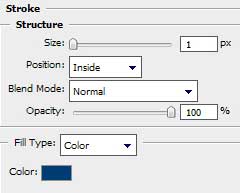
Blending Options>Stroke

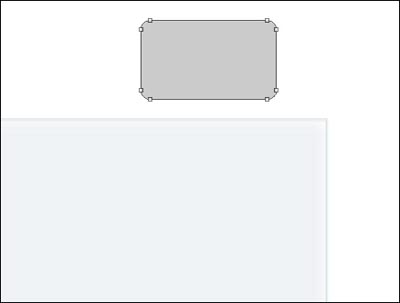
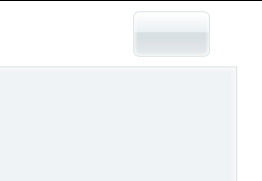
Next we shall draw the menu's button on the site's header. Use for this operation the Rounded Rectangle Tool (U) with the radius 5 px.
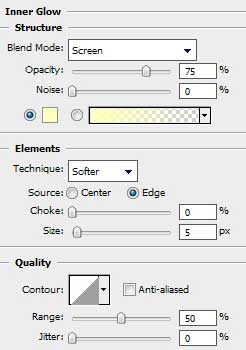
The layer's parameters: Blending Options>Inner Glow
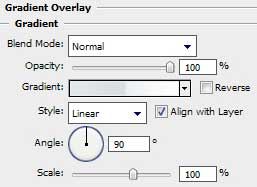
Blending Options>Gradient Overlay
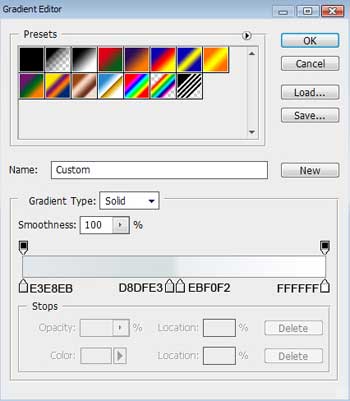
Gradient's parameters:
Blending Options>Stroke
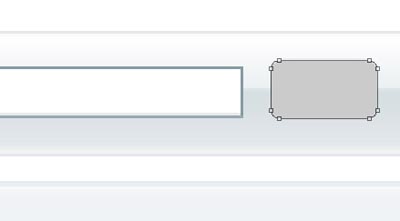
Make five copies of the layer containing the button. The copies should be situated from the right side to the left one. The fifth copy should be stretched out, applying the Free Transform selection.

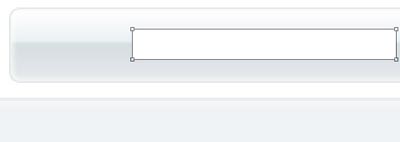
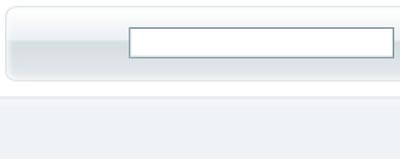
Next we'll represent the searching window out of the stretched button. The Rectangle Tool (U) in this case has the white color.
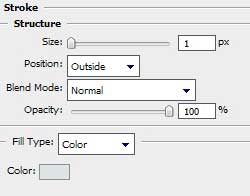
The layer's parameters: Blending Options>Stroke
Represent the button for starting searching process near the searching window. Select for this operation the Rounded Rectangle Tool (U) with radius of 3 px.
The layer's parameters: Blending Options>Gradient Overlay
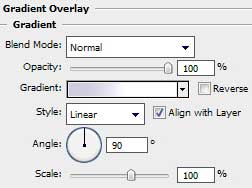
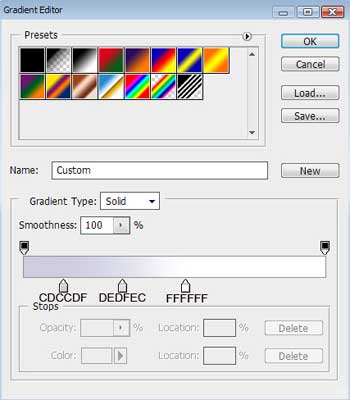
Gradient's parameters:
Blending Options>Stroke

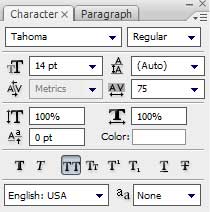
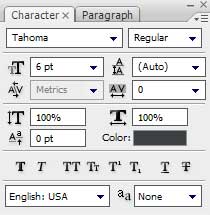
Insert the buttons' titles on the site's header and the inscription for the search and menu buttons.
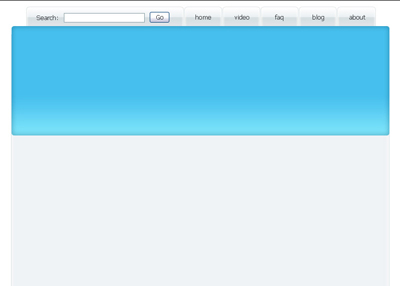
It's time for drawing the banner, choosing the Rounded Rectangle Tool (U) (radius 5 px).
The layer's parameters: Blending Options>Inner Glow
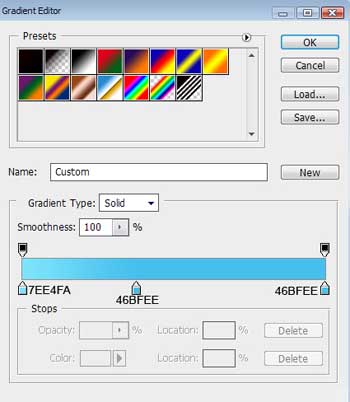
Blending Options>Gradient Overlay
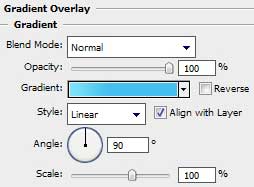
Gradient's parameters:
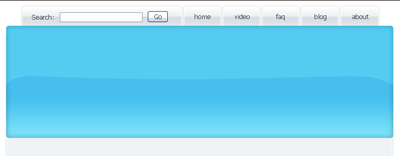
Make a copy of the banner's layer, replacing the copy's color with the white one and move off the layer's parameters out of the copy. Select the Add Anchior Point Tool to modify the element's shape.
Use also the Convert Point Tool to make the corrections on the highlight's shape as it is demonstrated below:

The layer's parameters: Fill 20%
Blending mode-Overlay
Insert the text on the made banner, keeping the next demands for the inscription: