Start working by creating a new file (File>New), having 1024x768 px and 72 dpi.
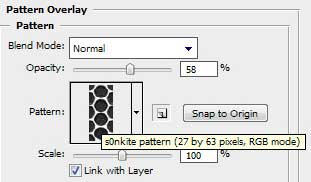
Find in Internet and download the next pattern - s0nkite Spiderman pattern.
Save it in the directory: Adobe Photoshop>Presets>Patterns.
Use the Rectangle Tool (U) to draw the background of the picture we want to have in the end.

Apply on the made layer the parameters indicated below by making a mouse click on the processed layer on the layers' panel. Blending Options>Gradient Overlay
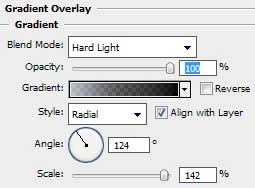
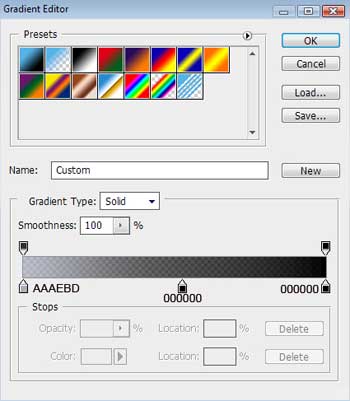
Gradient's parameters:
Blending Options>Pattern Overlay

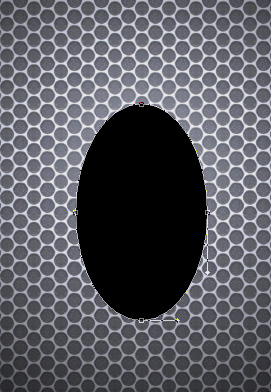
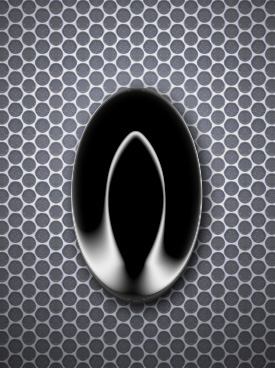
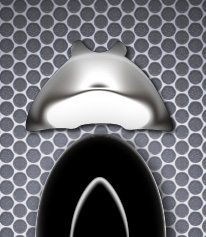
Select the Ellipse Tool (U) to represent the abdomen of a metallic beetle, having black color.
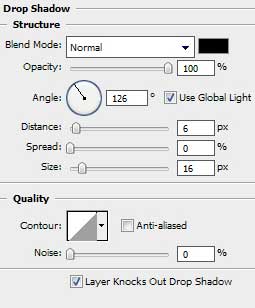
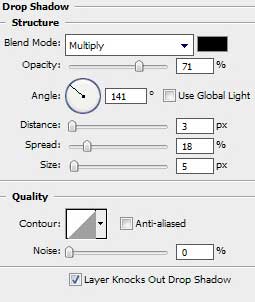
The layer's parameters: Blending Options>Drop Shadow
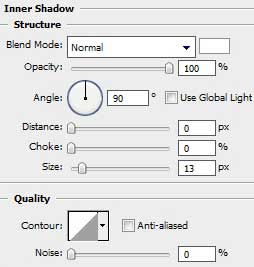
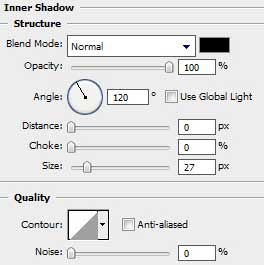
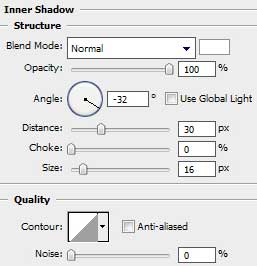
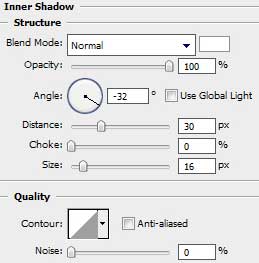
Blending Options>Inner Shadow
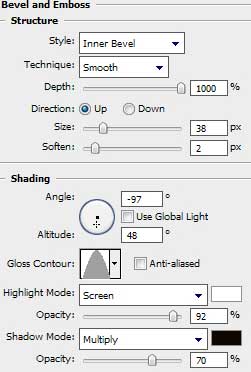
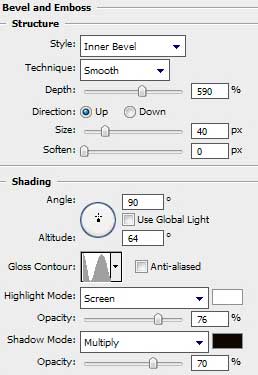
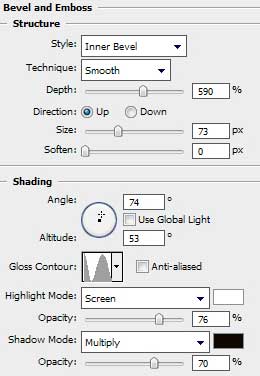
Blending Options>Bevel and Emboss
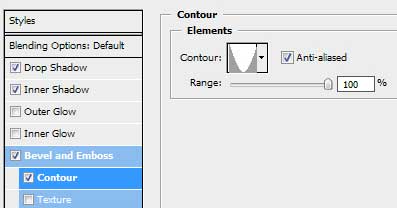
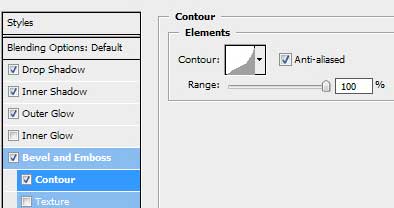
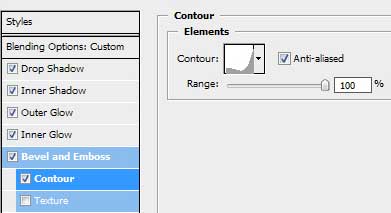
Blending Options>Bevel and Emboss (Contour)
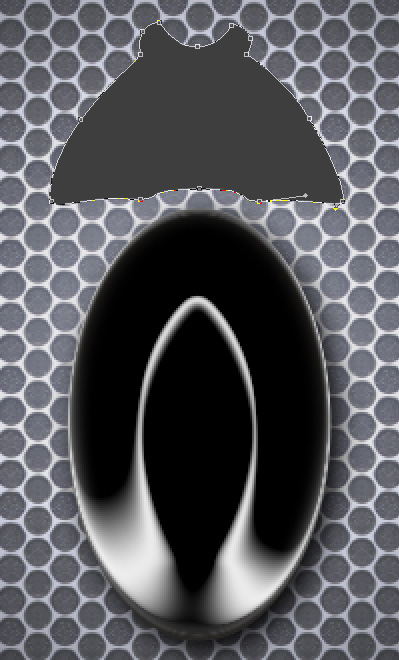
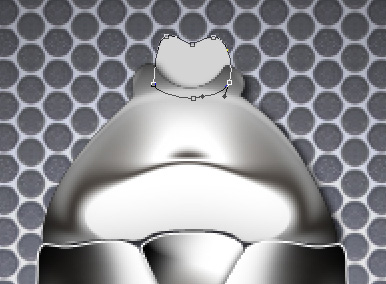
Select the Pen Tool (P) to represent the head of our metallic beetle which shape may be corrected with the Convert Point Tool. The layer's color is #3E3E3E.
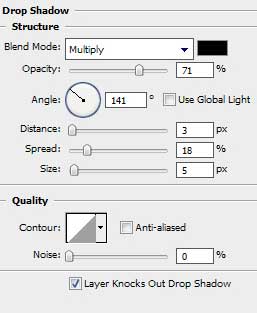
The layer's parameters: Blending Options>Drop Shadow

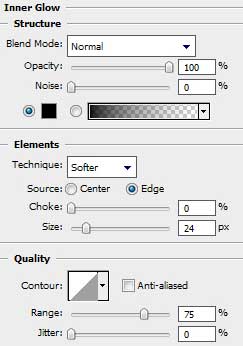
Blending Options>Inner Shadow
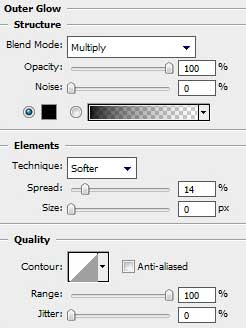
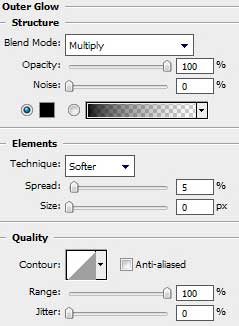
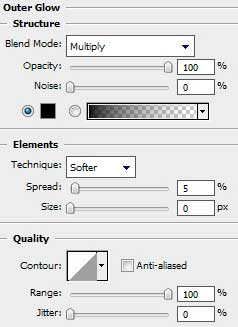
Blending Options>Outer Glow
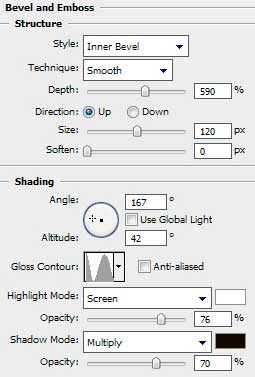
Blending Options>Bevel and Emboss
Blending Options>Bevel and Emboss (Contour)
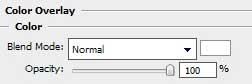
Blending Options>Color Overlay
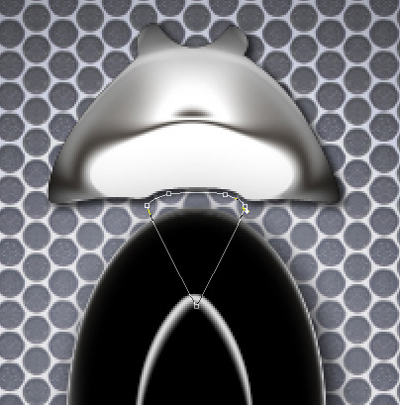
Using the same tool, try to combine the beetle's head with its abdomen.
The layer's parameters: Fill 0%
Blending Options>Drop Shadow
Blending Options>Inner Shadow
Blending Options>Outer Glow
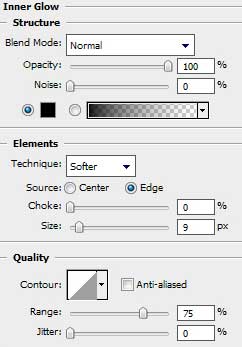
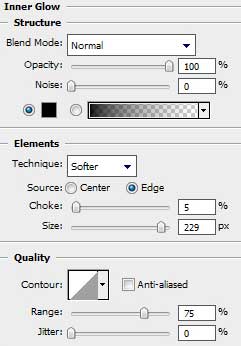
Blending Options>Inner Glow
Blending Options>Bevel and Emboss
Blending Options>Bevel and Emboss (Contour)
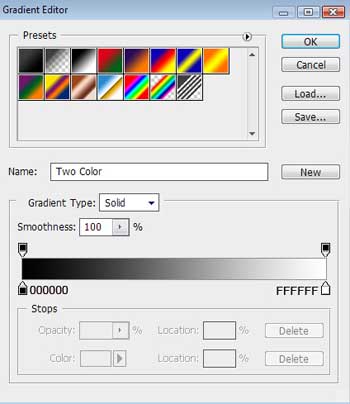
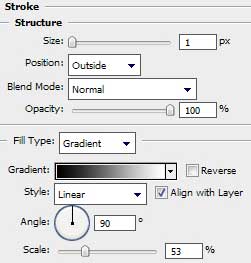
Blending Options>Stroke
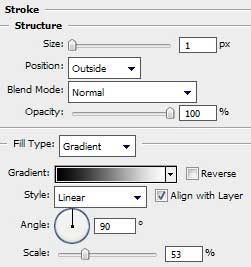
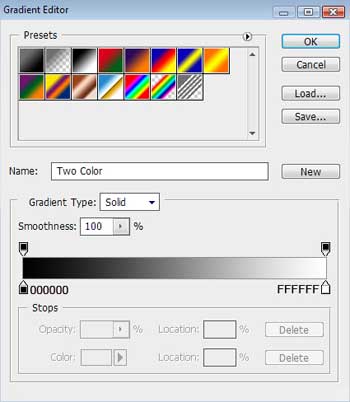
Gradient's parameters:

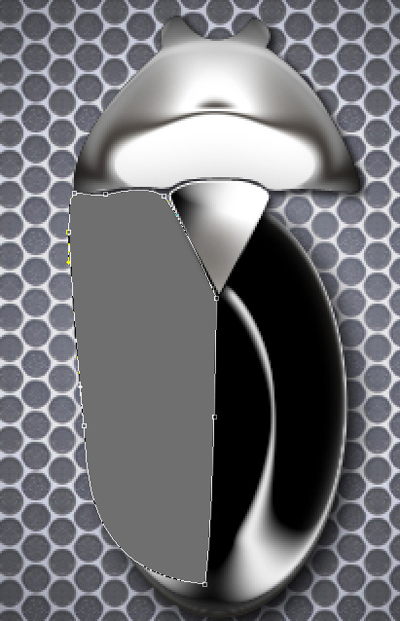
Use the same instruments (Pen Tool (P) and Convert Point Tool) to represent the left rigid elytra which color is #6F6F6F
The layer's parameters: Blending Options>Drop Shadow
Blending Options>Inner Shadow
Blending Options>Outer Glow
Blending Options>Inner Glow
Blending Options>Bevel and Emboss
Blending Options>Bevel and Emboss (Contour)

Blending Options>Stroke
Gradient's parameters:
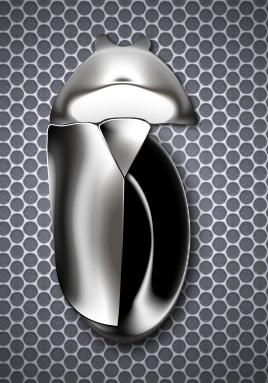
Make a copy of the last made layer containing the elytra and merge down the copied layer (Ctrl+E). Use the Free Transform option to turn over the copy and place the copy as below:
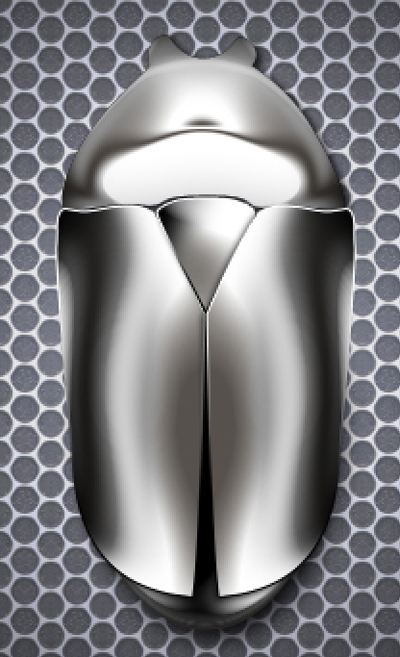
It's time to draw the beetle's jaws, applying the Pen Tool (P). For their correction we'll use the Convert Point Tool. Place this layer lower than the layer containing the beetle's head (on the layers' palette). The layer's color is #D4D4D4
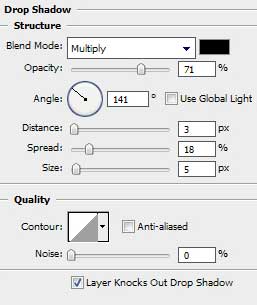
The layer's parameters: Blending Options>Drop Shadow
Blending Options>Inner Glow