

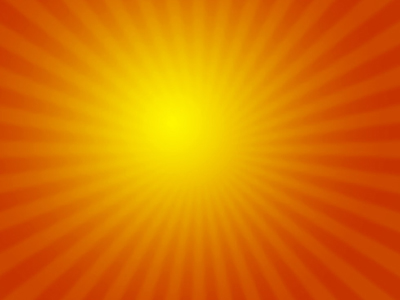
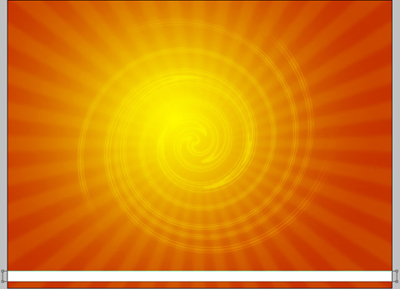
Create a new file (File>New), having 1600x1200 px and 72 dpi.
Using the Rectangle Tool (U), it's possible to draw the background of the picture to be.
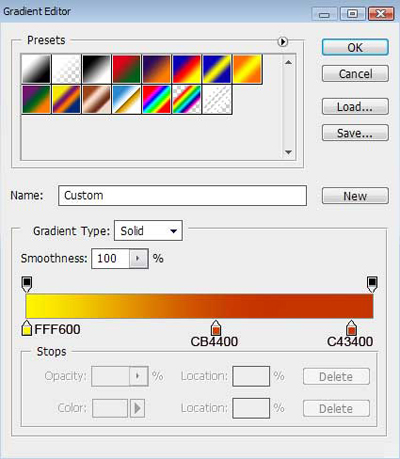
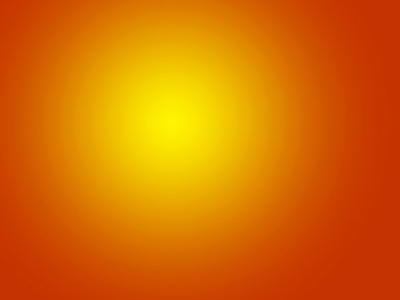
Select for the made layer the next demonstrated parameters by making a mouse click on the processed layer on the layers' panel. Blending Options>Gradient Overlay
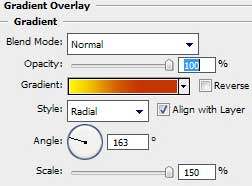
Gradient's parameters:
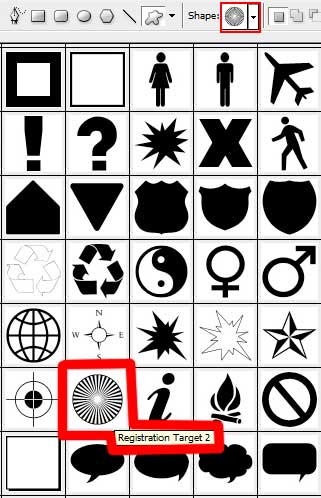
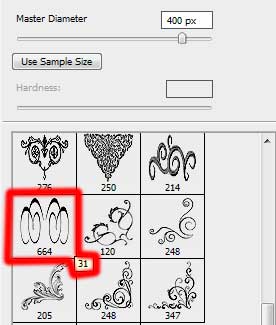
Next we shall draw several rays of white color, applying the Custom Shape Tool (U) and the shape from the next table:

The layer's parameters: Fill 9%
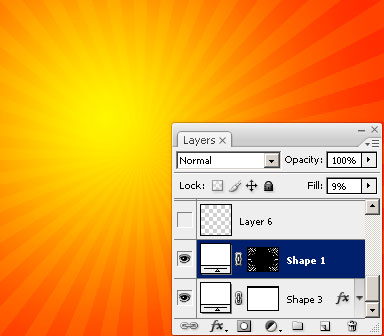

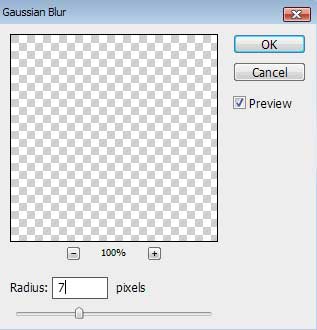
Merge down the layers. It's necessary for this operation to create a new layer above the previous one (on the layers' palette) and marking both layers (press Ctrl+E) to put them together in a single one. Apply for the new made layer the next option: Filter>Blur>Gaussian Blur
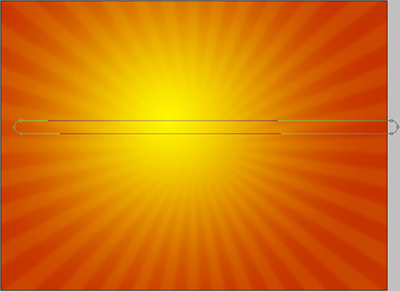
Using the Rounded Rectangle Tool (U) (radius 40px), try to get the primary elements reserved for the ornament to be.
The layer's parameters: Fill 0%
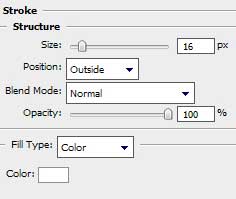
Blending Options>Stroke

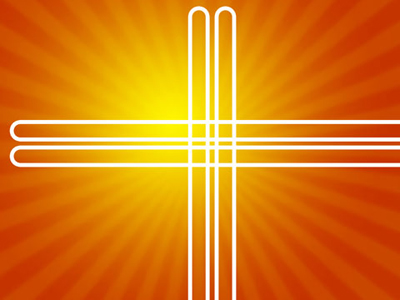
Make three copies of the last represented layer and select Free Transform option to turn over the copies if necessary and place them the way indicated below:
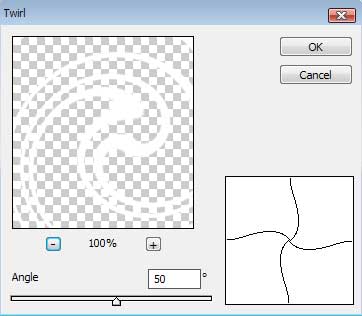
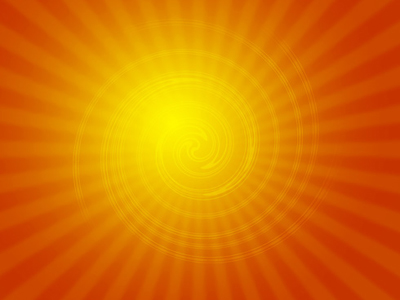
Combine in a group all the layers, containing the primary elements of the ornament (press Ctrl to mark out the corresponding layers and hold on the left mouse's button when taking the marked layers on Create a new group selection). Put together the elements of the group to get a single layer. Press on the group the next combination of buttons Ctrl+E. Select for the last layer the next option: Filter>Distort>Twirl

Choose the Free Transform option to place the ornament on the central part of the picture and make it smaller a little.

Make a mouse click on the same layer on the lowest part of the layers' palette on Add a Mask selection and choose the Brush Tool (B) of black color to clean out the unnecessary parts of the ornament.
The layer's parameters: Fill 30%
Blending mode-Overlay
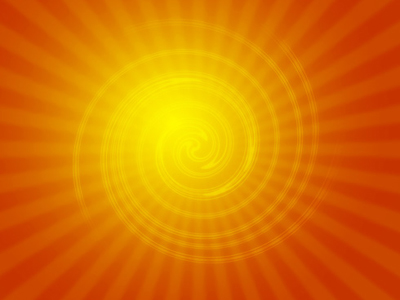
Make a copy of the recently created layer. Combine the layer containing the ornament into a new one (applying the earlier described method). We'll use also the earlier applied filter Gaussian Blur.
Using the Rectangle Tool (U), try to represent a stripe of white color on the bottom part of the picture.
The layer's parameters: Fill 59%
Blending mode-Overlay

Make four copies of the layer containing the ornament without the Gaussian Blur filter and then select the Free Transform option to turn around the copies, situating them the same way indicated below:

Select for the ornaments' layers the same parameter: Opacity 30%

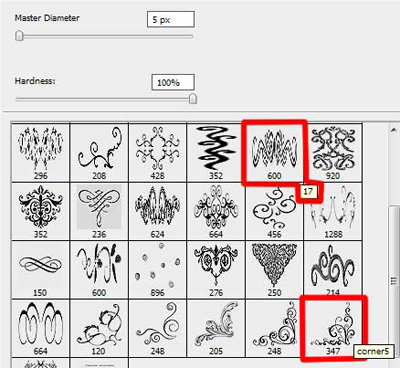
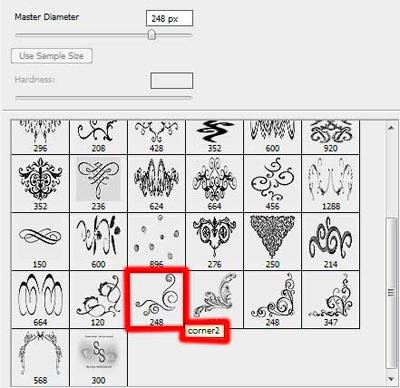
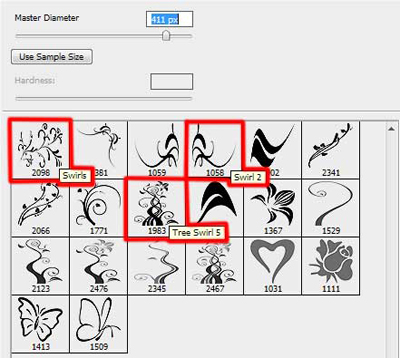
Download out of Internet a set of ready to use brushes for Adobe Photoshop, named SS-swirls.
Create a new layer and use the brush out of the above mentioned set. The brush's color is #F2CF11

The layer's parameters: Fill 40%
Blending mode-Overlay

Create a new layer again and use the brushes out of the set SS-swirls. The brush's color is the same with the previous one.

The layer's parameters: Blending mode-Vivid light

Create a new layer and use on it the brush form the mentioned set. The brush's color is #F2CF11.

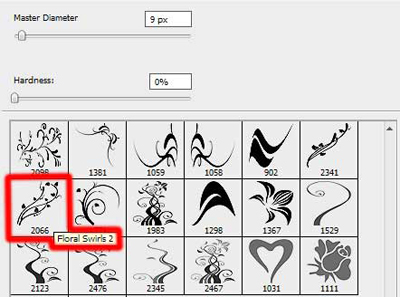
Download out of Internet a set of ready to use brushes for Adobe Photoshop, named this time Vector_Brushes. Create a new layer and apply on it the Brush Tool (B) out of the set mentioned above. The brush's color is #F2CF11. The brush may be turned over with the Free Transform option.

The layer's parameters: Fill 40%
Blending mode-Overlay

Make a copy of the last made layer and select the Free Transform option to turn over the copy, placing it in the right lowest corner.

On the next new layer (Create new layer) we should select the Brush Tool (B) out of the same set of brushes. This time the brush's color is #F2CF11.

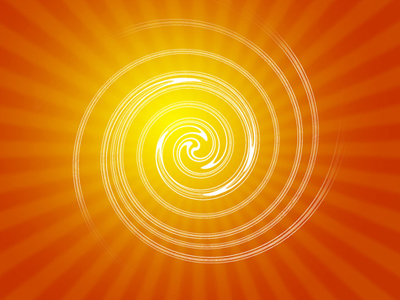
Finished!