1. Create a new layer and use Rounded Rectangle tool to make a rectangle like this
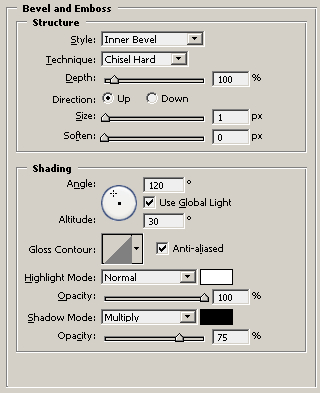
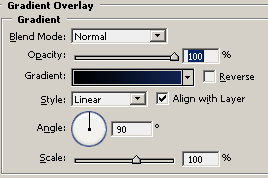
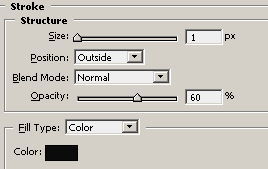
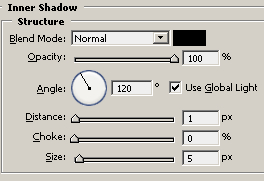
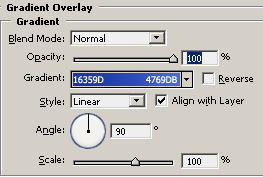
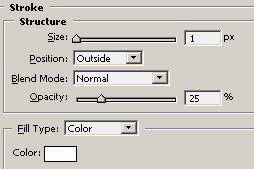
Right click on this layer and choose Blending Option and do as the pictures below
You'll get the result like this:
2. Create a new layer, select Gradient tool, color #5A74B4 : Linear, Color -> Transparent, and apply gradient at rectangle's bottom, you'll get the picture as the one below
Use Line Tool (1px): white color and draw a line close to the bottom of the rectangle, mode = Overlay.
Ctrl + Click at first layer (original rectangle), go to menu Select -> Transform Selection, resize it to half, use Gradient tool (White to Transparent) to do as the picture below then duplicate that layer to increase shining.
3. This step I'm going to show you how to make the button on the bar.
Create a new Set and create a new layer in that Set, use Rounded Rectangle to draw a small rectangle in the bar like this:
Right click that layer, choose Blending Option and do as the pictures below:
The result:
Use color #10C2FD to fill Gradient color like this:
Ctrl+click small rectangle layer, create a new layer, use Brush tool (Softbrsuh-10px) to apply around the border of the small rectangle, and adjust Opacity to get result like this:
Add more parts that you like:
Create a new layer and make shining like the step that you made for the bar.
4. This step we'll make separate line between buttons.
Zoom in the place beside the first button
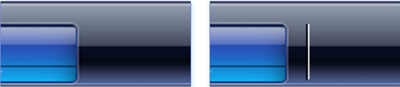
Use Line tool to draw 2 lines White and Black (1px) like right picture
Now, we need to merge 2 lines and use Eraser (Softbrush) to make sharp 2 points
We'll get the result:
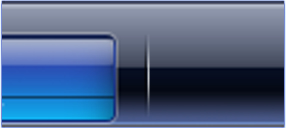
Continue to make more buttons and add title to each button.
This is my final result: