


Step 1: Creating the Workspace:
Start with a 100 x 100 Document and fill in the background with a nice white (#FFFFFF)
Make a new layer and grab your elliptical Marquee tool make the style fixed size and make 75 px x 75px circle like so:

Step 2: Add some colour:
Fill it in with any colour, as we will be adding in some gradient colours shortly.
Step 3: Apply some filters:
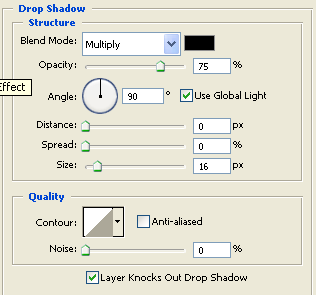
Right click on the circle layer in the layers panel and select Blending Options. Apply the following layer styles:
Drop Shadow:
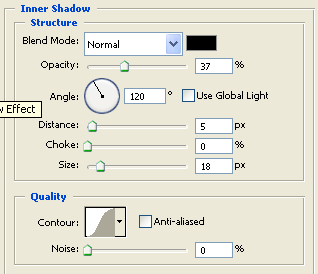
Inner Shadow:
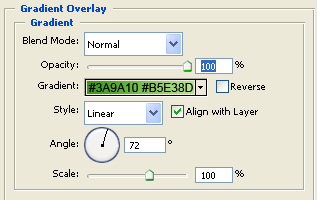
Gradient Overlay:
Apply all of those settings and our base layer should look like this:

Step 4: Duplicate the layer
Next we need to duplicate the base layer we just creating and modified the layer styles on. To duplicate the layer, simply right click on the base layer and select Duplicate layer. You will now have two base layers.
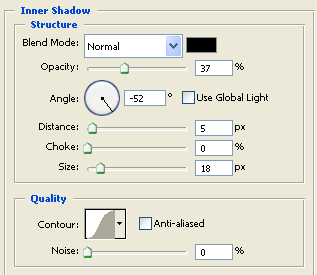
On the duplicated layer apply following layer styles (Layer styles on the base layer will have been copied onto the duplicated version. There is no need to change or remove any of the transferred layer styles, simply change/add the following layer styles below):
Inner Shadow:
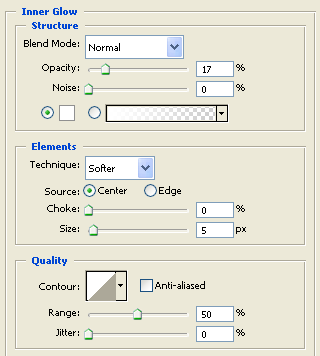
Inner Glow:
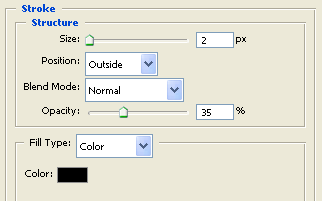
Stroke:
Apply those and then our duplicated base layer will look different but add a new effect to the orb button:

Step 5: Making the selection:
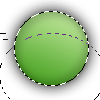
Now with the duplicated base layer selected in the layers panel hold Ctrl on the keyboard and click on the layers thumbnail so it selects the shape:

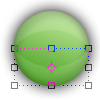
Now grab your elliptical marquee tool this time make sure the style is set to normal and not fixed size, then choose the third option Subtract from selection, then make a selection over the current selection like this:
After making this selection you should be left with a curved selection like this:

Make a new layer and then fill it in with a neutral white (#FFFFFF) to give you this:

Lower the opacity of the newly made layer to about 48% and then change the Blend mode to Soft Light to give you this effect:

Duplicate the curve selection and then go to Edit > Transform > Rotate 180 so you have two curved selections on your canvas:

Position this new curve at the bottom of our circe base like so:
The Final result:

You could use the button in a number of different ways, here's a few of my ideas:
![]()


I'm sure could this of more but there's a few to start you off!
Download the PSD file here.