Step 1: Creating the Workspace:
Start with a 125 x 125 document and fill in the background colour as a neutral White #FFFFFF
Step 2: Creating everything in one step:
Make a new layer and make a selection with your Elliptical Marquee Tool like so:

Note: Holding the Shift key on your keyboard will give you a perfect circle!
Fill in the circle with any colour by right clicking within the circle and select Fill. Choose any colour to fill it in.
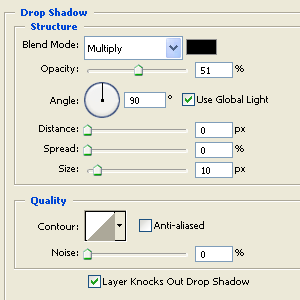
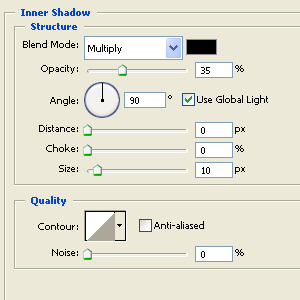
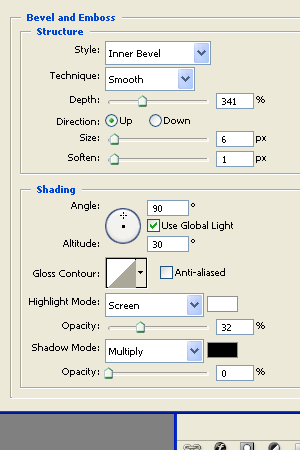
Once you've filled it in right click on the circle layer in the layers panel and select blending options. Apply the following Settings:
Drop Shadow:
Inner Shadow:
Bevel & Emboss:
Colour Overlay:
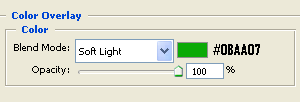
(Green was just a example for this tutorial you can create different colours as well! More examples will be shown at the end of the tutorial!)
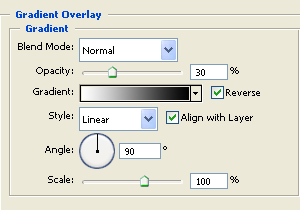
Gradient Overlay:
After applying all of those settings Click OK and we should have a button looking like this:

Step 3: Adding a Stroke (Optional)
Now during this tutorial I created this button with a stroke which ended up looking like this:

If you like your button with a stroke this settings are below:
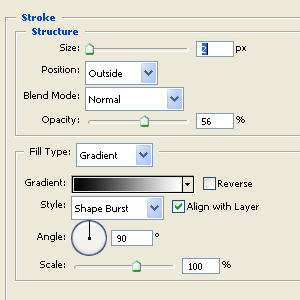
I preferred the button without a stroke so I'm going to continue on without one.
So the final result! Now during the Blending Options stage under the colour overlay setting I said that you can use different colours. Now to change the colour you would simply change the Colour Overlay Colour setting and nothing else. Don't modify the gradient! Here are some more examples with different colours:
The Final Result


Enjoy your Buttons!
Download the PSD file here.