Step 1: Creating the Workspace:
Begin with creating a 300 x 300 px document and fill in the background color with White (#FFFFFF)
Step 2: Make the first layer
Next create a new layer and grab your Elliptical Marquee Tool (M) and draw a circle like this:
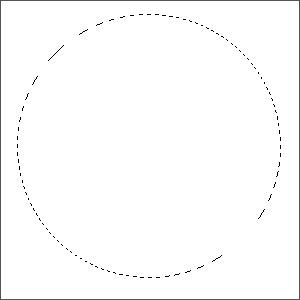
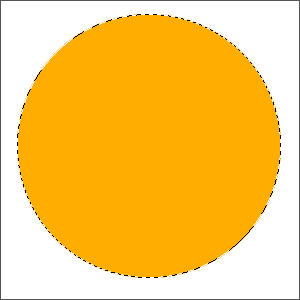
To get a perfect circle hold shift while you make it. One you have your circle right click within the dashed border and select Fill. Select the option of color in the drop down menu and fill it in with #ffae00. You should now have something like this:
Step 3: Make the inner layer:
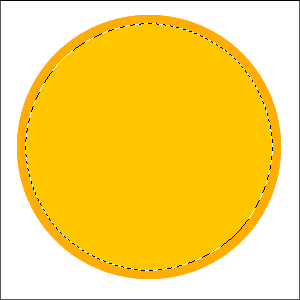
While the circle is still selected make a new layer again and go to Select > Modify > Contract. Contract the circle by 8 px and then on your new layer right click within the new circle border and fill it in with ffc600. It should look something like this:
Merge the first and second circle layers together.
Step 5: Create the Gloss effect:
Now make another new layer and make another circle. This time make the circle go half over but not all the way so like this:
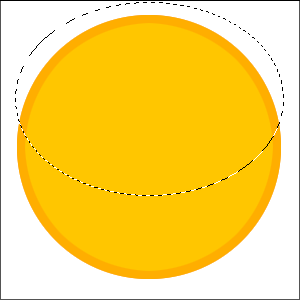
Fill in the third circle with white (#FFFFFF) You may want to rotate the new third circle a bit. If you do then go to Edit > Free Transform and then go to the end of the circle and move it around slightlly. Once your happy lower the opacity of this layer to 41 %. You come up with this:

Step 6: Modifying the Base Layer
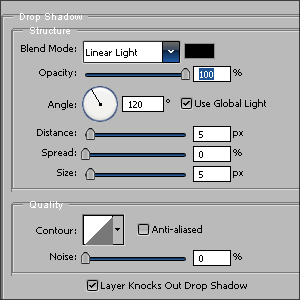
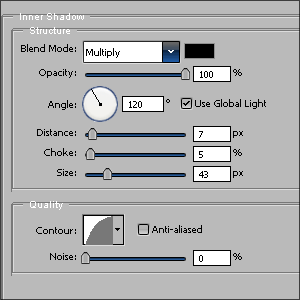
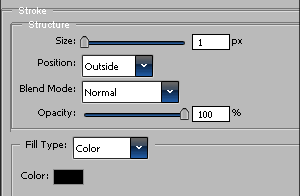
Now to create the orb feel of it. Select your very first circle layer you made right click on the layer and go to Blending Options and then apply these settings:
Drop Shadow:
Inner Shadow:
Stroke:
Once done click okay and then you should have something like this:
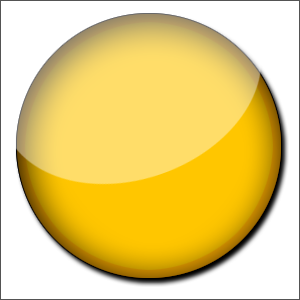
The Final Result: