

Step 1 - New Document
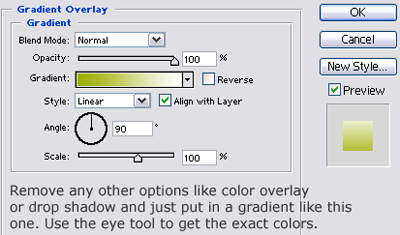
OK open up a new document. Size (700 by 40) Color the background the color(333333). Ok now create a new layer. Color it in the color (AEC300). You should just have a menu with that color nothing special yet right? Well ok now go to layer/duplicate layer. While on that layer go to layer/layer style/blending options. Then put in these properties.
Step 2 - Duplicate again.
OK now duplicate this top layer. Then go to layer/layer style/blending options and take all the options off accept color. Make the color white. (ffffff). Now you should just have a white screen right? Ok now go and grab the Rectangular Marquee tool and cut it in half. FIrst select then press backspace to cut. Half of it should be white half should be the actual menu bar. After you've done that go and make the opacity of the white to about 11 or 12. This is what I have so far.
Step 3 - Puting The Text in.
OK were going to have a reflected text. So go head grab the text tool and with a white font, the font of your choice( verdana recomended) Write out your menu. Keep this text on top of the white part. Make sure there is the same amount of space between each link. OK after you've done that go to layer/layer style/blending options and give the text a drop shadow. ( Distance 2 Spread 2 Size 0) Then make the opacity of the shadow to be 26. Ok great this is what you should have so far.
Step 4 - The Reflection.
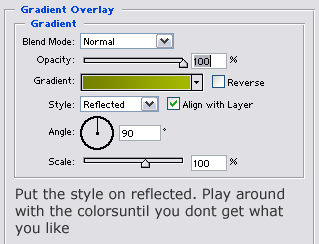
OK now its time for the reflection. First open up a new document. No matter the size. Color it in black that's (000000) Drag the actual text links into the new document. Then go to image/rotate/180 degrees then image/rotate/rotate canvas horizontally. Then drag the text back into the original document. After you've done that align the text with the other one. Then when your done go to layer/layer style/blending options/ Gradient overlay. Put in these properties. After you've done that make the opacity 34.
Step 5 - Time for the split
OK now were going to add little lines between each link to split them. These will be very shiny. Ok so create a new layer. Grab the rectangular marquee tool and make a one pixel selection. Then color. Duplicate it through out each link. After that give each of them this property.
Step 6 - New Layer Again.
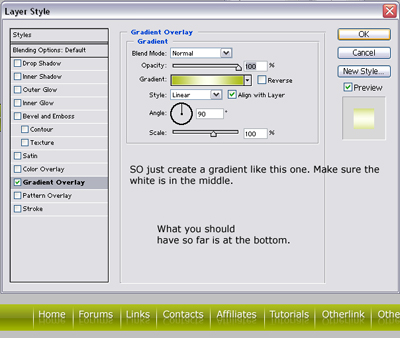
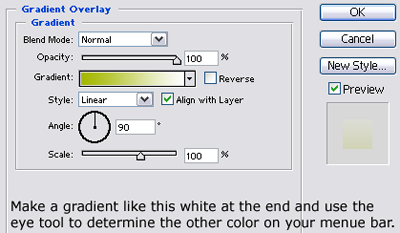
OK go on top of every layer. Then create a new layer. Make it white. What your going to do is cut off about 2 to 3 pixels from the bottom and up. So you should have a white bar going through the whole thing. Then cut off 5 from the sides. After you've done that put in this gradient. After you've done that make the opacity to about 21. You should have a glassy feel and look to it now.
Step 7 - Last step
Once again create a new layer on top of all layers. Then go to layer/layer style/blending options. And on blending options make the fill opacity to 0. Then go to stroke. Pick a one pixel black stroke, and make the opacity to about 25, with the position inside. This is my final product. Good luck with yours.
