

Step 1
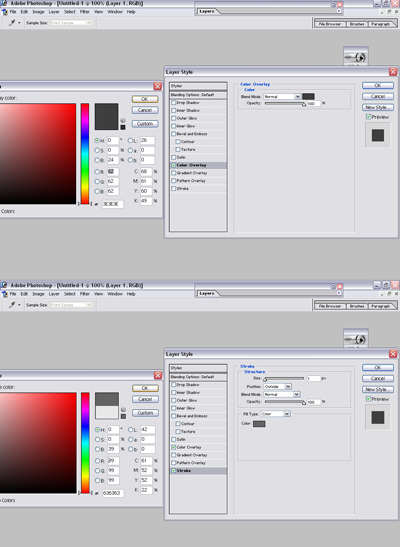
OK this tutorial is only for intermediate photoshop users although if you like to challenge yourselves you can try this. I mean its not that hard you just need to know basic techniques. Ok so lets start. Open up a new document size 700 by 200. Color the background in this hex color 333333. Create a new layer call it step one. Ok now you will use the rectangular tool to make a rectangle inside the document leaving one pixel on the outside. This is because were going to make a stroke for it. Ok now rasterize the layer. Then go to layer/layer style/blending options/and follow what you see on the image.
Step 2
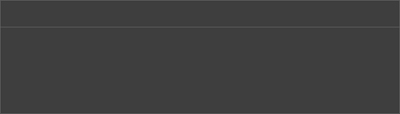
Now you will duplicate that layer, by going to layer/layer style/duplicate. Ok now you will cut everything but about 30 pixels. You probably don't know what I'm talking about so take a look at the pic.
Step 3
OK now go to layer/layer options/blending options. Follow the steps. Just change the color but leave the stroke the same color. This is what I came up with.

Step 4
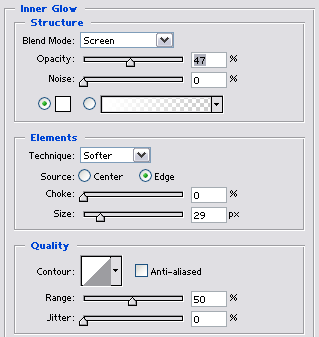
OK now your going to duplicate the layer again. The one that's green. Your going to make its color white and take off the stroke. Now your going to cut it in half once you did that make its opacity to about 30 that's what mine is. Now you should have it looking all glassy and nice. Ok now go back to the green layer. Then go to layer/layer options/blending options/inner glow and put these settings in.
Step 5
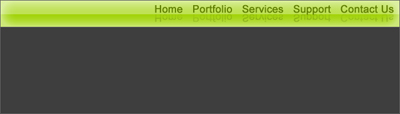
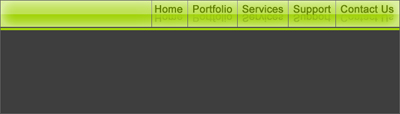
Now Grab your text tool and write the name of your buttons, Use this color font 607F00. OK and put it over all layers. Then put it above the glassy thing. Now were going to do a reflection. If you don't know how to do a reflection please look it this tutorial our Reflection Tutorial. This is what you should have now.
Step 6
Ok now were going to click back on the green layer/and were going to cut through every link. This should be easy for you know. Just use the rectangular marquee tool to cut and backspace to erase. Make the cuts one pixel. Ok after you've done that click on the layer under the green menu bar. This should be your first layer above the background. Ok now create a new layer above it call it what ever you want. Now do the whole thing where you draw a rectangle but leave one pixel again. But this time don't do it all around just where there is open space, don't go under the buttons. Ok now your going to cut that like we did before. Leave about five, four pixels if you don't know what I mean look at the image, but Make sure you color it the color same as the menu bar, to do that just use the eye tool.
Step 7
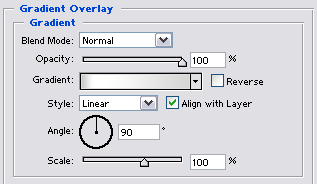
Ok now do the same thing we just did in the last tutorial where you did the whole thing where you filled the space up but one pixel. Ok now your going to do that and put in these settings.
Step 8
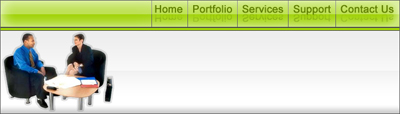
Now your going to duplicate that layer. Remove the gradient and make it white. Now do the whole reflection thing with this layer like we did before. Ok Great. Now that you done that you need to find a picture that you would like to use. Cut it out and place it in that space. See what I did, once again I said this is for intermediates so you should know how to do that. Try giving it a black three pixel stroke with a low opacity that would look good.
Step 9
Ok now your going to add text. Put your own affect in it. I don't care what you do, as long as you make it fit the banner. This is what Iv done. Add some text to the side and your done. See what I've done you could take my idea and do the same thing if you like or do something different. Good luck.
