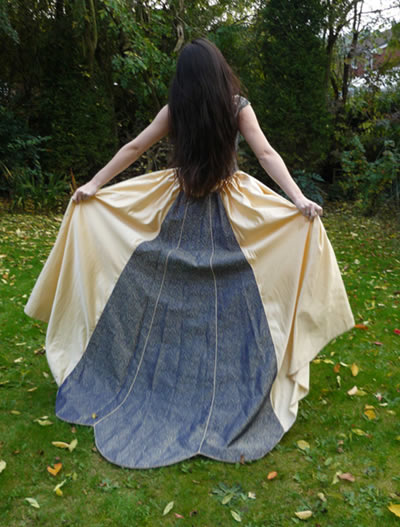
The first you open the photo below, use any cutting tools to cut the lady out of background
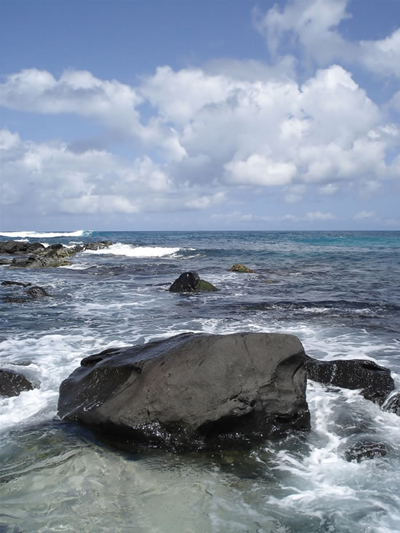
Continue to open this photo
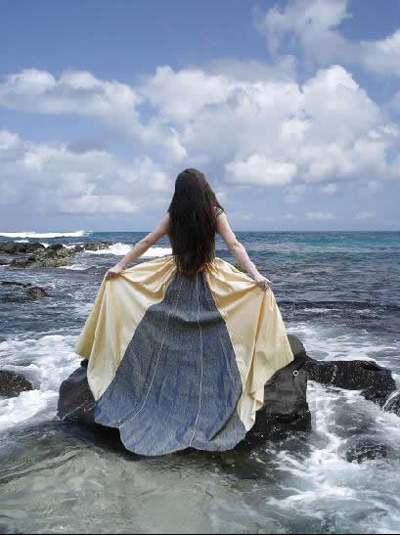
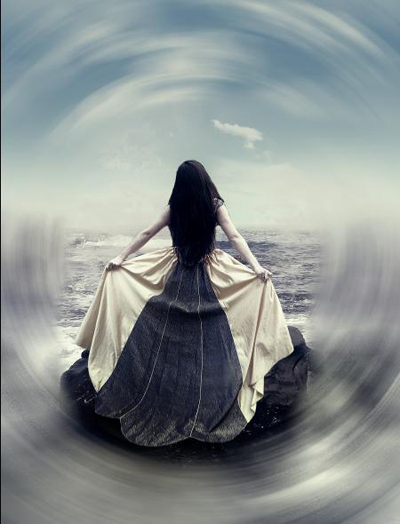
Put the lady into photo above to get the result looks like this:
Now we will adjust the color of the picture
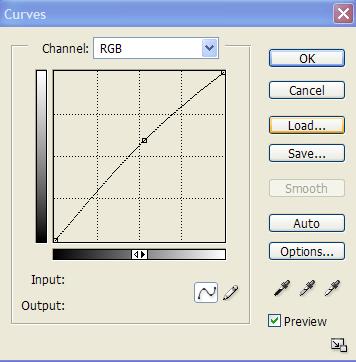
Go to Layer-> New Adjustment Layer -> Curves
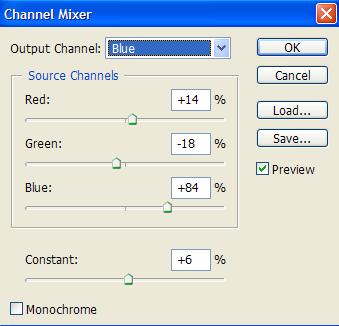
Continue to go to Layer-> New Adjustment Layer -> Channel Mixer
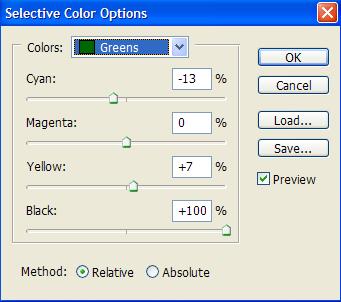
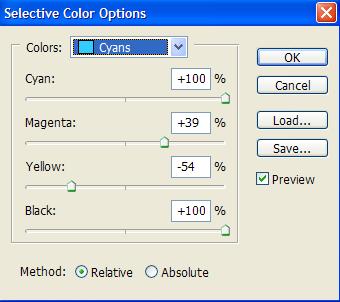
Go to Layer-> New Adjustment Layer -> Selective Color ( choose Greens and Cyans )
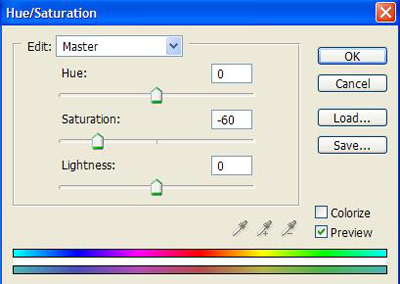
Layer-> New Adjustment Layer -> Hue / Saturation
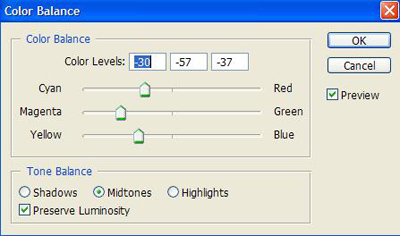
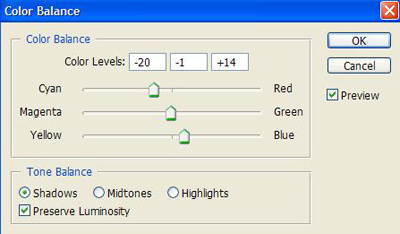
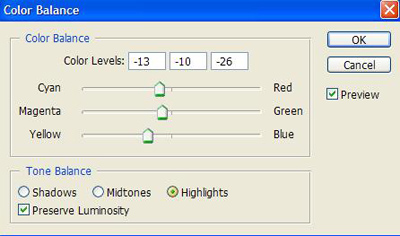
Layer-> New Adjustment Layer -> Color Balance
Create a new layer then press Shift +Ctrl +Alt + E
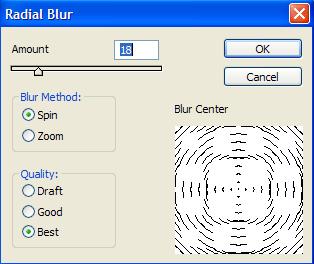
Continue to duplicate this layer then go to Filter -> Blur -> Radial Blur, do as the picture below:
Choose Eraser Tool, right click on the picture, set Hardness = 0
Erase around the model to get the result like this:
Create a new layer, press Shift + Ctrl + Alt + E
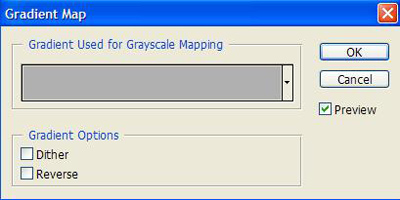
Go to Layer-> New Adjustment Layer -> Gradient Map ( Change blend mode to Overlay )
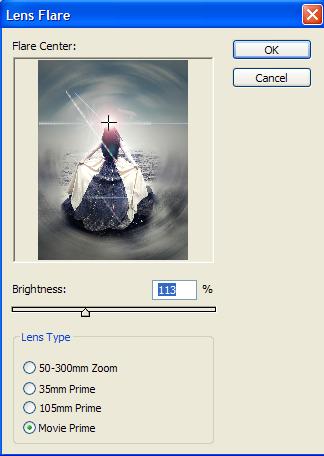
Then go to Filter -> Render -> Lens Flare
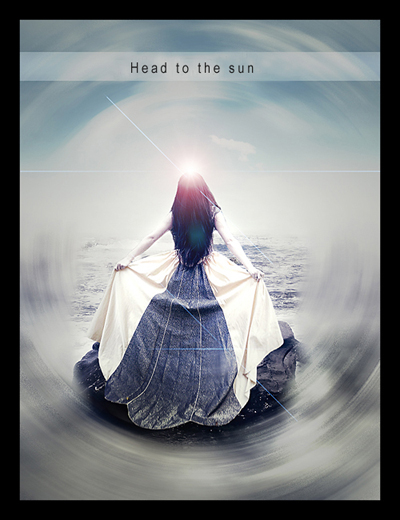
Finally, merge all layers together then go to Filter -> Sharpen - > Sharpen