Lets begin by creating a background, you may use mine or create your own.

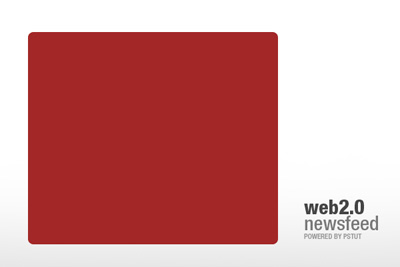
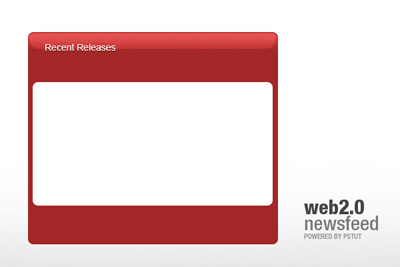
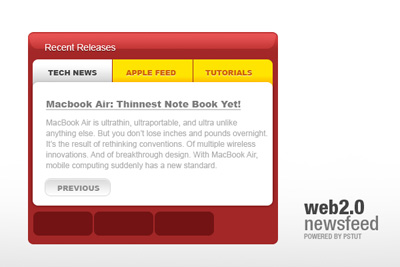
Begin by creating the base of the table. Use your Rounded Shape Tool with an 8PX Radius and a background of #a22727.
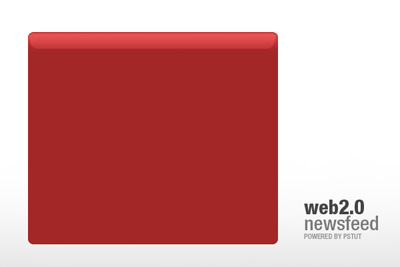
Duplicate the layer and set the color to white. Razterize the shap and using your Eraser Tool with the size of 100px fade out everything but the tip. It should create a nice looking gradient. Set it to overlay and here it is:

The glare will work well here so grab your rounded shape rectangle and create an inner rectangle inside right up to the middle of the your newly created gradient in the first step. Go to Edit Transform and Skew it from left hand side and right hand side. Drop the opacity 32% and overlay it.
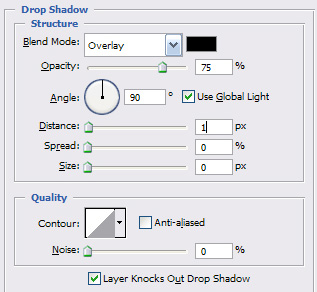
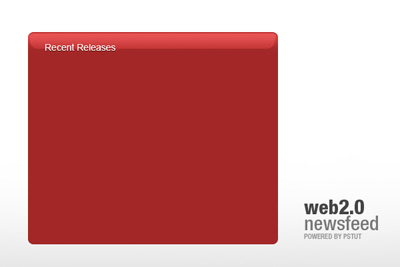
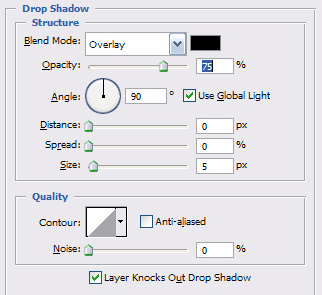
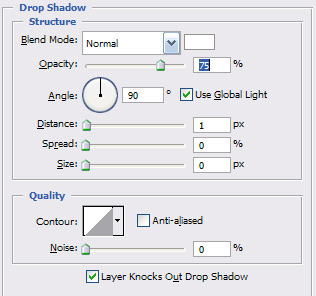
We need to name our feed box, Recent or Latest Releases both work. Throw that on and add a drop shadow effect that is listed below:
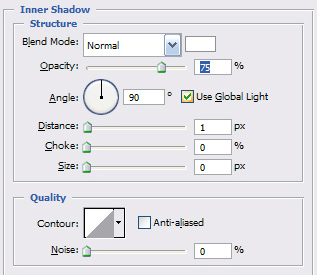
Our base is prepped and ready now. We will now begin to work on the content holder, so take out your Round Shape Rectangle with the same settings except a white background. Throw it one somewhere in the middle and paste a drop shadow layer style on it listed below:
In this we will create the tabs for the selection of feeds. I used white for the selected tab and yellow for the available options. Using your rounded shape rectangle, create three shapes on top of your content holder and cut off the round edges to connect them all together. Make sure the end tips both from left and right are not cut.
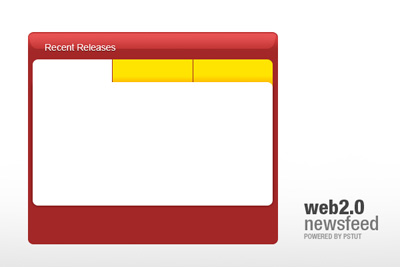
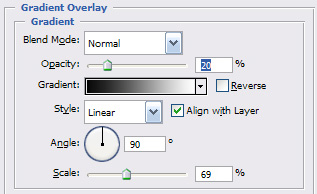
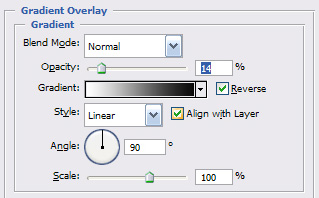
Apply a gradient overlay on your white tab
Time to add some dummy text! In the content place holder, its usually to make the title nice and large. I used Arial Black size 14px with the color of #7d7d7d. In my context area, i actually used Arial 12px with 75% of the #7d7d7d color.

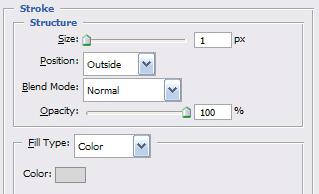
Label the little tabs now, mine go Tech News | Apple Feed | Tutorials. For Tech News, i used a darkish grey color (#454545) and for the two other yellow tabs i used cf6100. Also after you done labeling, apply the following effect to your text:
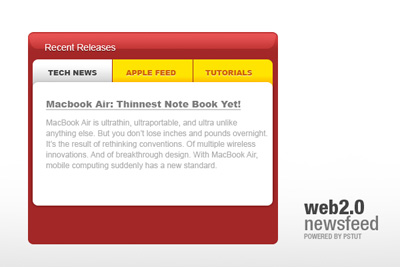
We need to implement a feature so the user can move around between the articles so grab your round shape rectangle, set the color to white and apply the following layer styles. After place PREVIOUS in Arial Black size 11px.

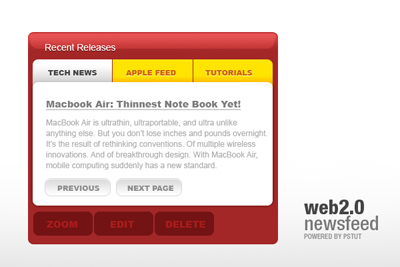
Duplicate all the steps or just the layers to create a next button as well! Now lets create a small editing interface for our users. Grab your round shaped rectangle, set the color to black and overlay it with 50%. Make three buttons underneath the content holder
Throw in some features like Zoom | Edit | Delete. The text of the color should be white under an overlay and 47% opacity. I used Arial Black size 14px. After you added the text, you are done pretty much.
I hope this tutorial will come in handy for your designs! Thank you for reading.