Step 1. Start off with a file 500x500.
Make a new layer. Get the Elliptical Marquee Tool (press M) and hold shift while dragging a Circle. Then fill that selection with black.
Now Duplicate that layer (Ctrl J), Load the Selection of the duplicated layer (Ctrl click on layer) and press Ctrl T to get in free transform. Now go into the percentages box Now go into the percentages box and set them to 40%, both, height and width.
![]()
Select the original layer and hit delete.
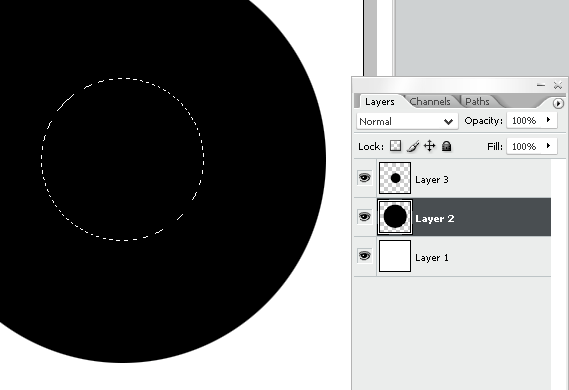
Delete the middle Circle (the small circle) layer. (layer 3 in my image)
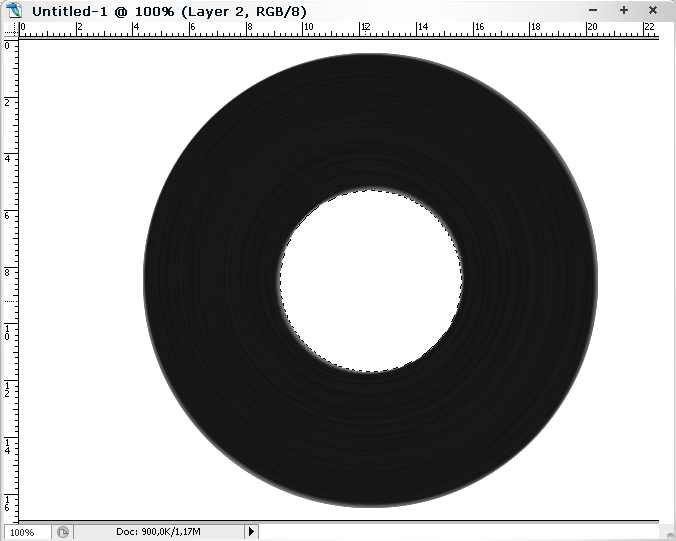
Step 2. Select the Main Circle again and go to Filter>Noise>Add noise
Use these settings:

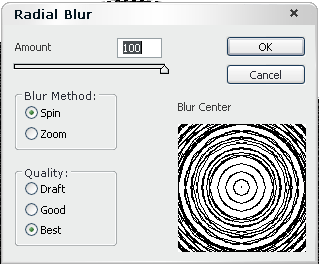
Load Selection (Ctrl click on layer) on the Main Circle. Then go Filter>Blur>Radial Blur and use these settings:
Step 3. Now use your Magic Wand Tool to select the middle of the circle.
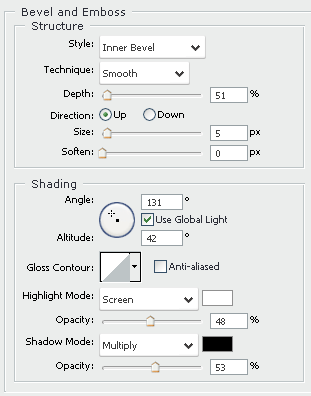
One you have done that create a new layer and go Select>Modify>Expand and use 2pxNow fill the selection with any colour you like (I used #fa8100).
Use Blending options: Bevel And Emboss.
Step 4. To get the light effect, we are going to make a Adjustment layer. Click the Adjustment layer icon.
![]()
And select Levels. A window will popup, use these settings:
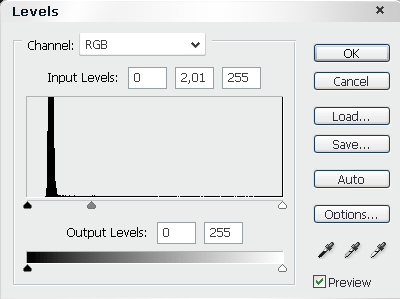
You can play around with these settings later.
Now fill the mask with black.
![]()
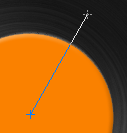
Get the Gradient Tool (G). Set your Fore- and Background colour White and Black, select the Reflected Gradient box and select Foreground to Background.
![]()

Then drag a Gradient like this:
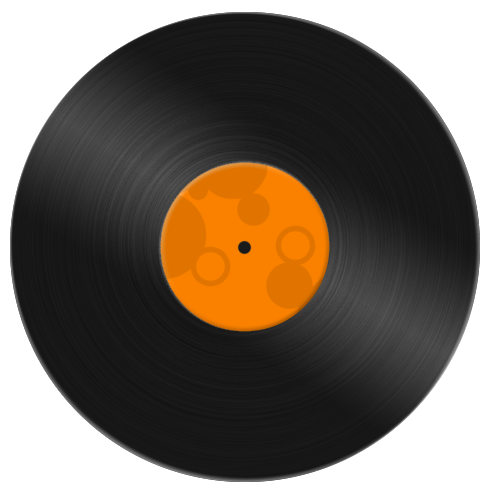
Your done!
Now you should be creative and make some text and images in the middle circle!