


In this tutorial I will show you a quick way to apply animal skin to your text. This process is simple and easy for all to understand with little Photoshop knowledge. I do suggest using a fairly large size image of skin or creating your own on a bigger scale. It is also better to do one letter at a time so you do not get seams in the texture.
At the end of the tutorial I will show you how to define the texture as a pattern to use in this tutorial.

First thing you want to do is select your "Type Tool" and create your letter.

Now select the "Add a Layer Style" at the bottom of your layer palette, and select "Pattern Overlay".
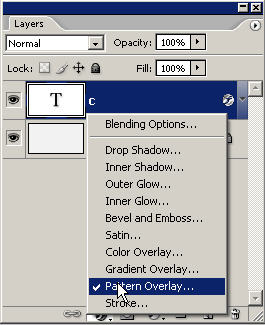
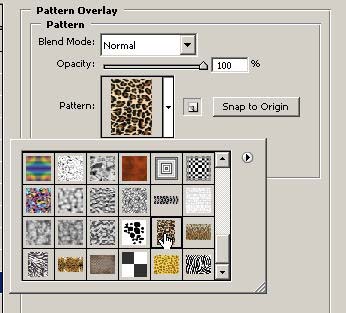
Then select the pattern you would like to use on your text.
In this example I chose a Cheetah skin I had already defined.
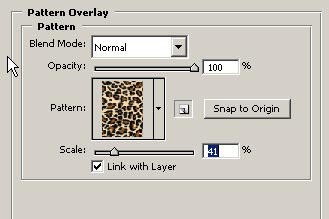
Next adjust your scale to the size that suits you. You may sometimes see that the pattern creates a seam. Simple readjust your scale a bit to remove it.
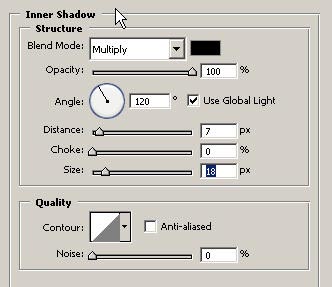
After that you can add other options to the text if you prefer.
Here I added a quick "Inner Shadow".
Final Result.

How to Define an Image for a Pattern :
Open up or create a new pattern.

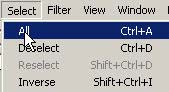
Go to Select>All
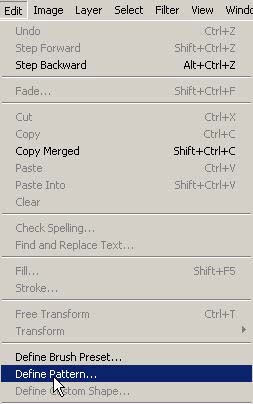
Then go to Edit>Define Pattern. Give the pattern a name and click OK.
I hope you enjoyed the tutorial.