


Create a new file (File>New) of 1280x1024 px and 72 dpi which must be painted with the Paint Bucket Tool (G) and the color #2A0900.

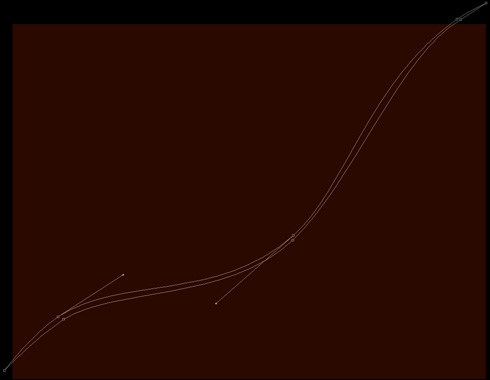
Next select the Pen Tool (P) to represent a wavy line which shape may be corrected with the Convert Point Tool.
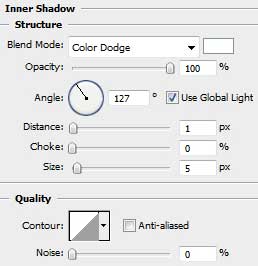
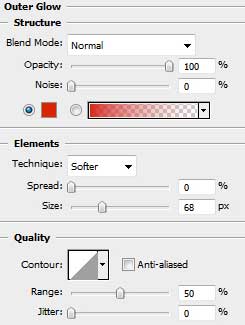
Set the next parameters for the last made layer by making a mouse click on this layer on the layers' palette.
Fill 0%
Blending Options>Inner Shadow
Blending Options>Outer Glow
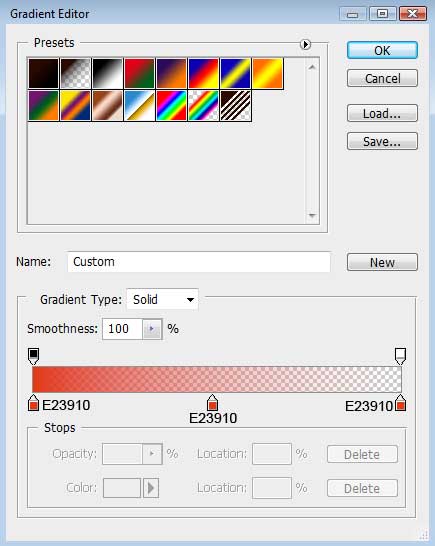
Blending Options>Gradient Overlay
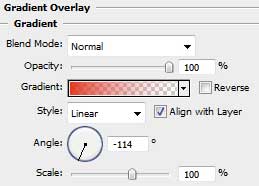
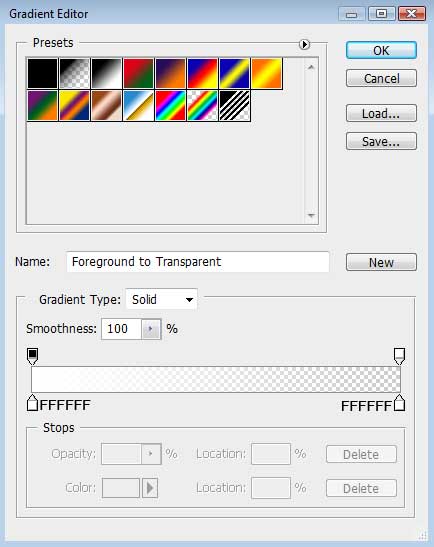
Gradient's parameters:

Make a copy of the line's layer and choose Free Transform option to turn the line's copy horizontally, placing it the same way demonstrated below.

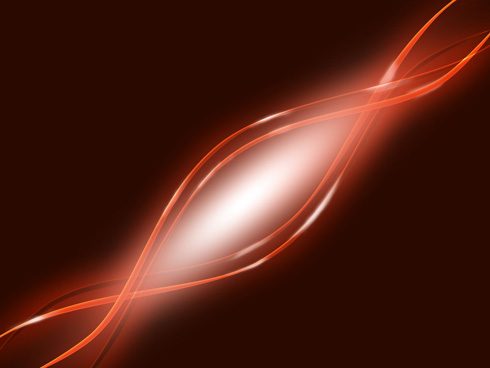
Getting the necessary result is possible if combine both wavy lines in a group (press Ctrl button to mark out the necessary layers and hold on the left mouse's button to move down the marked layers on Create a new group option).
Make a copy of this group. Turn this copy over, applying the Free Transform option and placing it the same way shown below.

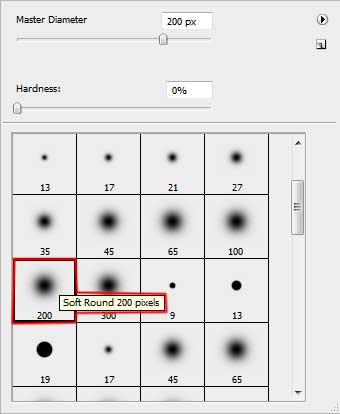
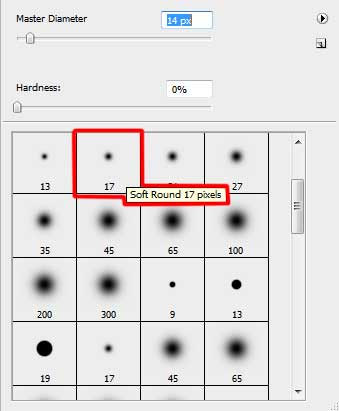
Create a new layer again and use on it the Brush Tool (B) with the Opacity of 50% to draw several highlights of white color on these lines.


Create another new layer (Create new layer) where we shall apply the same Brush Tool (B) to represent several spots on the central part of the picture.
The brush's color:

Using the Free Transform selection, try to stretch out the spot horizontally and turn it over the same way shown next picture.

Use the same method described above to represent a white spot.
The layer containing the white spot needs the parameters from below.
Blending mode-Overlay

Make a copy of the layer containing the white spot and select Free Transform option to make the copy smaller and change the layer's parameter also with that one from below:
Blending mode-Normal

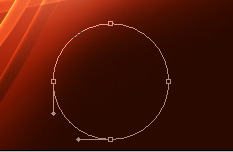
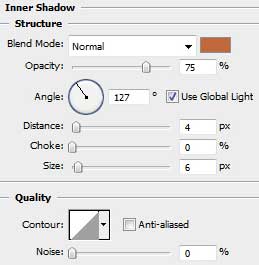
Next we have to choose the Ellipse Tool (U) and represent the primary layer of a bubble to be later.
The layer's parameters: Fill 0%
Blending Options>Inner Shadow

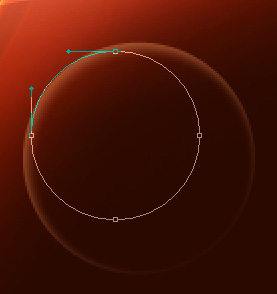
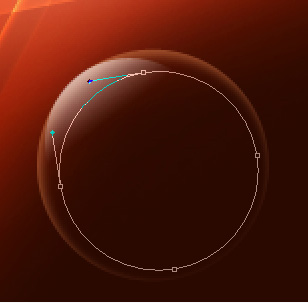
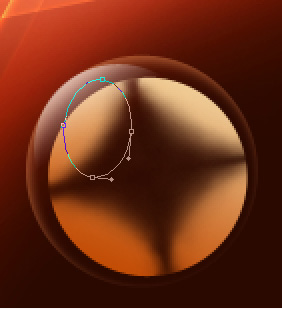
Now it's time to draw a highlight on the made bubble, applying the same Ellipse Tool (U).
The layer's parameters: Fill 0%
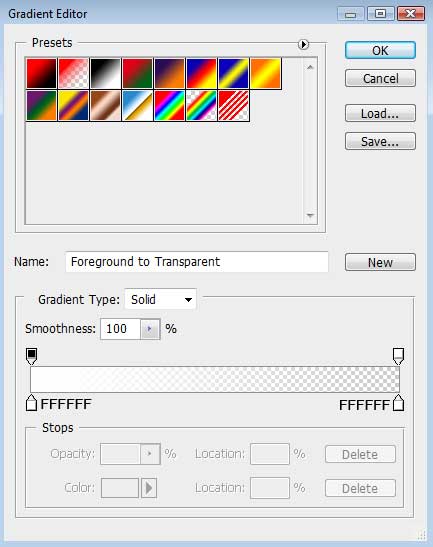
Blending Options>Gradient Overlay
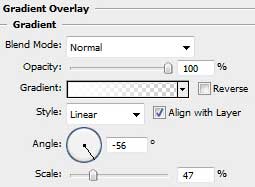
Gradient's parameters:
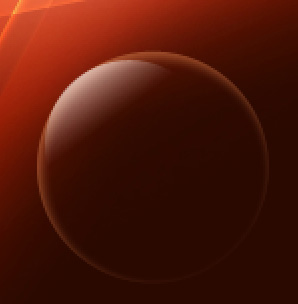
Use the last tool to create the next layer belonging to the same earlier made bubble.
The layer's parameters: Fill 0%
Blending Options>Gradient Overlay
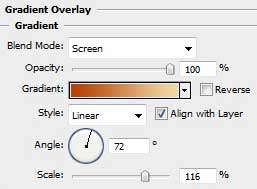
Gradient's parameters:


Make a mouse click on the same layer on Add a mask option situated on the bottom part of the layers' palette and use simultaneously the Brush Tool (B) of black color to erase easily a part of the bubble's surface.
Using the Ellipse Tool (U), try to make another highlight on the bubble's surface.
The layer's parameters: Fill 0%
Blending Options>Gradient Overlay
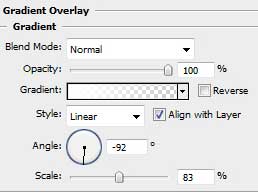
Gradient's parameters:


Next we need to combine in a group all the layers composing the circle (press Ctrl button to mark out the corresponding layers and then hold on the left mouse's button while moving the marked layers on Create a new group selection). Make many copies of this last made group and select again the Free Transform option to change the copies' sizes and place them on the picture the same way demonstrated below.

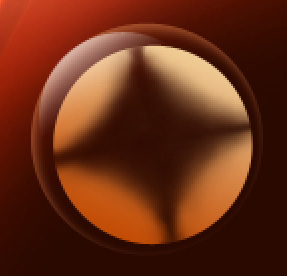
The picture is finished!