


Step 1
Open up a new document (900X600px) and fill it with a very light cream color (ECE2CF). Then select a paper texture from our free paper textures set and paste this onto a new layer above your background color layer. Set this layer's blend mode to 'multiply' and reduce it's opacity to 25%.

Step 2
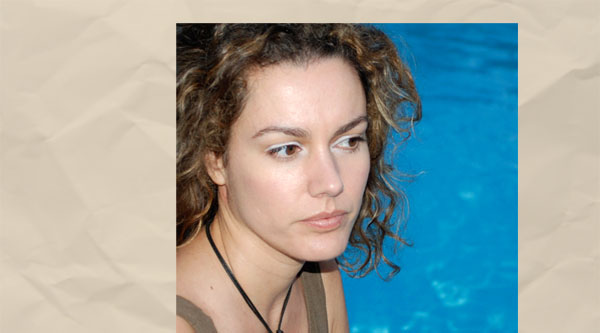
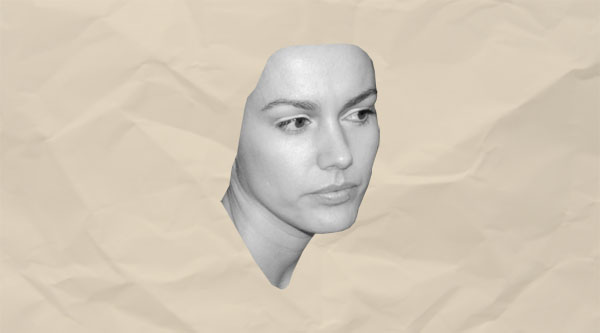
Now paste in an image of a woman's face (original photo: http://www.sxc.hu/photo/797128), then cut out just the face and neck (don't include her hair), and finally go to image>adjustments>desaturate to make the photo black/white.
Step 3
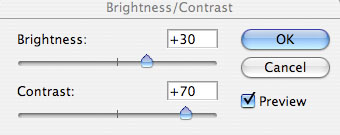
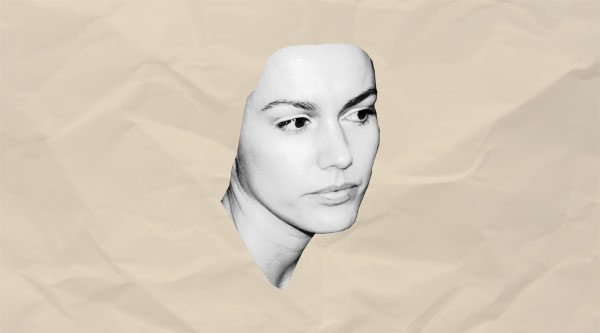
Now duplicate your layer containing the woman's face. With your duplicate layer selected go to image>adjustments>brightness/contrast and up the contrast to +70 and the brightness to +30.
Step 4
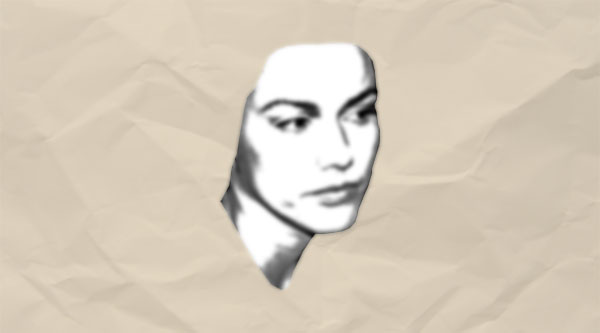
Now duplicate this layer and go to image>adjustments>shadow/highlight. Increase both shadows and highlights to 100%. Then set this new layer's blend mode to 'multiply' and reduce it's opacity to 35%.

Step 5
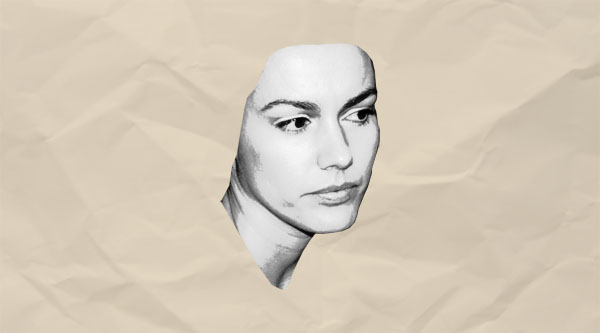
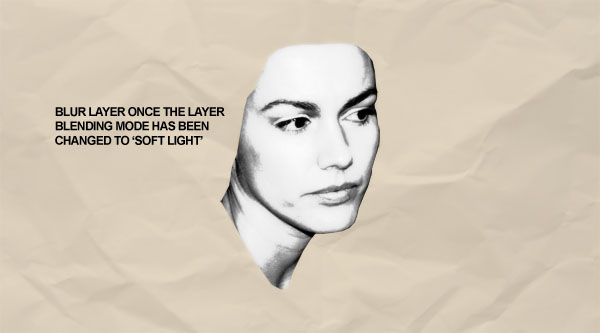
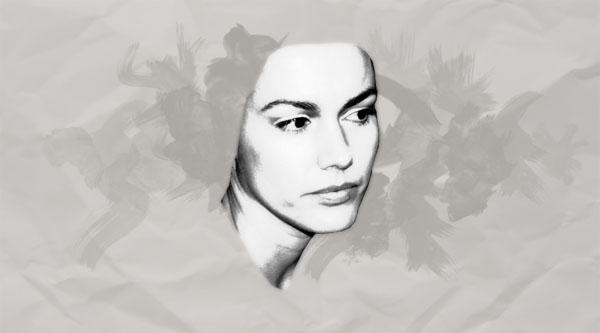
Now duplicate this layer and go to filter>blur>gaussian blur. Then apply a gaussian blur of 3.0px. Finally set this layer's blend mode to 'soft light'. This is a really effective set of steps to giving a boring original photo a nice soft look, whilst retaining a nice contrast.
Step 6
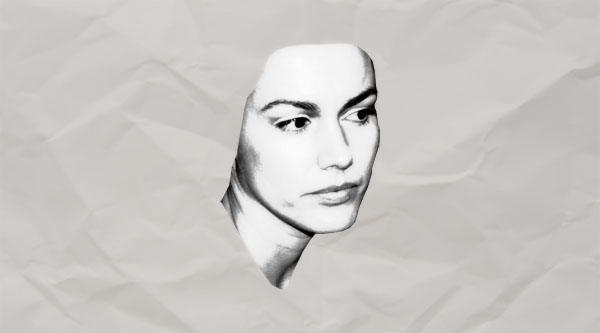
The background is looking a little too saturated, so I select it and then go to image>adjustments>desaturate to grayscale it. Now it fits better with the photo. Now make all layers invisible except for your multiple face layers. Then go to layer>merge visible. Now all your face layers should be on one single layer.
Step 7
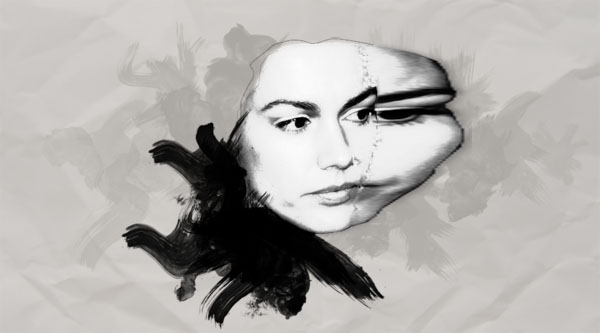
Now create a new layer beneath your face layer. Grab a watercolor brush set and set your brush color to AAA6A1. Then apply fairly random marking across the center of your image. Try to reduce the opacity of your brush as you move further away from the center of your image towards the edges. This should create a subtle background effect.
Step 8
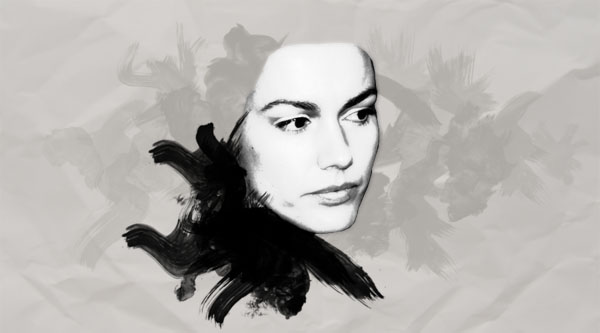
Now create a new layer above your face layer and apply the watercolor brush set around the woman's neck, using a solid black brush. Try not to overlap onto her face too much, but black out most of her neck and the area surrounding this.
Step 9
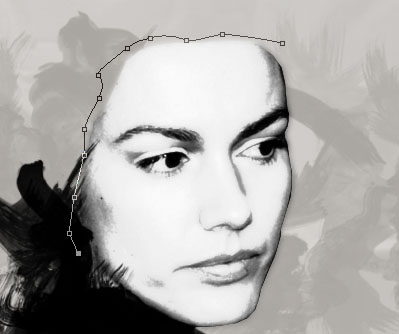
Create a new layer. Now use your path tool and draw a path line along the left edge of the woman's head. Select a 1px brush paint brush and then with your path tool selected right click on the path and select 'stroke path'. This should stroke your path line with a 1px solid black line. You may need to duplicate this layer a couple of times to make it a little bolder.
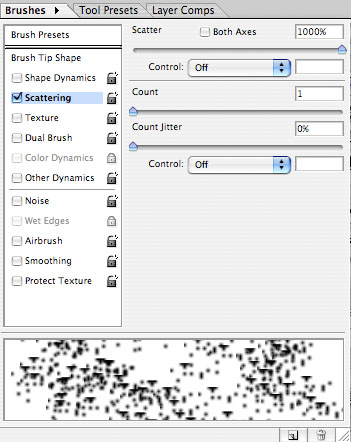
Step 10
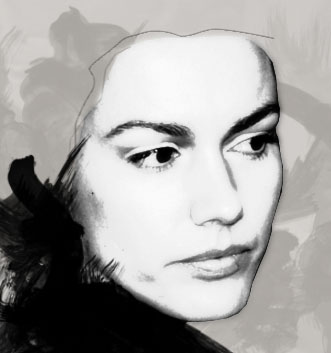
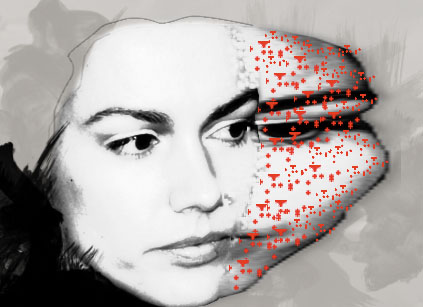
Select your eraser brush. Then in your brushes palette load 'natural brushes'. Select the first brush, then up it's brush size to 40. Make sure that 'smoothing' is unchecked and that 'scattering' is checked within your brush options. Then double click on 'scattering' and in the options for scattering make sure that 'scatter' is at 1000%. Then select your face layer. Duplicate it and hide the original as we are going to be applying destructive techniques in this step. Begin erasing parts of the right side of the woman's face, but be careful to avoid her eyes/lips as we want to retain these details.

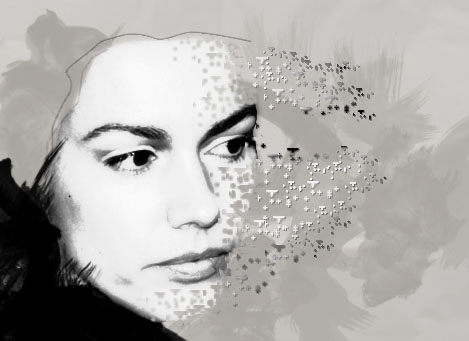
Step 11
Now make the original face photo layer visible again. Duplicate it once more, and again hide the original just for safe keeping. With the duplicate selected select the edge of the woman's face using the marquee selection tool. Then go to edit>transform>distort and stretch it as about 2/3 of the width of the woman's head. This may look extremely creepy, but there is a method behind my madness! Go to edit>define pattern and define your pattern as 'head shards'.
Step 12
Now create a new layer called 'face shards'. Use the same brush that you used to erase the edge of the woman's head to paint in what should look like shards of the woman's head exploding outwards. Be fairly rough with this, and try to use a larger brush the nearer to the head you are, and a slightly smaller one as you get further away. You shouldn't go over the shape of the stretched head edge layer that we've just created in the last step. The brush strokes aren't designed to be this large however, so will look a little blurry. To fix this simply go to filter>sharpen>sharpen more. Apply this effect twice.
I've used a red brush to highlight where I'm put my brush strokes, as well as how they're looking now that I've applied the 'sharpen more' filter.
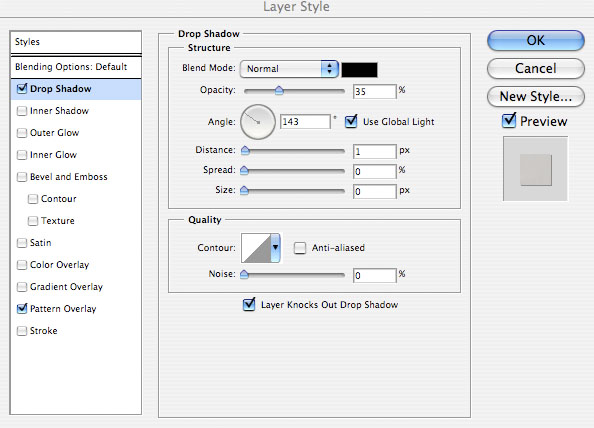
Step 13
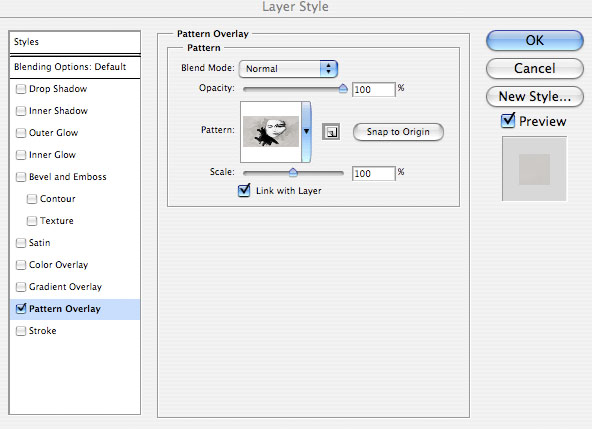
Now with your 'head shards' layer selected go to blending options > pattern overlay and apply the 'head shards' pattern that we created earlier. Hide your stretched head edge layer. What this should do is give the red brush strokes the same shadows/shades as the edge of the woman's head, thus making them look like an extension of it - or rather the missing pieces that we erased earlier.
Also, we want to make the 'head shards' appear to be floating in mid air. To do this I apply a simple drop shadow to give them a little depth.
Finally I use my lasso selection tool to select/delete some of the 'shards' that stem out from the woman's eye. This is because I never erased her eye, so it doesn't make sense that many shards would be coming from this area of her face.
Step 14
Now create a new top layer and draw a wavy path line that follows the contour of the top black paint stroke to the left of the woman's head. Stroke the path with a 1px black paint stroke, and then duplicate this line and move the duplicate down 10px. Repeat this step until you have many wavy contour lines.
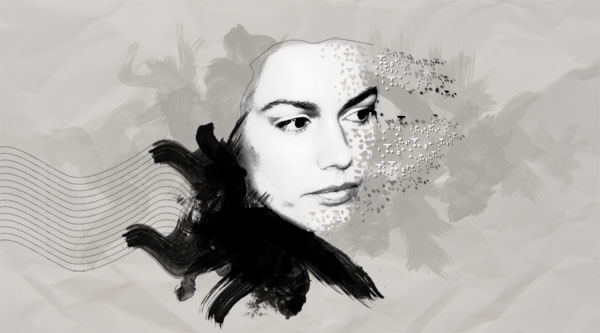
Step 15
Now create a vertical bar on a new top layer using your marquee selection tool. Fill the bar with black, and set the layer blend mode to 'overlay' and the layer opacity to 35%. Repeat this, making several bars across your image.
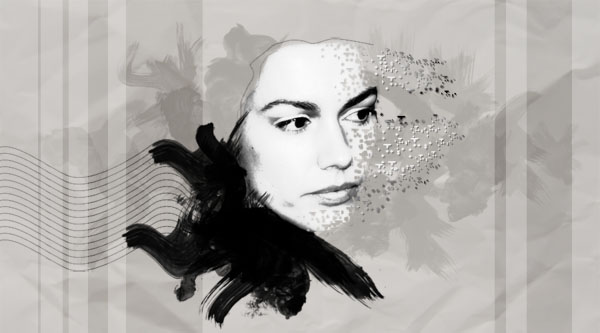
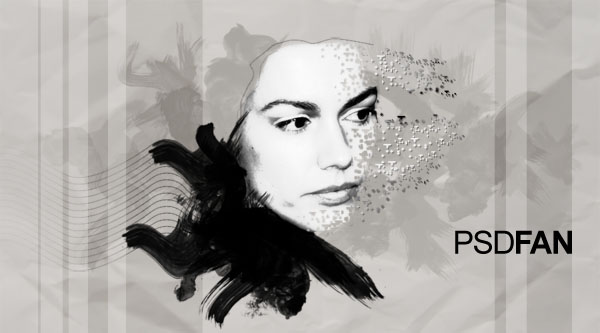
And We're Done!
To finish up I added some simple text and used a large, soft eraser brush to erase the left edge of my 'wavy lines' layer.
I really hope that you enjoyed this tutorial, and as always your comments are appreciated.
 PSD.FanExtra is a blog centered around design and Photoshop. We provide in depth Photoshop tutorials, articles, inspiration, freebies and more. Our goal is to help teach and inspire creatives around the world,and contribute to the design community.