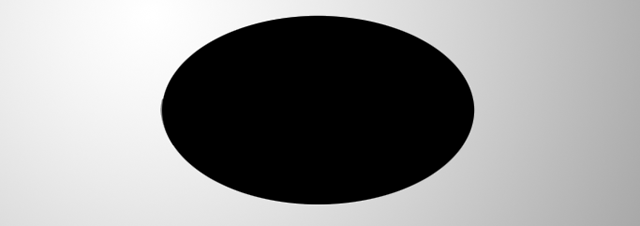
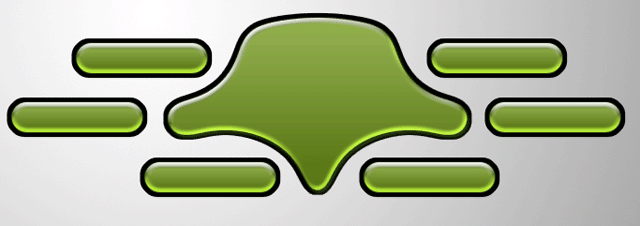
A starting shape
You don't always need the Pen-Tool to make fancy shapes. In this tutorial I will only use the Circular Marquee-Tool to create a shape where we will start and then continue NOT using any tools. Okay, maybe one, but just the Rounded Rectangle-Tool to create buttons.
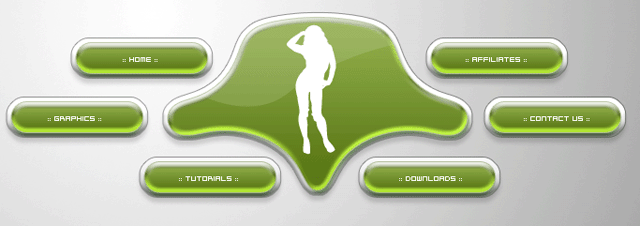
I created the shape seen below by drawing a circular shape and using the same tool, extracting shapes from it.
When you have your circular egg-shape ready on a single layer, just simply use your Circular Marquee-Tool to select areas and press Delete to remove them.

f you wish to have semi-hard edges, leave it like this and continue with the next step.

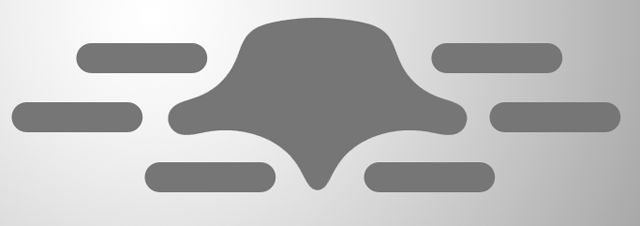
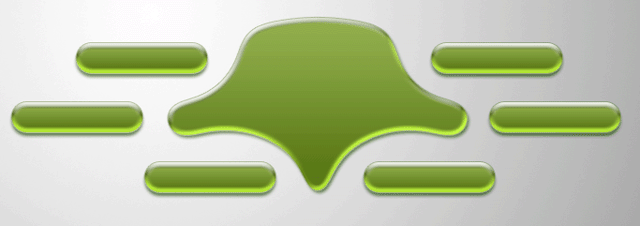
Now that you have your shape ready for use, let's start adding some fancy buttons using the Rounded Rectangle-Tool. Set the feather-radius to 20 or higher. We do not want rounded edges, we just want to opticially illude the viewer when making it look like a stretched circle.
When the feather-radius is larger than the actual corner, you will get this button-shape, so make sure you also increase this amount when using a larger canvas! Just place a few around your shape.

Wanna get more useful tutorials and freebies? Subscribe to our newsletter!
Getting that jelly-look
Then merge all those shapes together if you're done, or just keep them seperated. If you keep them seperated, you will keep the control over the placement much easier. Just remember that you will have to add the layer-styles to every shape then.
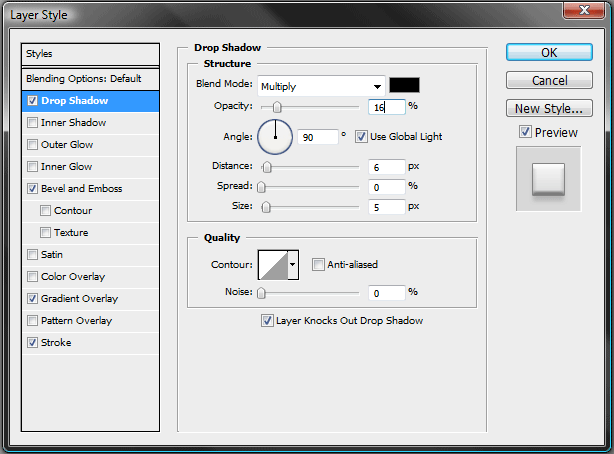
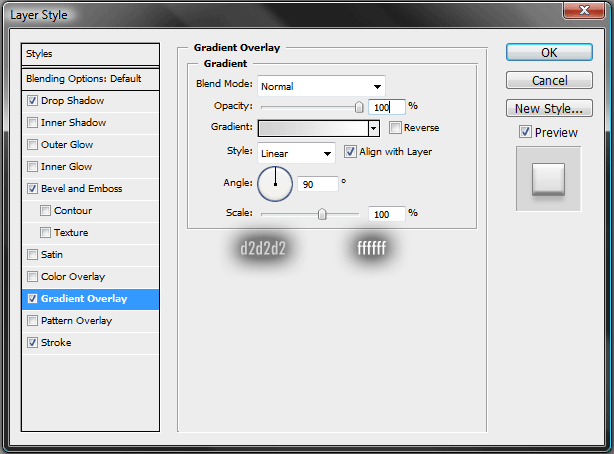
Making it look technical
If it's all one shape, simple Ctrl+click the thumbnail of the layer to select the shape. If you have multiple shapes, also hold Shift when clicking on the thumbnails.
When you have everything selected, go to Select>Modify>Expand and select an amount of 5. (Or obviously a higher amount if you're using a different resolution then mine)
Fill the selection with black on a new layer.
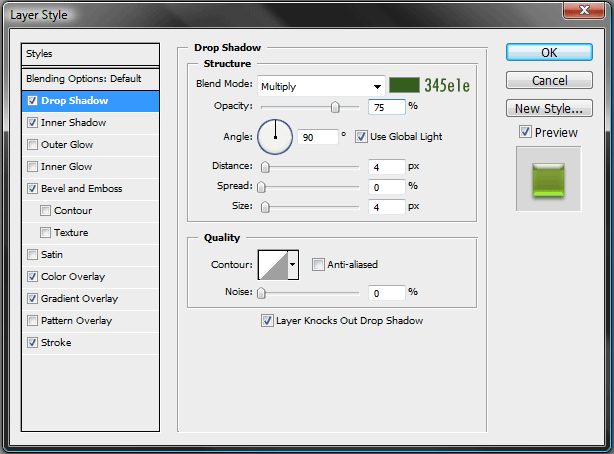
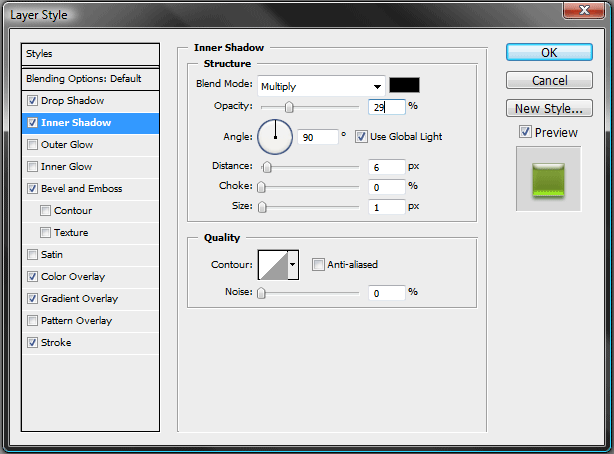
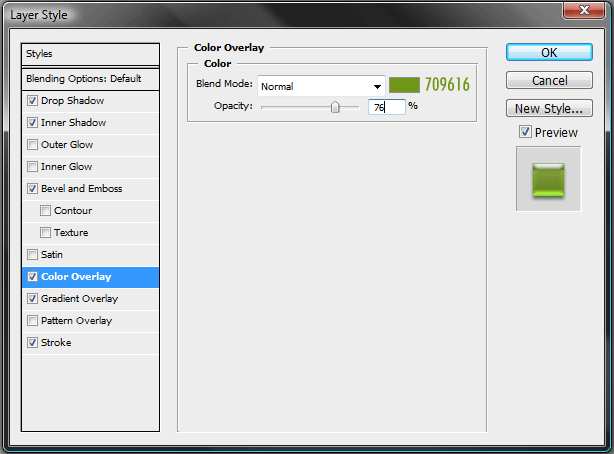
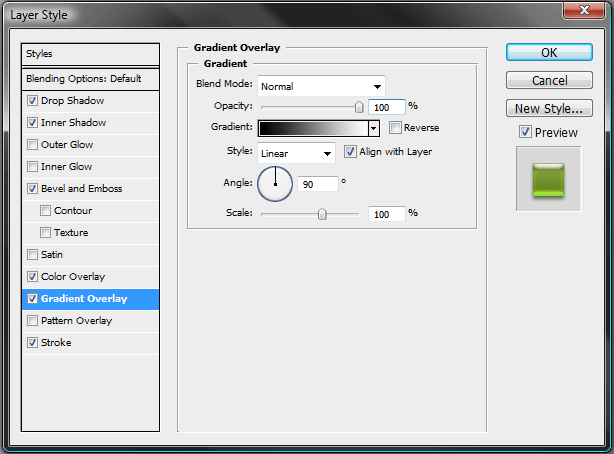
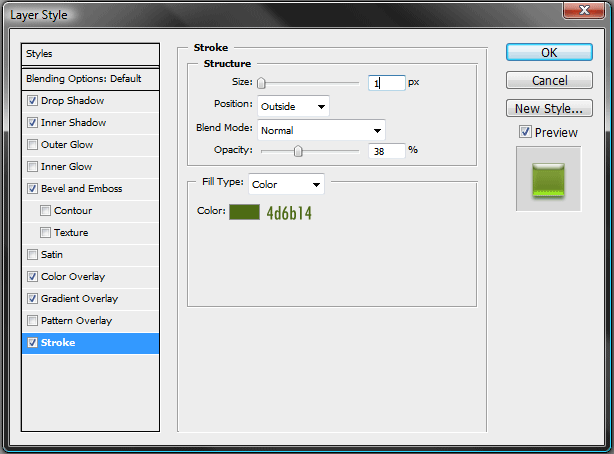
Then continue by adding these layer-styles to the just created shape.
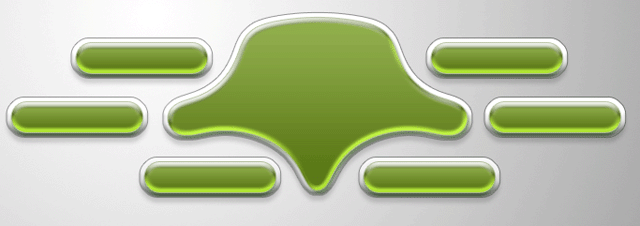
Finishing up
You cannot have something technical without making it shine. Ofcourse that could be possible if it was a grunge-form of technical, but since we're not doing that, we're gonna go with a nice shine!

hen just simply finish it off with text and a shape or your logo in the center.
Conclusion
This tutorial may look long, but that is just because of the layer-styles. Remember that you can save previously made layer-styles in your styles-tab for later use. That way your work is never for nothing and you can save all your experiments to learn from them.