

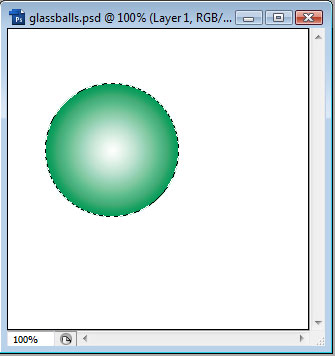
We start with a blank white canvas, and then use the Elliptical Marquee Selection tool to create a perfect circle selection (Hold SHIFT while sizing). Once we have our circle, we will want a new layer and to fill in with whatever color we want - we will be changing this through Layer Styles anyway.
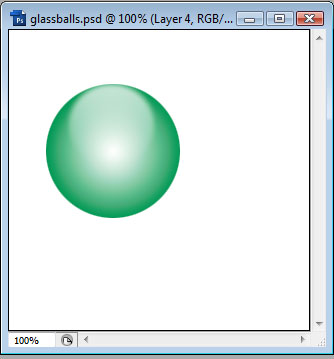
So once we have our solid colored circle, open up the Layer Styles for the layer, and choose Gradient Overlay. Choose a Radial gradient you like, with White as the center and a color around the edges, like so (you may need/want to increase the scale of the gradient slightly):
Once we have this, we will want to create a new layer, and then choose the gradient tool. Select a Linear Gradient and we want White to Transparent:
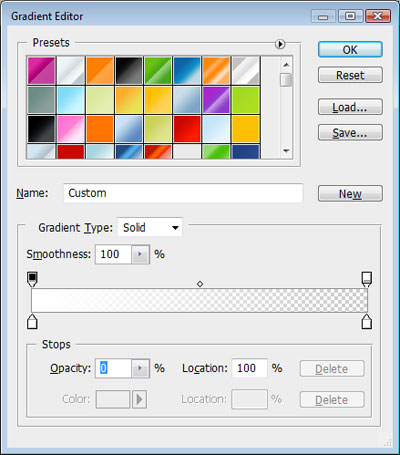
Now fill the selection in with this gradient, from top to bottom, on the new layer. We want it to fade from White (top) to transparent (bottom). It should look something like this:

Next, goto Edit > Transform > Scale, and resize to something like this:

We may then want to reduce the opacity of this new layer, and perhaps even blur a little (Filter > Blur > Gaussian Blur). If we choose to do this, it may look like this:
To complete the look, we may want to add some text and/or a shadow:
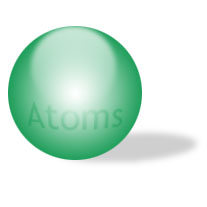
We added the text and then Ctrl-clicked the ball, then added a Filter > Distort > Spherize to it.
To add the shadow, we duplicated the ball layer, moved it beneath, removed all layer styles and went to Edit > Transform > Distort. We also blurred it and reduced the opacity.