To start, we open up our chosen flag in PhotoShop and goto Image > Canvas Size. We want to make the canvas slightly bigger than the flag, because we are going to displace it. Increase the canvas by about 50px - if your image is a lot bigger than the one in this example, increase accordingly.
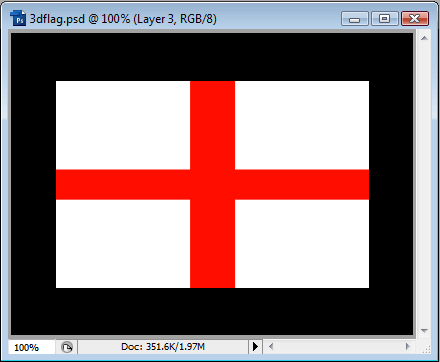
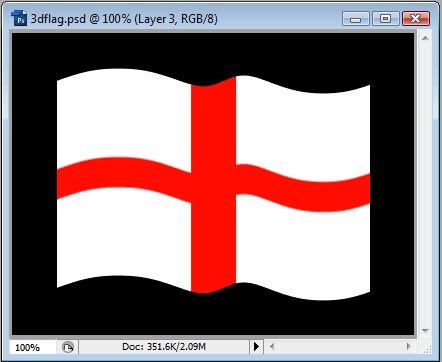
We will be using the England flag in this example.
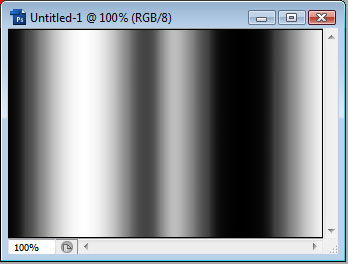
The first thing we need to do is create another blank canvas the size of your flag. To do this quickly, Ctrl+Click your flag layer, press Ctrl + C to copy it, and then press Ctrl+N to create a new document with the dimensions of what you just copied, and press Ok. Now we want to make a selection of roughly half of the image, and then fill this with a gradient that looks something like this:
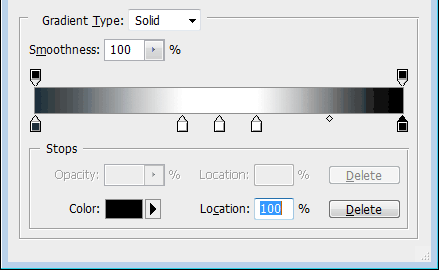
Now fill in the first half of the new document with this gradient, like so:
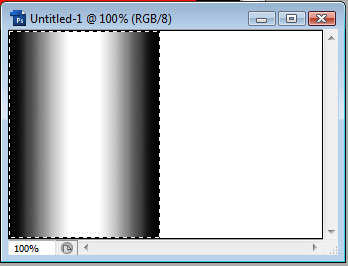
Then we can goto Select > Inverse and fill the other half with the same gradient and then goto Image > Adjustments > Invert (or press Ctrl+I). Now we need to soften the edges before we use this bump/displacement map. Goto Filter > Blur > Guassian Blur, and blur by about 10 (more if you're using a bigger image). It should look something like this:
Now save this PSD, then go back to our flag PSD. We want to make sure nothing is selected (Ctrl+D), and then select the flag layer and goto Filter > Distort > Displace. Choose 0 for Horizontal, and around 10 for Vertical (higher if using a bigger image). Stretch to Fit and Repeat Edge Pixels should be selected. When you click Ok you should be prompted for a displacement map. Choose the one we just created and saved.
We should have something like this:
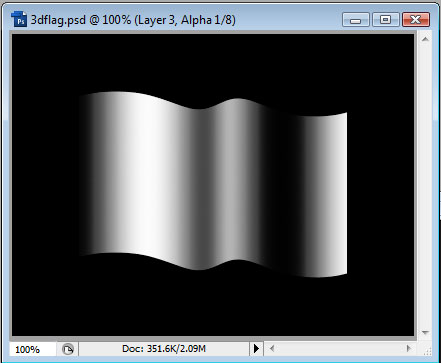
Now we want to use the displacement map again. Go back to it and copy the gradient (Ctrl+A, Ctrl+C) and then go back to our flag PSD and click on the Channels tab, next to the Layers tab. We want to add a new channel, and then paste the gradient. Then, we want to goto Filter > Distort > Displace, and do the same as we did to the flag. This will make the map the same shape as the flag.
The channel should look something like this:
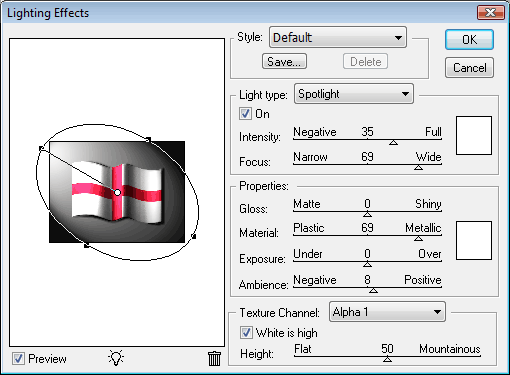
We can then go back to our flag layer and goto Filter > Render > Lighting Effects. You should choose Spotlight, and Alpha 1 as the texture channel (or the one you just created, if it's named differently). You are encouraged to play around with the settings, as every image is different, and you can experiment to get the best settings. The following settings were used for this example:
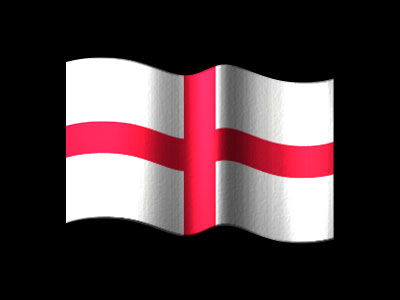
The outcome of this tutorial is the image below: