


Step 1
Create a new document, size doesn't really matter but I chose 800x400px simply that's where my comfort zone is. Fill the background layer with black colour.
Select a font, I used this font from fontspace.com, type some texts onto the background layer and this automatically form another layer. See below for position of the text:

Step 2
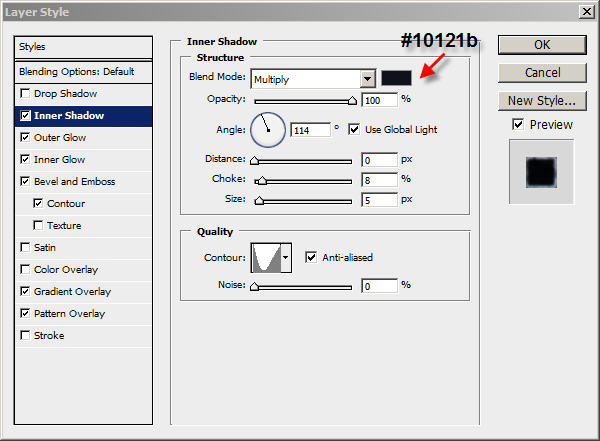
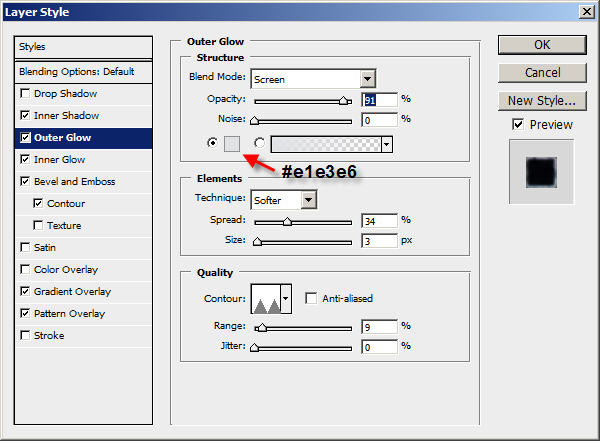
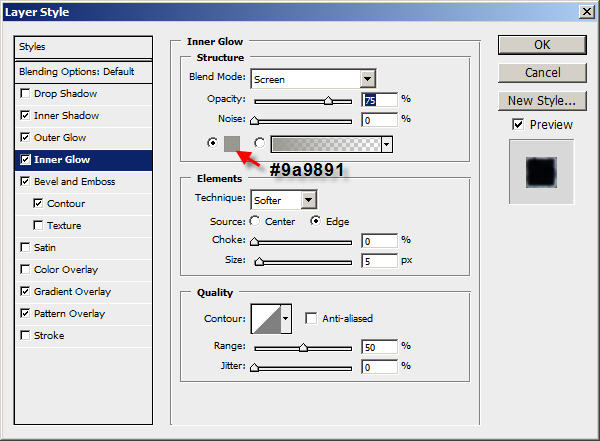
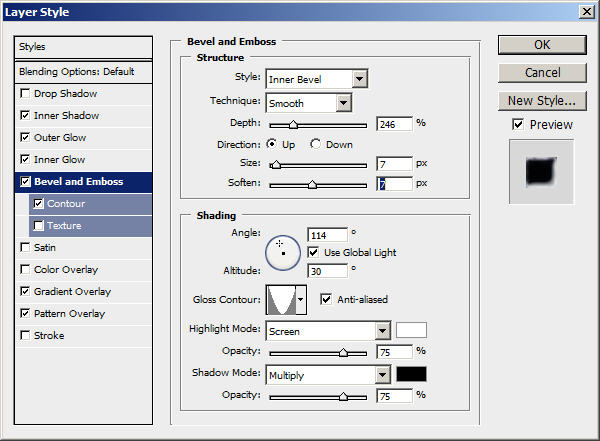
On the text layer, apply the following layer blending options:
Inner Shadow:
Outer Glow:
Inner Glow:
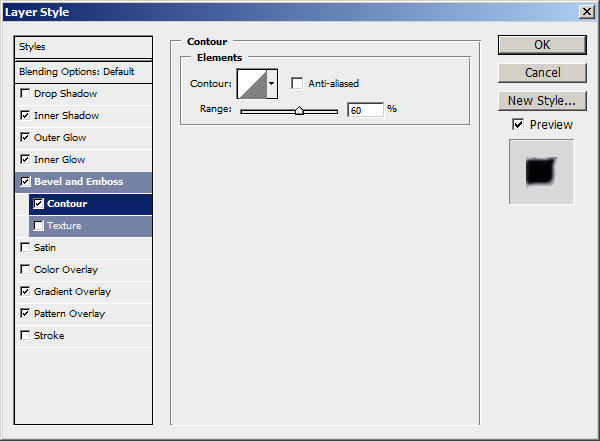
Bevel and Emboss:
Contour:
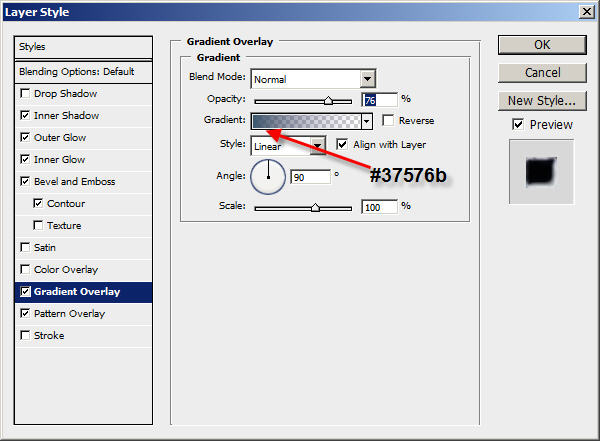
Gradient Overlay:
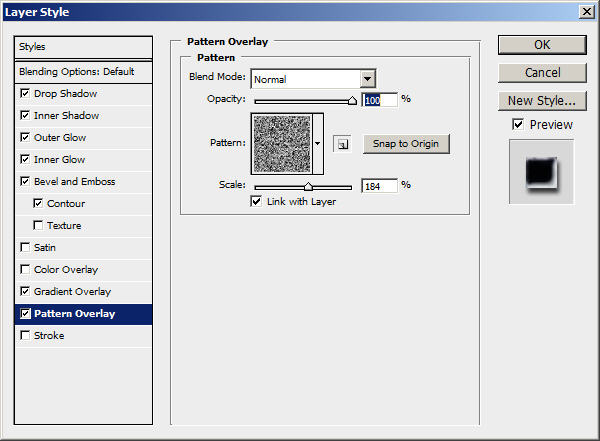
Pattern Overlay
The result so far looks like this:

Step 3
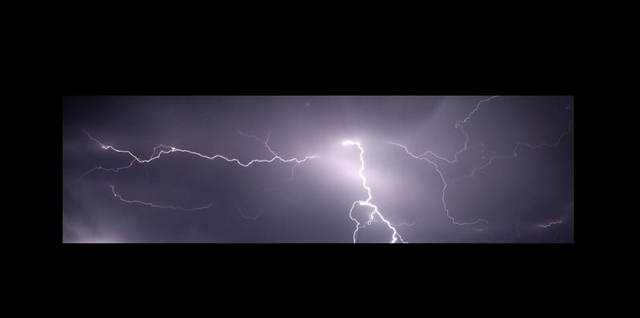
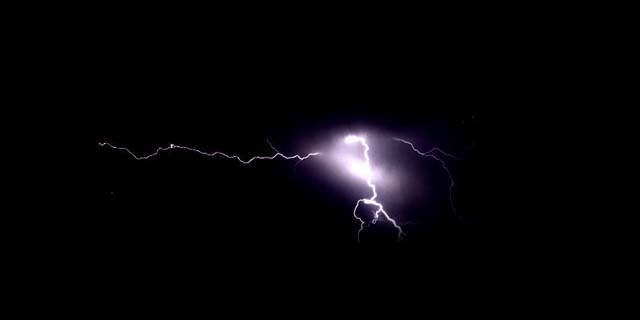
Find an image of lightning, I used this one from reformationquest.wordpress.com.
Load the image of your choice into Photoshop, select a portion of the lightning and copy and paste it onto our document. Name the layer as "lightning".
Resize it and make it roughly the same size as the text. See below for details:
Then go to Image > Mode > Lab Color and change the mode of "lightning" layer to Lab. If askes whether to flatten the image, choose "Don't Flatten".
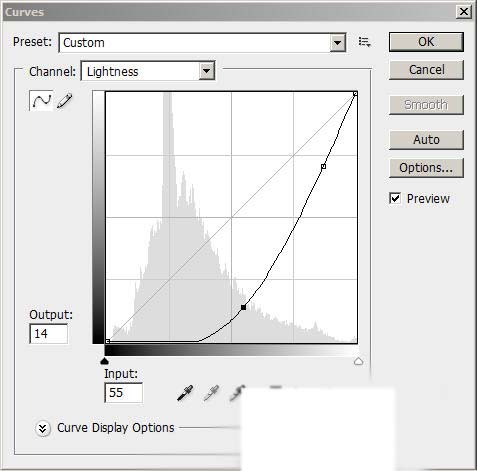
Hit Ctrl + M and bring up the curve tool, adjust the lightness contrast according to the settings below:
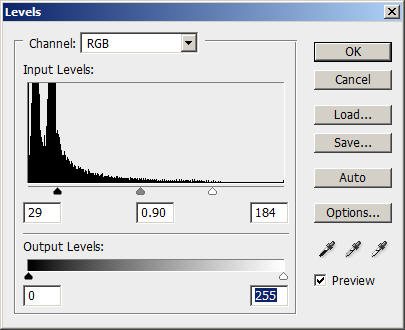
Change the image mode back to RGB Color, then hit Ctrl + L and bring the Level Adjustment tool, use the following settings:
The effect will now look like this:
Step 4
Now we can add some more lightning bolts (otherwise it looks a bit empty!). Use the Clone Stamp Tool and choose the big brush, and clone some bolts. Detailed settings see below:
![]()
Optional: You may also want to alter the Hue and Saturation of the "Lightning" layer a bit:
Change the layer blending option of "Lightning" layer to "Hard Light". You can adjust the Hue and Saturation of this layer a bit, totally up to you.
The effect so far will look like this:

Step 5
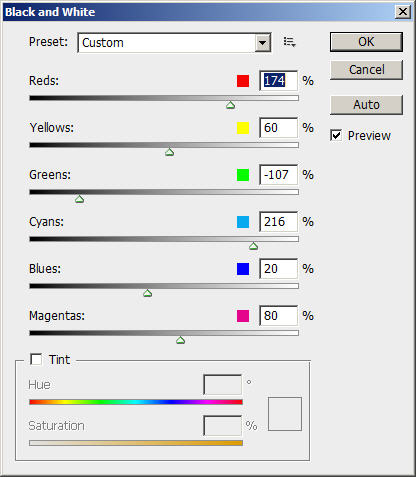
Duplicate the "lightning" Layer once, hit Ctrl + Alt + Shift + B and bring up the Black and White Adjustment Tool, use the following settings:
Then duplicate the "lightning" again, this time drag the duplicated layer beneath the Text layer. Keep its layer blending option to "Hard Light".
Change the layer blending option of "lightning" layer to "Color", change to the blending option of "lightning copy" (the one above "Lightning" layer to to "Soft Light".
You will now have the following image:

Step 6
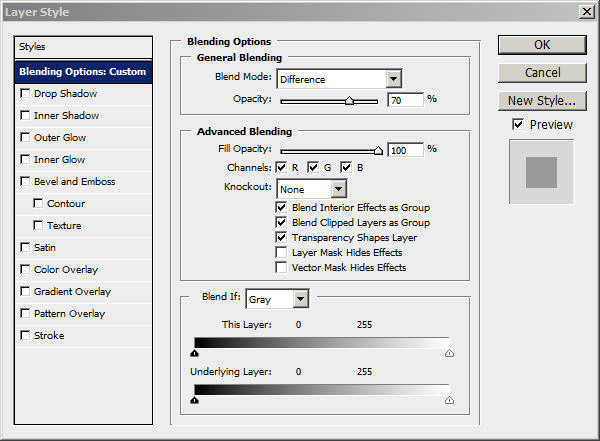
Duplicate "Lightning layer copy 2″ (the one beneath the Text layer") once, then go to Edit > Transform and Flip Vertical/Horizontal. Flip the duplicate layer vertical and horizontal once each. Alternatively, you can use free tranformation tool and rotate the layer.
Change the layer blending option to "difference" and set the layer opacity to 70%. See below for details:
This is the effect so far:

Ok, that's it for this tutorial! The rest is left upon your own creativity, you may want to duplicate the lightning layer a few more times, or adjust the hue and saturation a bit.
Here is my final image for this tutorial:

Hope you enjoy this tutorial and find it useful and infomative!