

Step 1
Create a new document, size doesn't really matter but I chose 800x400px because that's where my comfort zone is. Fill the background layer with Black colour.
Type some texts on the document. You can choose any font you want. I use this font from dafont.com. This should automatically create a new layer on top of the background layer.
Position the text to the centre of the canvas.

Step 2
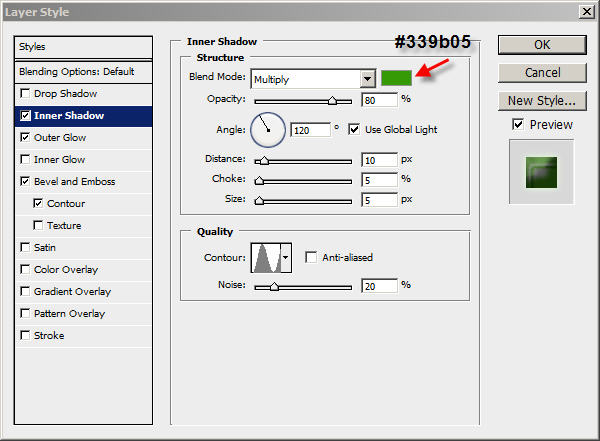
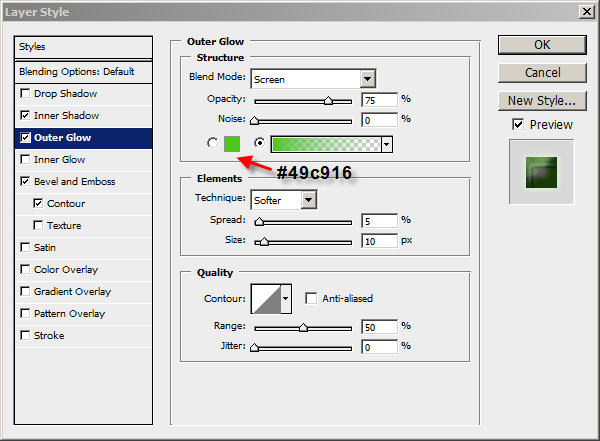
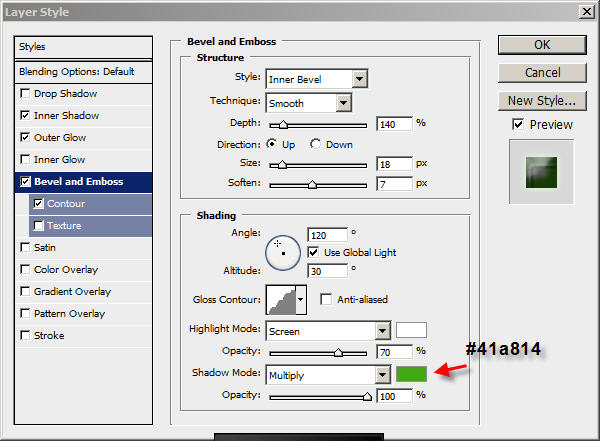
On the text layer, apply the following layer blending options:
Inner Shadow
Outer Glow
Bevel and Emboss
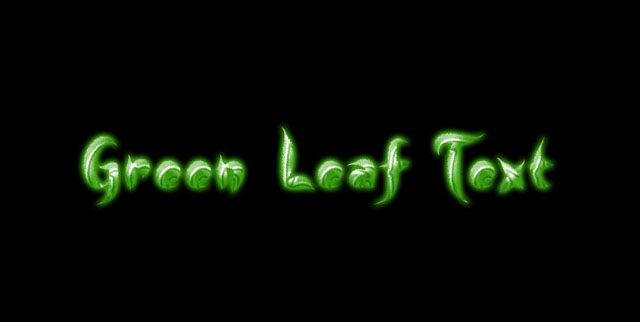
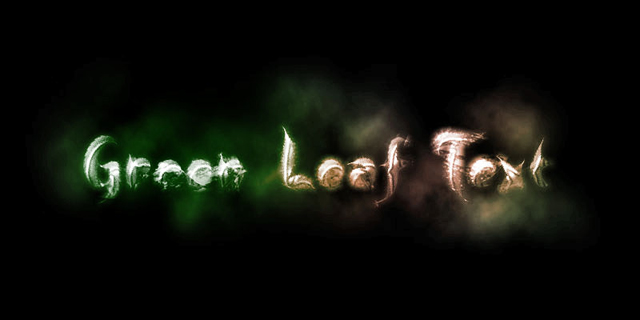
The effect so far will look like:
Step 3
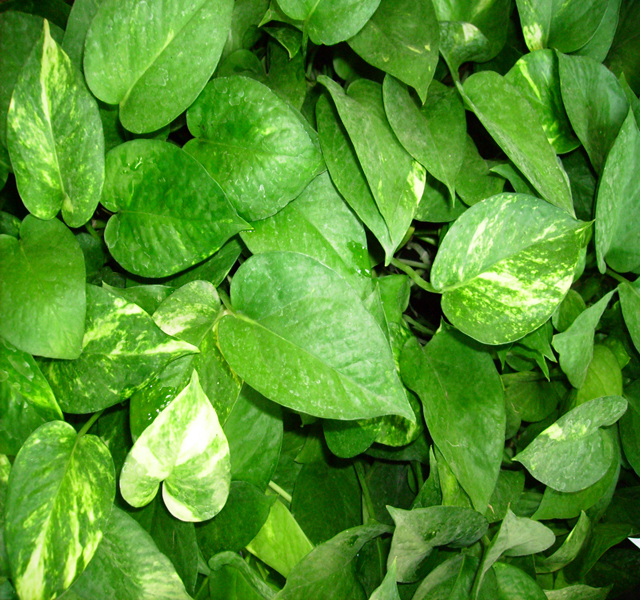
Now we can add some more crystal feeling into the text. I found applying some leaves texture overlay turn out to be good. Here is the texture I used for this tutorial:
Download the above image, load it into Photoshop and select a portion of it using the rectangle selection marqee tool. Copy and paste it on our document, then resize it to fix the dimension of the text.
See below image for detailed image overlay position:
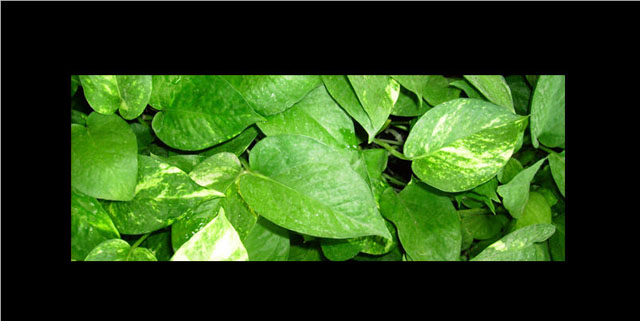
Change the layer name of this layer to "texture overlay".
Step 4
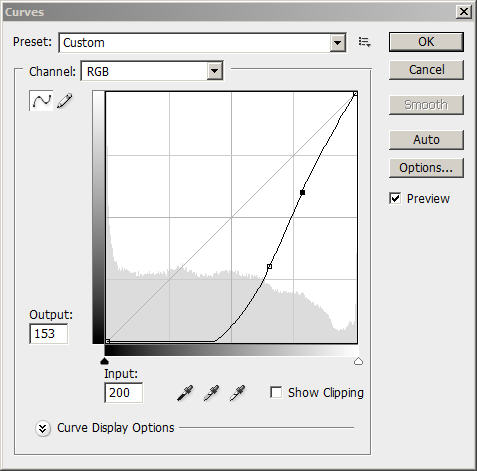
On "texture overlay" layer, hit Ctrl + M to bring up the Curve Tool, apply the following settings:
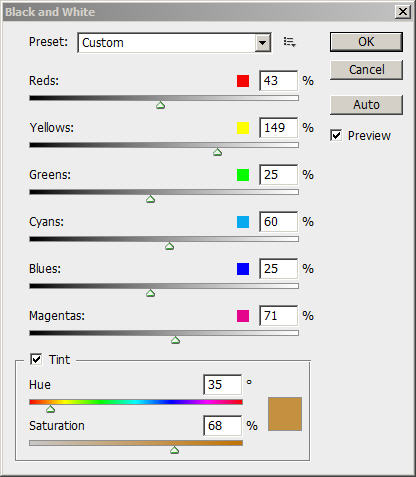
Then hit Ctrl+Alt+Shift+B to bring up the Black and White Tool, apply the following settings:
Then change the layer blending style of this layer to "overlay".
The effect so far will look like:

Step 5
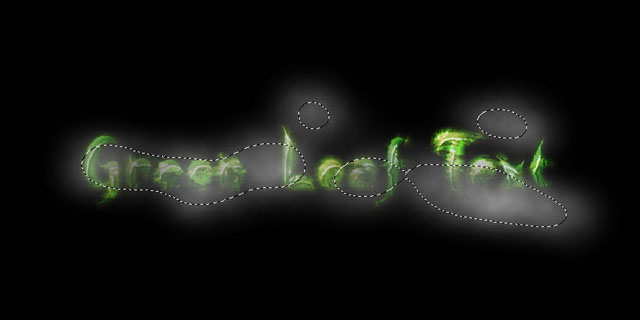
We can add some mist onto the text to make it look better. To do this, create a new layer on top of the "texture overlay" layer, use the Lasso Tool with a 20px feather to select some areas around the text, fill the selection with black and set the layer blending style of "Screen".
See below for details:
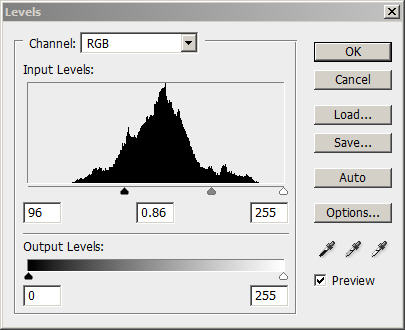
Then use the Level Tool under Image > Adjustment > Level and apply the following settings:
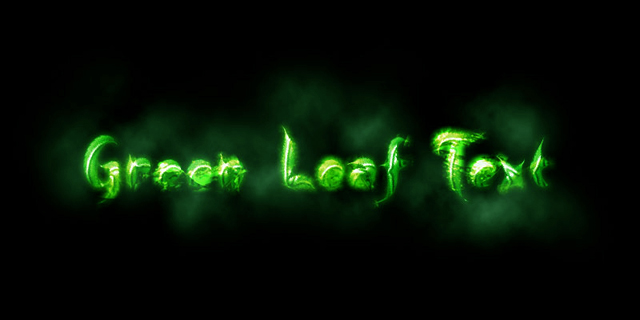
The effect will now look like this:
Ok, that's it for this tutorial! The rest is left upon your own creativity!
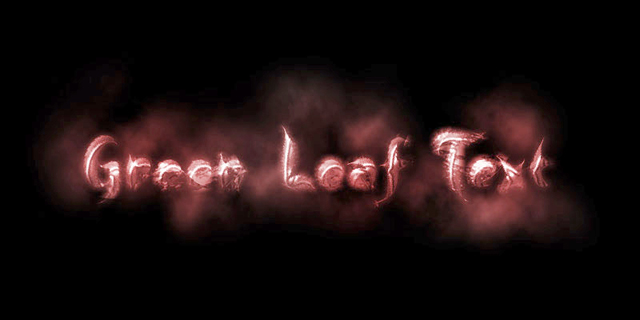
I also made two alternative version with different colour scheme:
Hope you enjoy this short tutorial and if you have any question, just drop me a comment!
Cheers and have a great day!