Preparation:
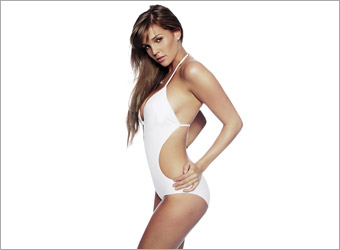
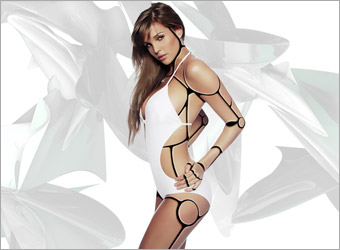
After googling for some time, I found this stunning wallpaper of Danielle Lloyd suitable for this tutorial.
All rights of these resources belong to their respective owners.
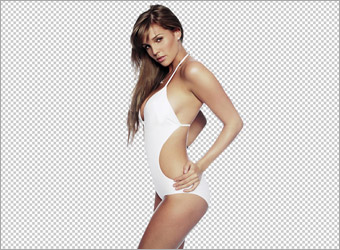
Step 1 - Removing Background:
Create a document with size 1020x748 pixels. Open up Danielle Lloyd wallpaper and drag it as a new layer into the document.
Extract model out of the background using Pen tool.
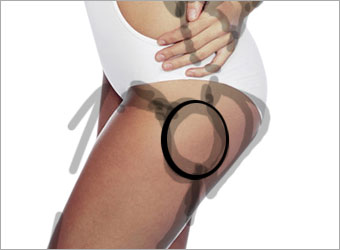
Step 2 - Drafting the Grooves:
Create a new layer above the model and name it as Draft Lines
Using the Brush tool, with size around 20pts, foreground color set to #000000 and opacity to 50%, draw roughly how you want the grooves to look generally.
The joints are all drawn as circles while the rest are straight lines.
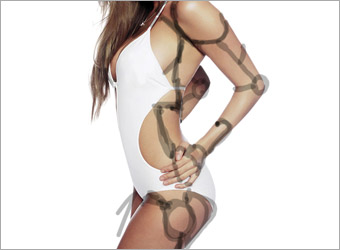
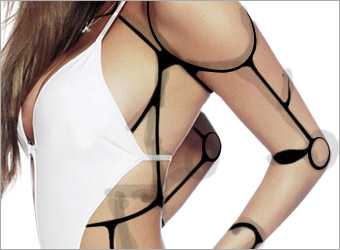
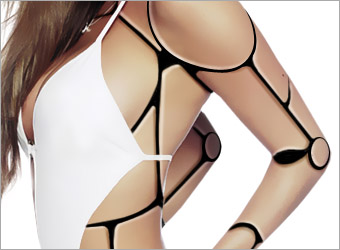
Step 3a - Painting Grooves:
Create a new layer above the Draft Lines and name it as Grooves.
We will concentrate on all the circular joint areas first. Using the Elliptical Marquee tool, draw a circular selection and fill it with #000000 like the one shown in the diagram.
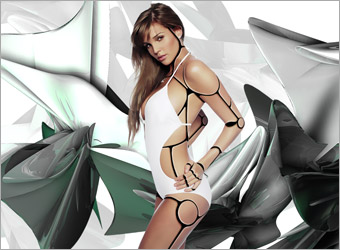
Step 3b - Painting Grooves:
Create another circular selection, slightly smaller than the one you done earlier.
Move the selection a little towards top right of the black circle. Press Delete once you get something like the example.
Repeat Step 3a and 3b for rest of the joint areas.
Step 3c - Painting Grooves:
Using the Brush tool, set the size to 3pt and color to #000000, paint in the remaining grooves.
Notice that I curved all the edges so that it looks better. There is no fixed areas for the grooves. Add in more where you think is appropriate.
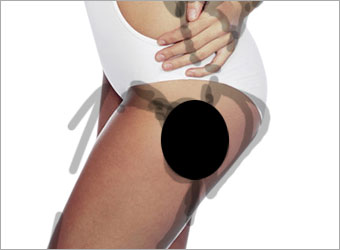
Step 4 - Apply Surface Blur:
Select the Model layer and go to Filter > Blur > Surface Blur.
Set the Radius to 5 and Threshold to 8.
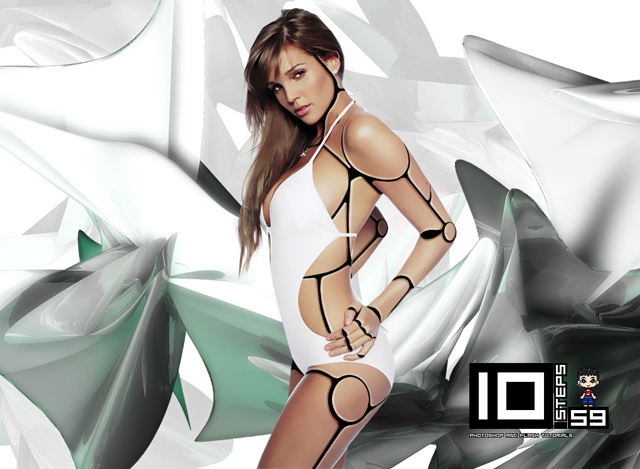
Step 5 - Adding Highlights:
While still on the Model layer, select the Dodge tool, set the size to 5pt and use it to highlight the bottom and left edges of each pieces.
This step is to enhance the depth of the grooves.

Step 6 - Adding Shadows:
Similar to Step 5, but this time use the Burn tool, set the size to 5 pt to darken the top and right edges of every pieces.
Step 7a - Adding a 3D Background:
Place the 3D render below all the layers and set its opacity to 30%.
Step 7b - Adding a 3D Background:
Duplicate the same 3D render and set its opacity to 100% this time.
Shift and resize it so it is different from the one at the background.
Step 7c - Adding a 3D Background:
Then duplicate this 3D render and go to Filter > Blur > Gaussian Blur. Set the radius to 20.
Set the Blend Mode of this duplicated render to Screen and we are done!
Hope you like this tutorial.
 10Steps is a huge resource of Photoshop tutorials, freebies and inspiration for designers.