

Step 1
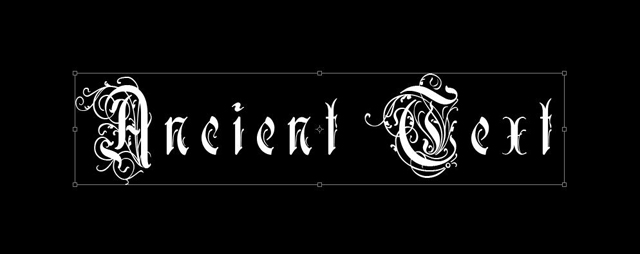
Create a new document sized 1000 x 400 pixel, fill the background layer with Black colour and type some texts onto it. You may use any font you like, I chose this beautiful font from dafont.com.
Position the text as shown below: (You may hit Ctrl + t to bring up the free transformation tool to resize the text a bit)
Step 2
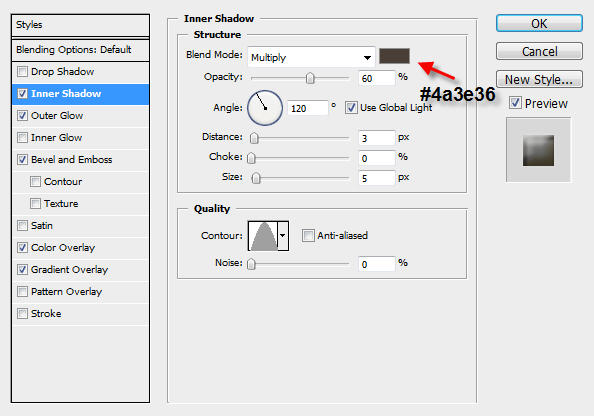
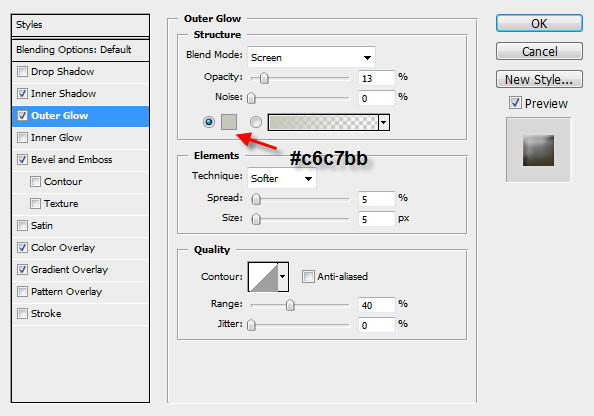
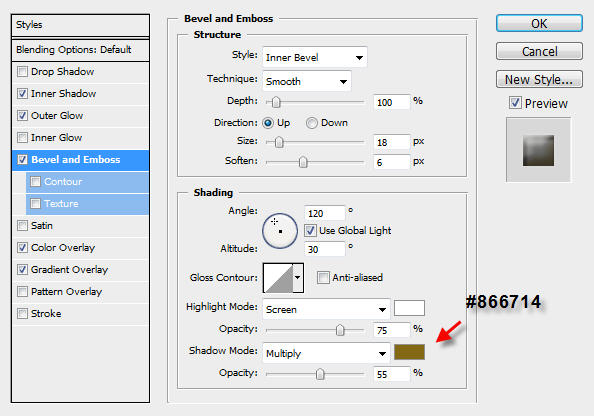
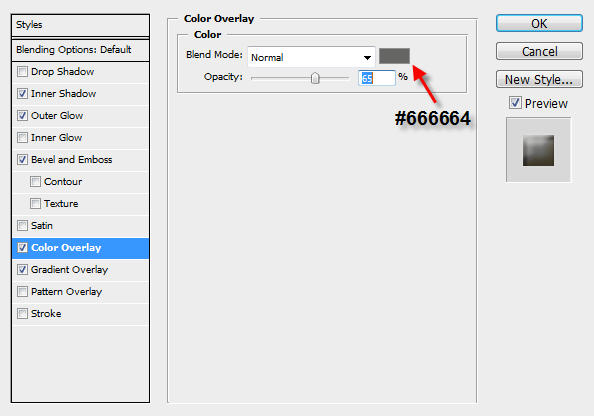
On the text layer, apply the following layer blending options:
Inner Shadow
Outer Glow
Bevel and Emboss
Color Overlay
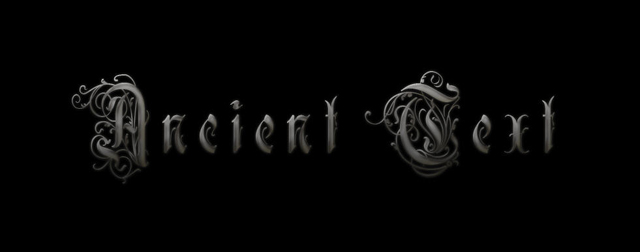
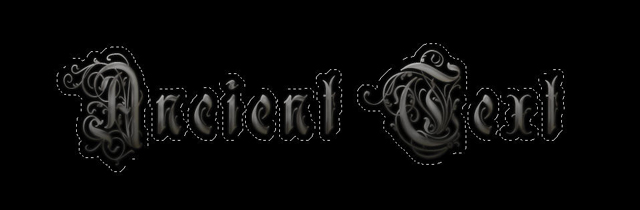
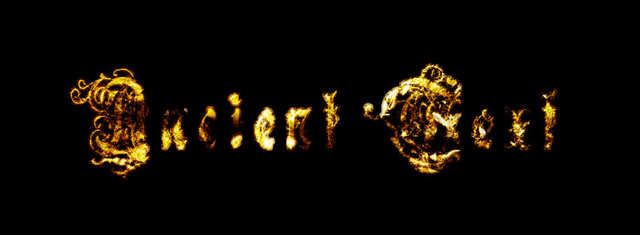
The effect so far will look like this:
Step 3
Now we're going to make a selection of the text, which we can use later in the tutorial.
Move your mouse over the text layer, hold down the Ctrl key and left-click on the layer - this will load the selection of the text (as shown below)

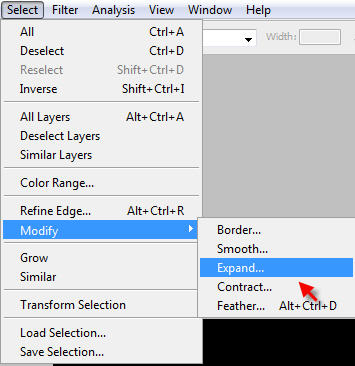
Then go to Select > Modify > Expand (Path shown below)
Apply the following setting:
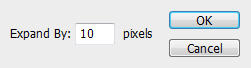
And the selection of the text should now look a bit wider than before:
Step 4
Now we're going to add some texture to create some ancient feeling for the text.
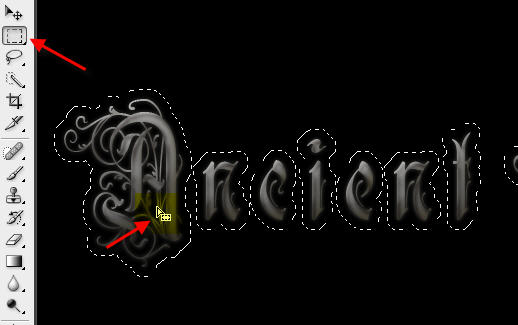
Download a copy of this image and load it into photoshop. Go back to our own document and press the "M" key to select the Rectangular Marquee Tool, then move your mouse over the text until the cursor turns into a rectangular marquee shape: (see image below)
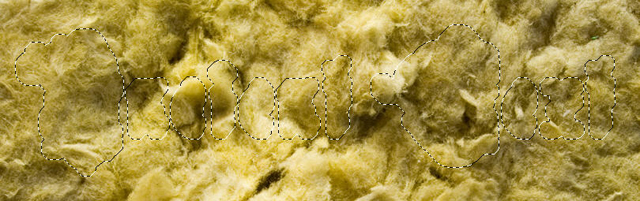
Then hold down your left mouse button and drag the entire selection over to the newly loaded texture:
Copy and Paste selected area over to our document - This action will automatically create a new layer, name it as "texture".
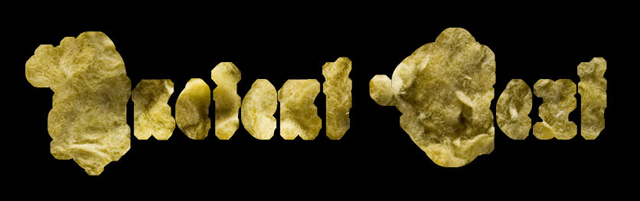
Set the blending mode of this layer to "Overlay" and you should have the following effect so far:
Step 5
Duplicate the "texture" layer three times. Apply changes to layer blending as following:
Change the layer blending mode for "texture copy" layer to "Color Dodge", with an opacity of 40%

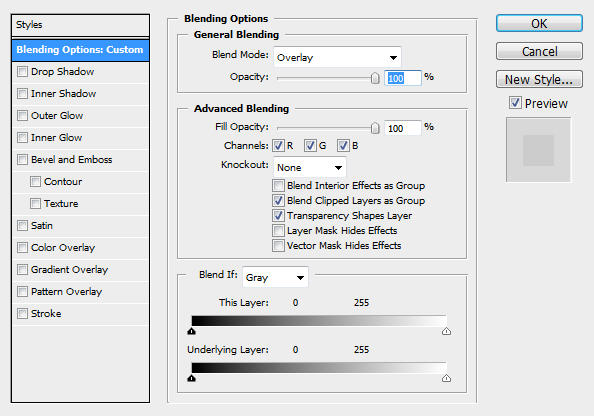
Keey the layer blending mode for "texture copy 2″ layer as "Overlay", with an opacity of 100%
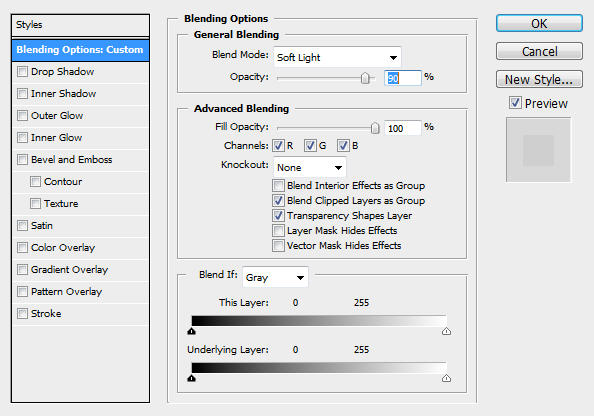
Change the layer blending mode for "texture copy 3″ layer to "Soft Light", with an opacity of 90%.
And you should now have the following effect:

Step 6
This is an optional step. I feel like adding some depth into the text, so I duplicate the "texture copy 3″ layer once, then hit Ctrl + Alt + Shift + B to bring up the Black and White adjustment tool and apply the following settings on the duplicted layer:
The effect will now look like this:
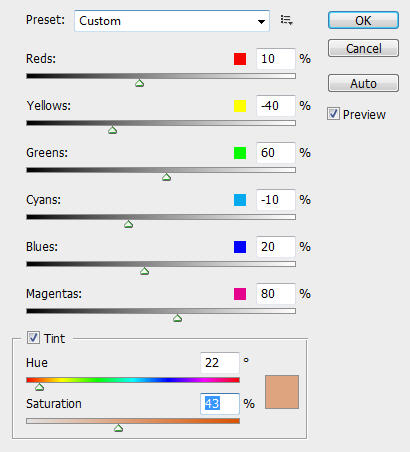
OK that's it for this tutorial! The rest is left upon your own creativity, you can add some more texture, adjust colour balance, etc. Totally up to you :)
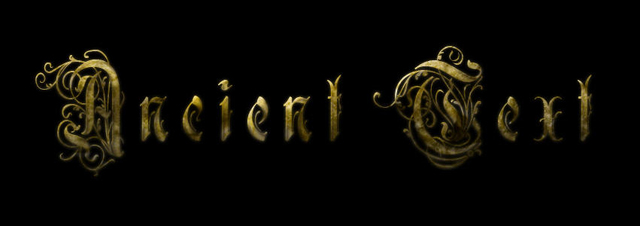
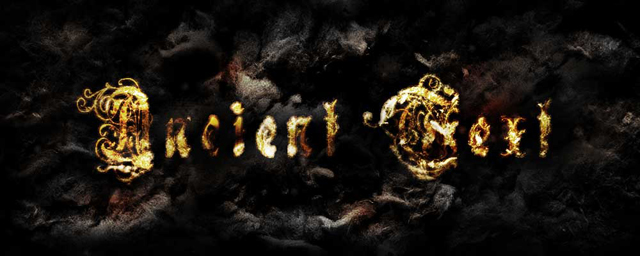
Below is my final result for this tutorial: (I added a background texture and further adjusted the colour balance)
Hope you enjoy this tutorial and find it useful and inspirational!
Thanks very much and have a nice day!