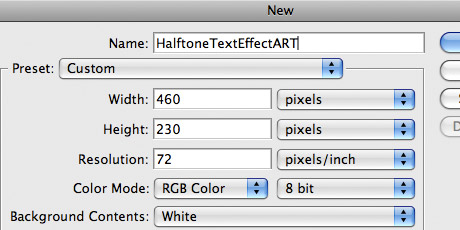
Step 1: Create a new Photoshop document.
Step 2: Fill the background layer with red.

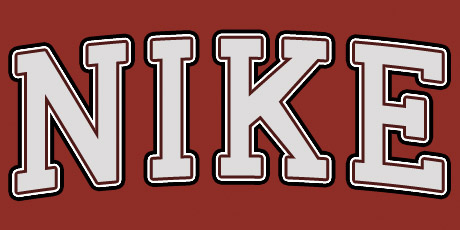
Step 3: Add some text and set the fill color to silver (R 222, G 220, B220).


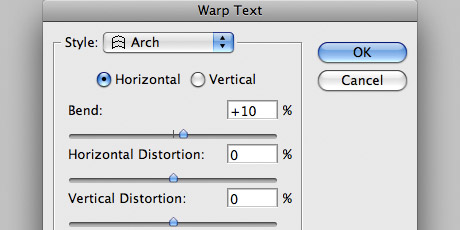
Step 4: Arch your new text. Layer > Type > Warp Text.

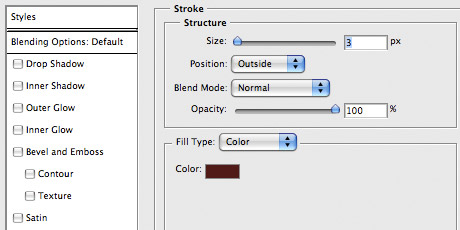
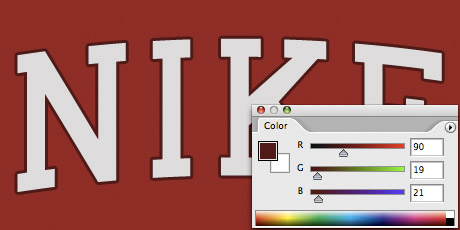
Step 5: Now it's time to add a few strokes following the step in my previous tutorial Photoshop Text Outline Effects. The first outline stroke should be a nice rich maroon (R 90, G 19, B 21) and applied with the Stroke layer style.
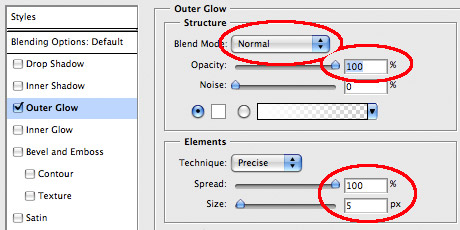
Step 6: Add the second outline stroke using the Outer Glow layer style.

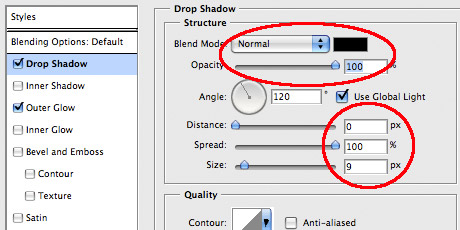
Step 7: Add the third outline stroke using the Drop Shadow layer style.
Step 8: Duplicate the current Photoshop document. Image > Duplicate.
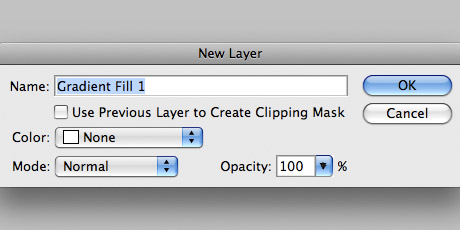
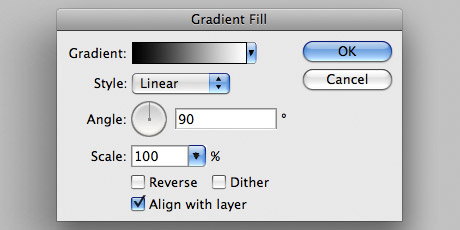
Step 9: Add a new fill layer at the top of the layers palette in the duplicated document. Layer > New Fill Layer > Gradient. When the Gradient Fill dialog box opens, be sure to choose the Black to White (3rd from left) basic gradient setup.

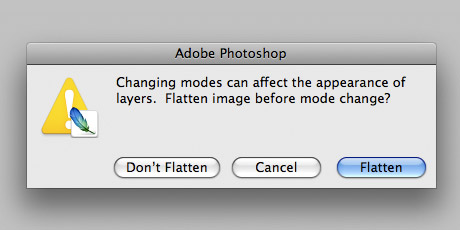
Step 10: Convert the image mode to Grayscale. Image > Mode > Grayscale.
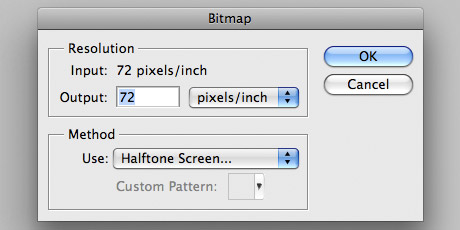
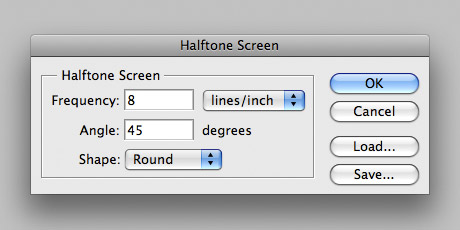
Step 11: Convert the image to a halftone bitmap.
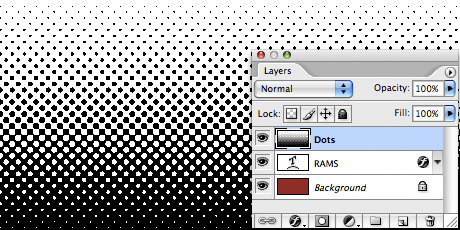
Step 12: Select the entire bitmap image (Select > All) and then copy (Edit > Copy) and paste (Edit > Paste) it into the original document. You can now close the duplicated document without saving.
Step 13: Make sure the new layer of halftone dots is at the top of the layers palette.
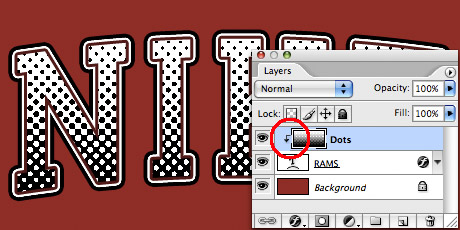
Step 14: Select the Dots layer and create a clipping mask with the text layer below. Layer > Create Clipping Mask.
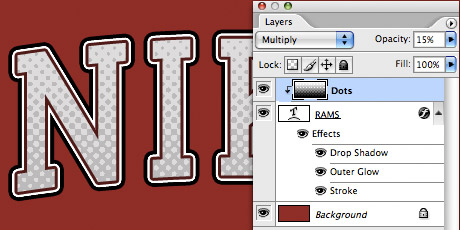
Step 15: Set the blending mode for the Dots layer to Multiply and the opacity to 15%.
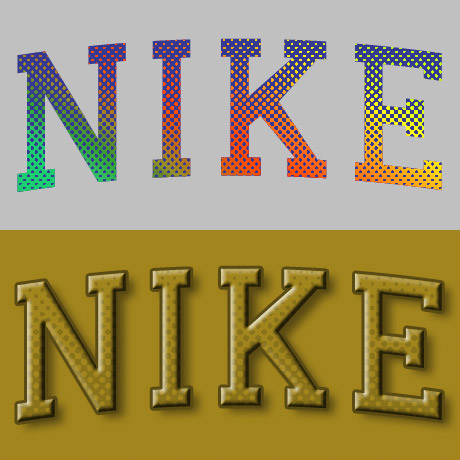
Done: