

Step 1. Open a new file> Actionscrip2.0 and change the background colour to black using the properties panel.
Step 2. Select the text tool, click anywhere in your canvas and type the words you want to be glinted.

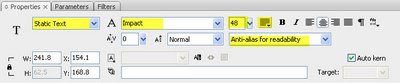
Step 3. While the text is still selected, change the properties as below:
Step 4. Lock the text layer and create another layer underneath called Glint

Step 5. Select the rectangle tool and put stroke: none and fill: grey
![]()
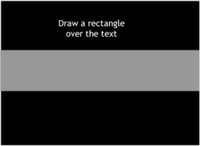
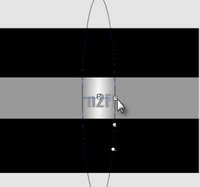
Step 6. Draw a big rectangle that will cover the entire text like so:
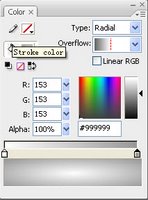
Step 7. Select the entire rectangle and change the fill to radical and change one end to white and the other to grey:
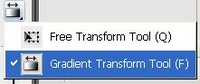
Step 8. Select the gradient transform:
Step 9. Shrink the gradient to about the middle:
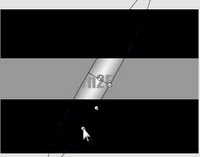
Step 10. Rotate the gradient until it is slanted.
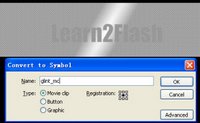
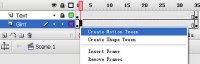
Step 11. Select the whole rectangle and go Modify>Convert to Symbol or (F8), name your symbol glint_mc, and select movie clip and press OK.
Step 12. Click on frame 35 of the text layer and press (F6) to add a key frame and do this with the glint layer as well.

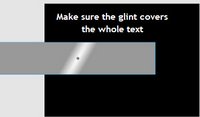
Step 13. Now select frame 1 of the glint layer and select the rectangle and move it to the very left hand side of the text but it still has to cover the whole text.
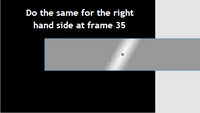
Step 14. Now go to frame 35 and move the rectangle to the far RIGHT hand side of the text like so:
Step 15. Now right click anywhere between frame 1~35 and select motion tween.
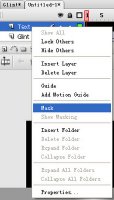
Step 16. Right click on the text layer and select mask
Finished!! Now press Ctrl+Enter to test your movie.