


Step 1
Create a new document sized 1200 x 600 px, fill the background layer with Black colour. Choose a font you like (I used this font from urbanfonts.com) and type some texts onto the background layer.
This will automatically create a new layer on top of the background layer, name it "text" and position it in the centre of the canvas as shown below:

Rasterise the text once you're satisfy with its size and position.
Step 2
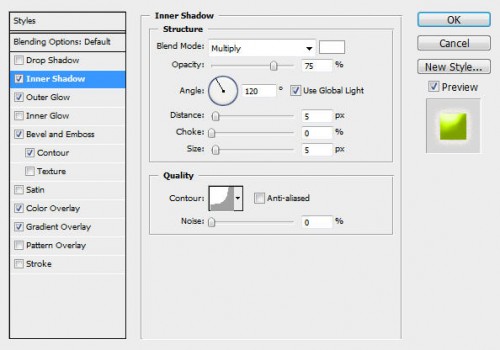
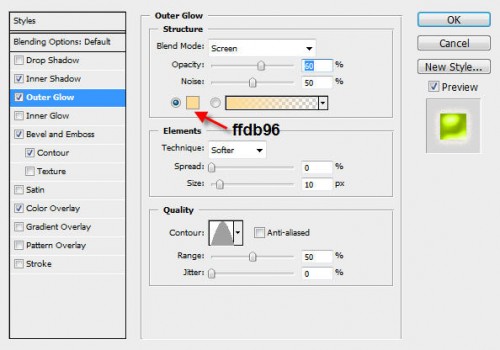
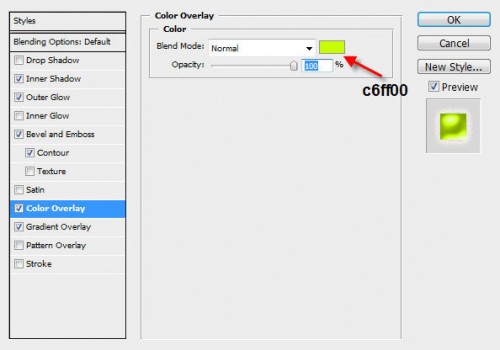
On "text" layer, apply the following Layer Blending options:
Inner Shadow
Outer Glow
Bevel and Emboss
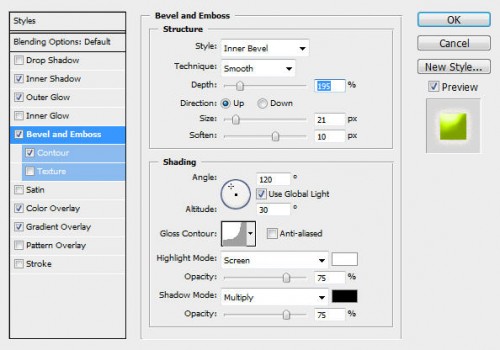
Contour
The effect so far will look like this:

Step 3
Still on the "Text" layer, load the selection of the text by holding down the Ctrl key and left-click the thumbnail image of "Text" layer on the layer palette:

Then go to Select > Modify > Expand and expand the image by 15px, then go to Select > Modify > Feather and apply a 15px feather to the selection.
The selection should now look like this:

Step 4
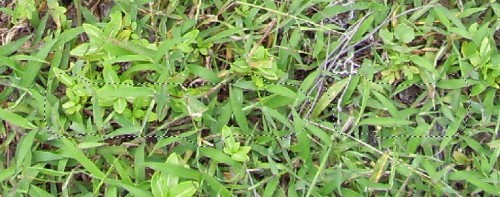
Download a copy of this grass texture and load it into Photoshop. This image is of my own stock and you can use it wherever you want.
Go back to our own document and drag the selection onto our the grass texture:
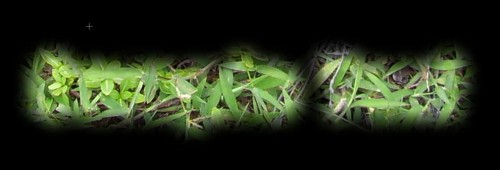
Copy and paste the selection back to the our document and name the newly-created layer "Grass". The effect so far will look like this:
Step 5
Change the layer blending option to "Grass" layer to "Hard Light", hit Ctrl + L and apply the following level adjustments:
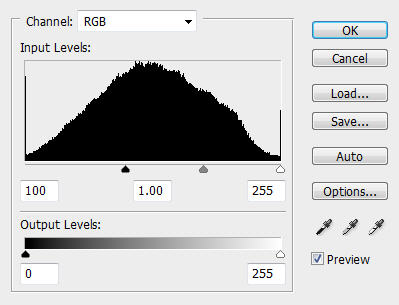
The effect so far will look like this:

Optional: if you would like to add more leaves and grass onto it, you may duplicate this grass layer a couple of times, and keep its blending option to "Hard Light".
Once you're happy with the grass texture, grab the Eraser Toll with a soft round brush (set the opacity and flow to 50%), gently erase the area where the text sits beneath so the texts can be revealed and become clearer:

Step 6
Ok now we can add some wooden texture for text so it look a bit more natural.
Download a copy of this wooden texture and load it into Photoshop. Go back to our own document and use the Lasso Tool (40px feather) and draw a selection underneath the text as shown below:

Again we drag the selection onto the wooden texture, copy a random portion and paste back to our text document and name the newly created layer "Wood". Drag this layer below all previous layer and just above the background layer.
The effect is shown below:

Step 7
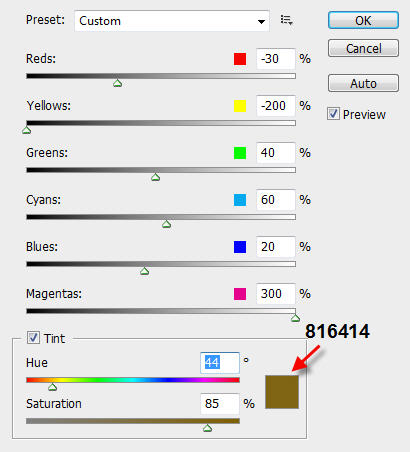
On the "Wood" layer, apply the following Black and White image adjustments (Ctrl + Alt + Shift + B) and apply the following settings:
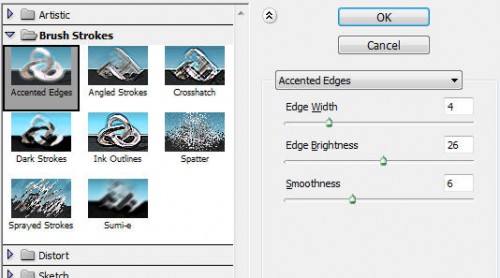
Duplicate the "Wood" layer once and go to Filter > Brush Strokes > Accented Edges, apply the following settings on the duplicated layer:
Change the layer blending option of the duplicated wood layer to "Overlay" and duplicate it a couple of times more, you will see this adds a glowing effect to the wood texture:

Here is the effect so far:

Step 8
To add some depth the text effect, we can do a multi-select of all layers (hold down Shift key and left-click the top and bottom once respectively)
Then hit Ctrl + T and use the free transform tool and distort the text until you reach the effect shown below:

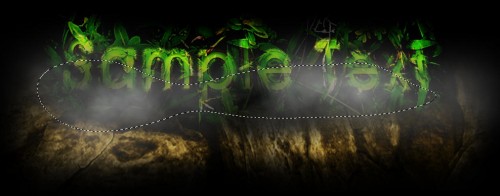
For final touchup, you can create a new layer called "cloud" and again use the Lasso Tool to draw a selection, fill the selection with Black and render some cloud in there:
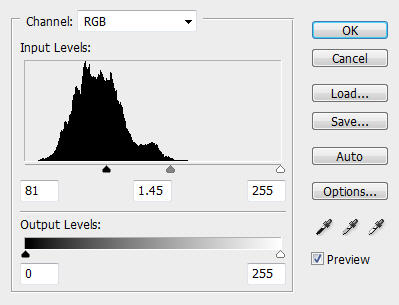
And apply the following Level Adjustments (Ctrl + L) to the "Cloud" layer:
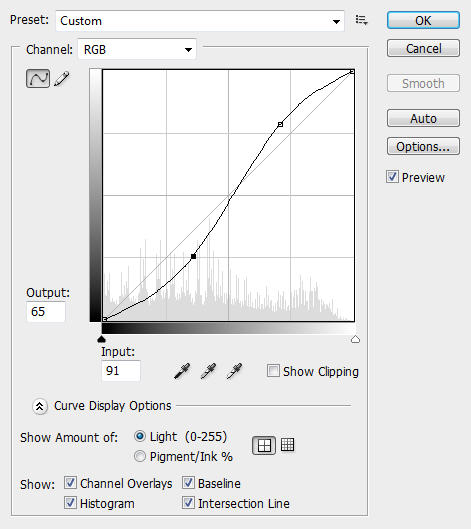
Then apply the following Curve Adjustments (Ctrl + M) settings:
Then put the "Cloud" layer just above the "Wood Copy 2″ layer, change the blending option to "Screen" and you will have the following resulting effect:

Ok that's it for this tutorial! Hope you enjoy it and find it useful and inspirational!
Here is my final image for this tutorial:

Cheers and have a nice day!