
Step 1
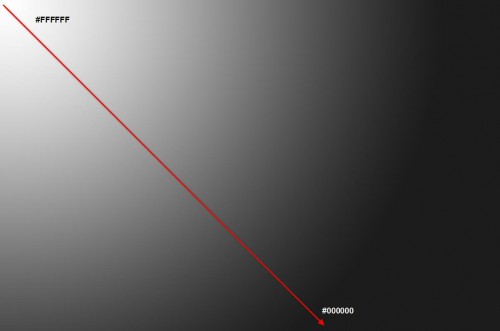
Create a new document sized 1200px * 800px and fill the background layer with Black. Duplicate the background layer once (Always a good habit) and grab the Gradient Tool (G) fill the duplicated layer as shown below:
After applying the gradient effect, duplicated this layer once and on the second duplicated layer, go to Edit > Transform > Flip Horizontal and change the layer blending mode to "screen".
You will have the following effect:

Step 2
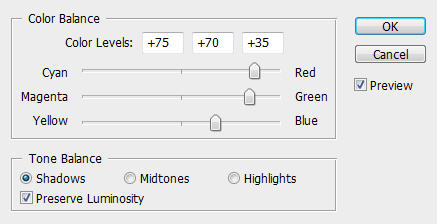
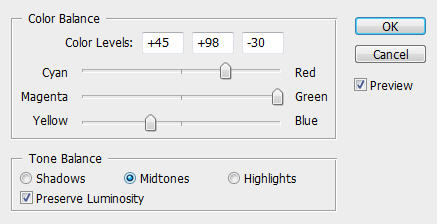
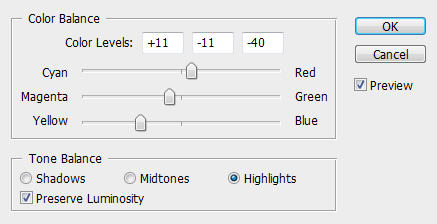
We can make the background a bit brighter and fresher. So go to Layer > New Adjustment Layer > Color Balance and apply the following settings:
Shadows
Midtones
Higtlights
And you will have the following effect:

OK that's for our background! We can now add our text effect onto it.
Step 3
Download this font and type some text onto it, resize and position it as shown below:
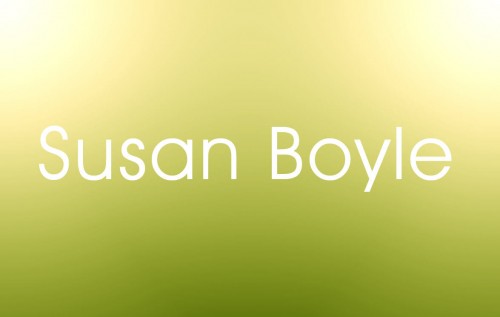
I typed Susan Boyle because I was so touched and inspired by her performance on Britains Got Talent show :) Wish her all the best!
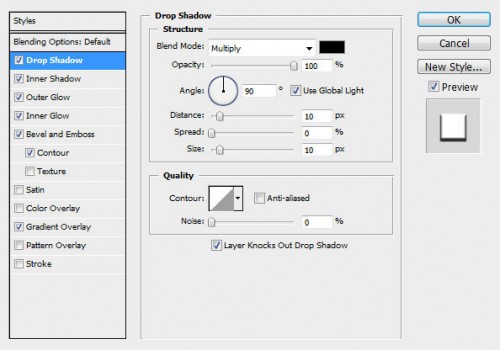
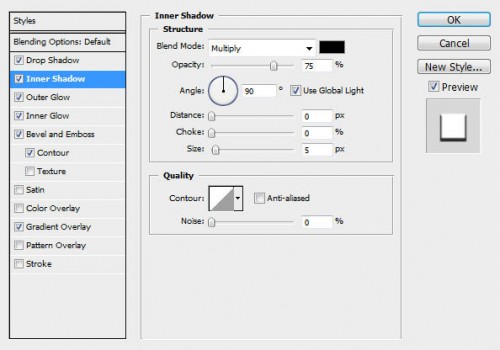
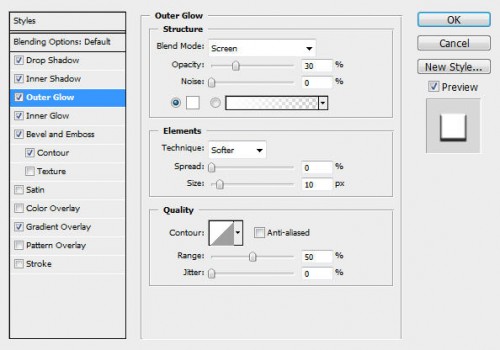
Apply the following layer blending effect to the text layer:
Drop Shadow
Inner Shadow
Outer Glow
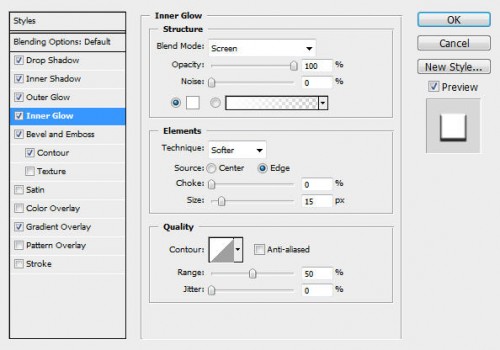
Inner Glow
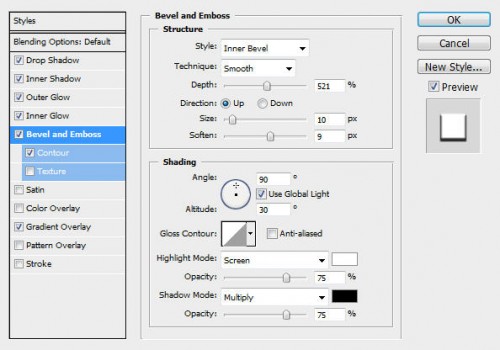
Bevel and Emboss
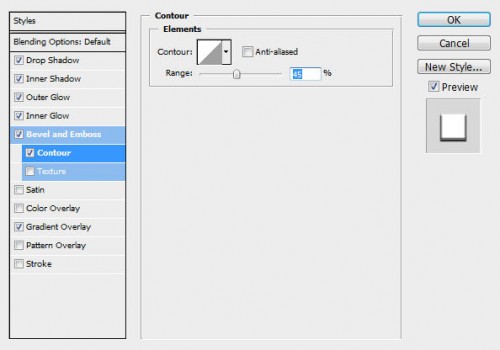
Contour
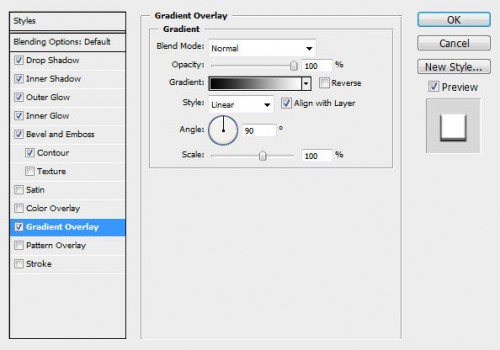
Gradient Overlay
And you will have the following effect:

Step 4
Load the selection of the text layer (ctrl + left-click the thumbnail image of the text effect on the layer palette):


Then create a new layer called "fibre" (make sure you maintain the selection) and fill it with White colour:

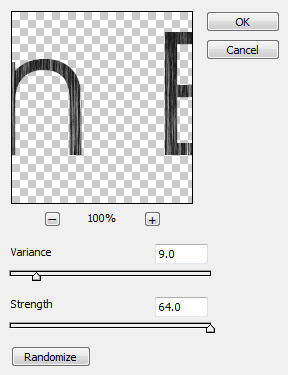
Then go to Filter > Render > Fibers and apply the following settings:
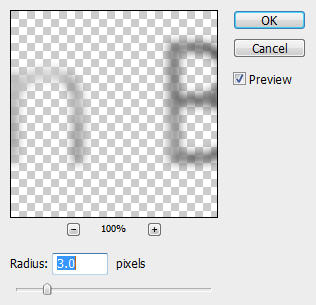
Then go to Filter > Blur > Gaussian Blur and apply the following settings:
Change the layer blending mode of this "fiber" layer to "lighten" and you will have the following effect:

To add some lighting variation onto it, we duplicate the "Fiber" layer once more and change the blending mode of the duplicated layer to "overlay":

Step 5
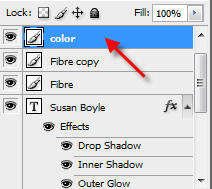
Now we can add some colour onto our text! To do this, load the selection of the text layer using the method described previously, create a new layer called "colour" on top of all layers:
Maintain the selection of the text layer, grab a soft brush with colour of your choice and simply paint over the layer. You will see because we have a selection of the text, you will paint only within the selection not any other area:

Change the layer blending mode of this layer to "color" and you will have the following effect:

To add a bit more shining effect to finish off the text, duplicate the "colour" layer once and change the blending mode of the duplicated layer to "overlay".
Here is the final effect:

Ok that's it for this tutorial! You can of course add some of your own texture or filter effect and see what the end results are!
I added some textures on the background just to decorate it a bit:

Alternatve Colour

Hope you enjoy this tutorial. Cheers and have a nice day!