


Requirements
- Photoshop, version 6 or higher.
- A sketch or idea of what face you want to draw.
Quick Recap of how to use the Pen
The Pen is very useful for cropping out images and creating irregular vector shapes.
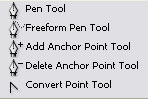
These are the available Pen tools in Photoshop:
The Pen: This is what you use to draw paths and shapes of all kinds precisely.
The Freeform Pen: This freehand style is usually used when you are confident in what you're going to draw and do not want to bother with anchors. However, it's not not commonly used as it is hard to draw perfect shapes with a mouse.
Add Anchor Point: Used to add a new anchor point.
Delete Anchor Point: Used to delete an anchor point.
Convert Point: Click on an anchor point in this mode to turn it into a Corner Point, or hold down your mouse and drag on an anchor point to turn it into a Smooth/Rounded Point.
Here's how to use the Pen tool.
Below are the available options under the Pen Toolbar on top.

Mode
- Shape Layers - create solid coloured layers
- Paths - create working paths for selection
- Fill Pixels - create rasterized shapes
Optional
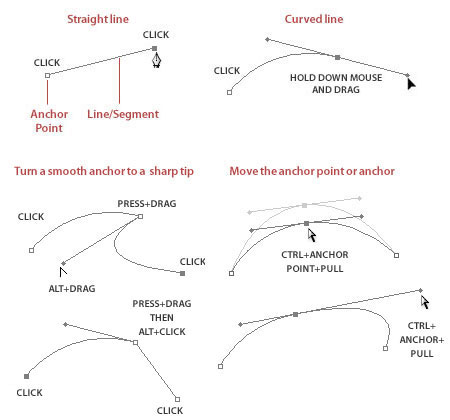
- Rubber Band - Clicking this allows you to preview your next curve, so you can see where you should click to make that perfect circle.
- Auto Add/Delete - Just click a line/segment to automatically add or delete an anchor point.
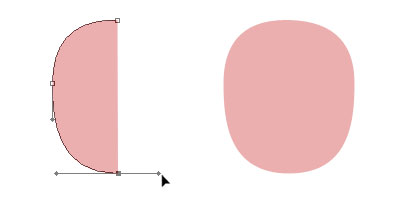
Let's make a cartoon avatar with purely the Pen. Create a new file with the size of 300 x 300 pixels. Next select the Pen Tool and Shape Layer mode, with Auto Add/Delete clicked. Start with the base outline, in this case, a circle. Remember to drag your point on mousedown to get the curve you want. Draw 4 curved points and close the shape by clicking on the first point you made. Since this is to be the outline, colour it black, but for now, my outline will be pink for details.
* You can also trace the outline from a scanned image, or use the Circle Shape if you want.
** Those of you who like to experiment can try using the Freeform Pen to sketch out your cartoon outline in one go.
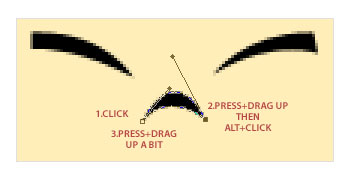
You have a head shape, now to add the ears. Click a little above and below your left point, making it 3 points. Hold down CTRL to get the Direct Selection Tool and pull the Point 2 out as shown below. Hold down ALT to get the Convert Point and drag the bottom anchor tip of Point 1 up right, and the top anchor tip of Point 3 down right to get a smooth curve for the ear's shape. Repeat on left side.
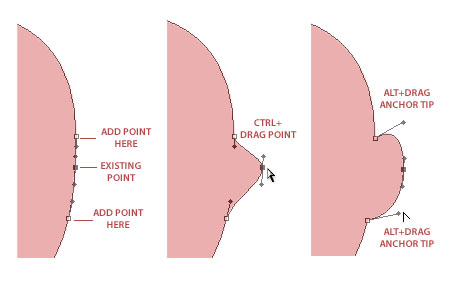
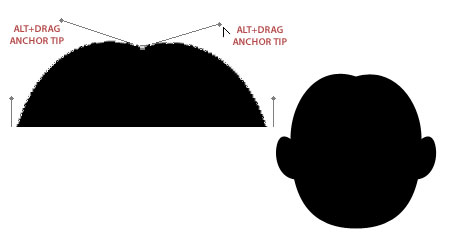
A round head's just fine, but for this tutorial, let's give this fella a hair indent. Hold CTRL and select the top point of the head. Now hold ALT and pull the left anchor tip upwards a bit. Repeat with the left anchor tip. You should have your base outline like below.
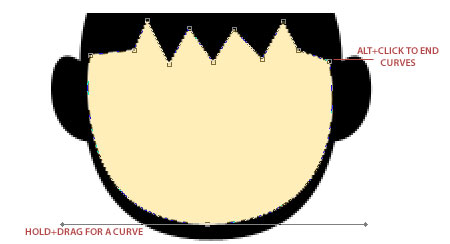
For the head's content, we will now draw shapes within the black outline. How think or thin you want your cartoon outline to be dePends on how near the edge of the outline you draw your face and other features. Draw a half circle with zigzag lines ontop, similar to that of a broken eggshell. Close the shape and give it a skin tone.
By now you would be more confident in making irregular shapes. Try creating a mango shape for the ear using smooth curves. Copy that layer and go to Edit > Tranform Path > Flip Horizontal for the other side.
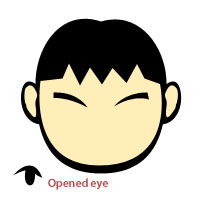
For the Asian happy eyes, create a thin strip with sharp anchors. Below is one way to make it. Feel free to explore around the different ways to make simple eyes, like an oPen eye, lazy eye, etc, all with the Pen. Like the step above, don't forget to make a copy for the other side.

To make a small nose, create a crescent with 2 points as seen below.
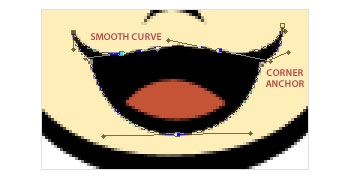
Here comes the mouth. A semi-circle is the easiest way out, but if you're looking for something of more character, draw a smooth mouth using curves and corner anchor points. For an oPen mouth, be sure to add a base outline, then the inner mouth shape.
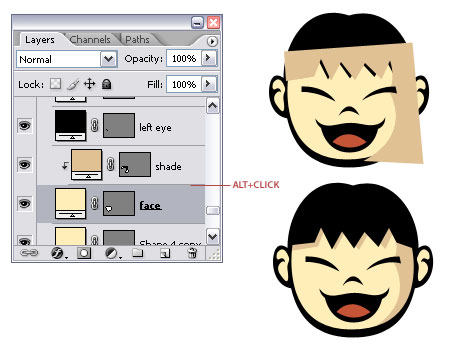
The cartoon face is done, but if you think it's a bit flat, add some shading using the Pen. For the skin shading, copy the face layer and tweak the points to make a shadow according to where your lighting should be. It's easier to make a shading layer bigger than the face itself. All you need to do is place the shading layer above the face layer, hold down ALT and click right between the 2 layers.
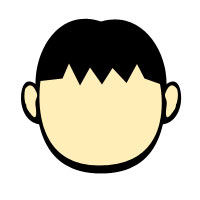
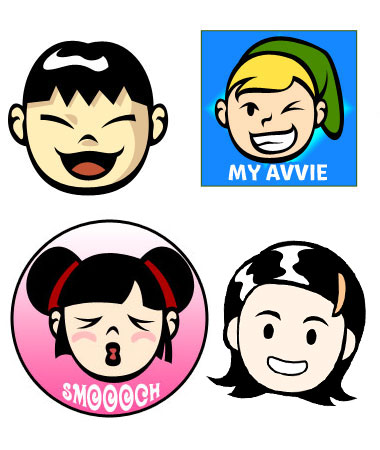
With a touch of highlight, you've got yourself a cartoon avatar! Experiment with all sorts of shapes with the Pen to create vector art in Photoshop for avatars, mascot design, icons, etc. With Shape Layers, you can recycle shapes and replace or change the facial elements at a go, and enlarge the images without reducing quality.
For those with no Illustrator, I hope you found this tutorial useful.
 10Steps is a huge resource of Photoshop tutorials, freebies and inspiration for designers.