


You don't even have to be familiar in xhtml and css, as long as you follow all the steps you will be ok.
Step One: The first step to this tutorial is to open up a new document. I made my document the size 500 by 300 just so I have enough space to work with. Once you have your document opened create a new layer. Call this layer, "base". Then you will grab your rectangular marquee tool, which is located on your tool panel.
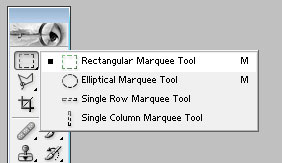
Once you have grabbed this tool, you will have to make a rectangular selection. Make a rectangle big enough for one link. You can decide the height of your menu by yourself, that's completely up to you, and it won't affect anything. So once you have your selection grab the paint tool and just paint it black by default.

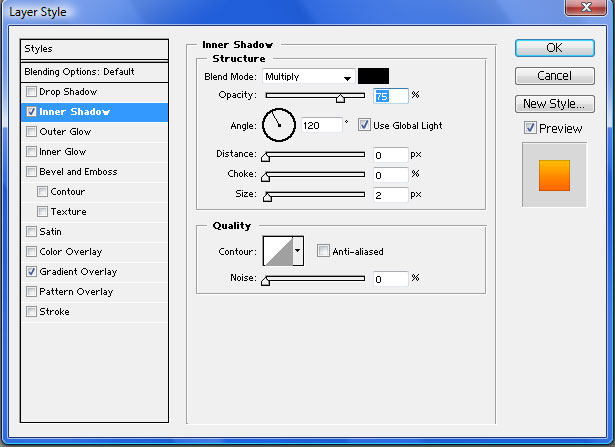
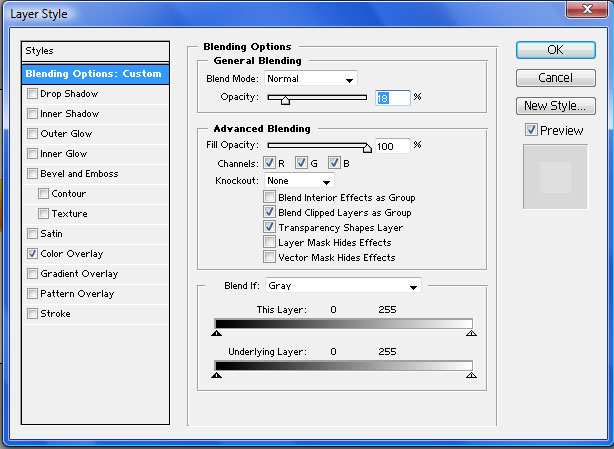
Step Two: Now its time to make our menu look good. We will do this by playing with our blending options. So go to layer/layer style/blending options. A menu should pop up with all these options. Give it the following attributes.
"Inner Shadow"
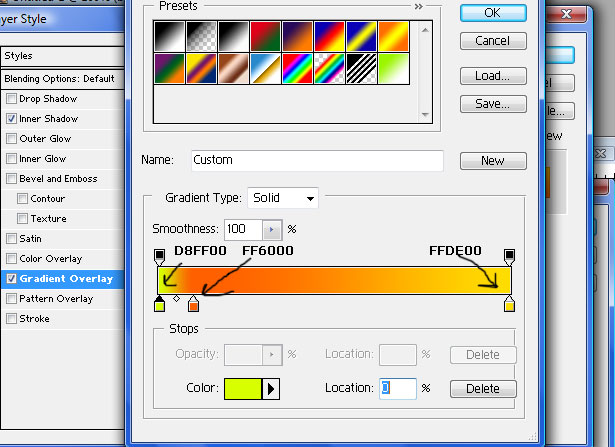
"Gradient"
Leave all the settings to default accept the colors!
Step Three: Now that you have this we need to fancy it up a little bit. So what you want to do is duplicate this layer. So go to layer/duplicate layer. Then go back to blending options and take off all the attributes which we added, but instead just make it a plain white color. Then go to the blending options setup, and where it says opacity put it to 18%.
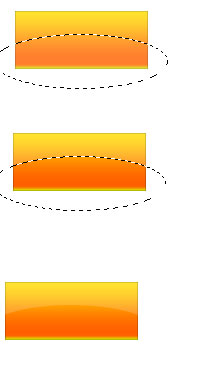
The next step is to cut this layer in half but using the elliptical marquee tool so it ends up being round. You can find this tool on the same panel where you found the rectangular marquee tool. So make a selection and split the "base copy" layer in half. Then press backspace to delete it. To clear the selection press "ctrl" and "d" at the same time.
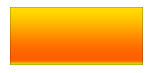
This is what you should have so far. This will be your main image where your links will go on.
Now all we need to do is make a rollover image. So what you need to do is duplicate both layer, "base" and "base copy" and move it right next to each other say the look exactly alike.

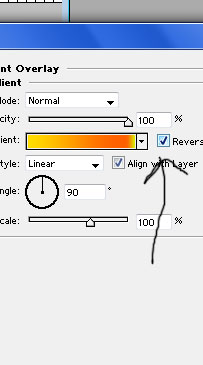
This will be easy because all were are going to do is reverse the gradient. So click on the layer "base copy 2″, which is now your second square to the right. Then go back to layer/layer style/blending options/gradient. Where it says reverse click on it. That will give us our rollover image.
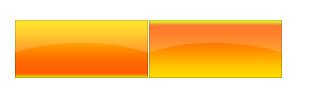
We have have our image and our rollover image. Now all thats left to do is to slice, code it, and use it.
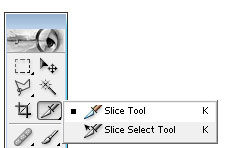
To slice it we will grab the slice tool.
With the slice tool you will cut out your main image and your rollover image exactly as if you were using the rectangular marquee tool. As you crop one of your images, right click/edit slice options. A screen pops up with all these options. Where it says name call it "link".
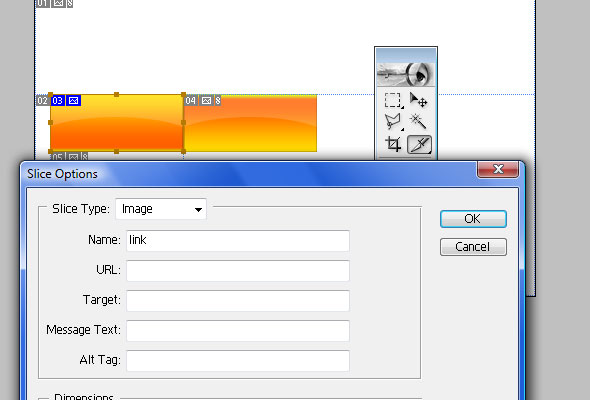
Now do the same with the rollover image and call it "linkroll". After you have done this go to file/save for web, and save your images to what ever location you choose. Once you have done this its time for the coding.
For your xhtml you should have:
| <div class="Links"> <a href="http://pstweaks.com">PsTweaks</a> <a href="http://www.pstweaks.com">Linkfive</a> <a href="http://www.pstweaks.com">Linkfour</a> <a href="http://www.pstweaks.com">LinkThree</a></div> |
For your Css you should have:
| .Links a{ text-decoration: none; font: bold 20px Arial; color: #ffffff; float:left; background-image:url(images/link.jpg); background-repeat: no-repeat; padding-top: 14px; text-align:center; width: 133px; height: 58px; } .Links a:hover{ background-image:url(images/linkroll.jpg); } |
All you have to do is replace your image link, the height the width, and your link names, and you will have yourself a fully working menu that you could use on your website.