


To complete this tutorial, you will need the following stocks:
Coastal Cliff Scene
Island Sky
Rock Island
Waterfall 1
Waterfall 2
Ancient Ruin
Beautiful Sitting Lady
Step 1
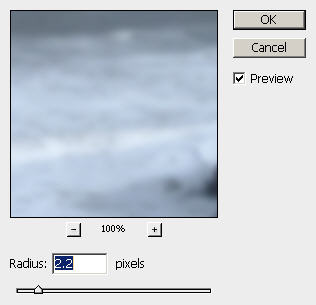
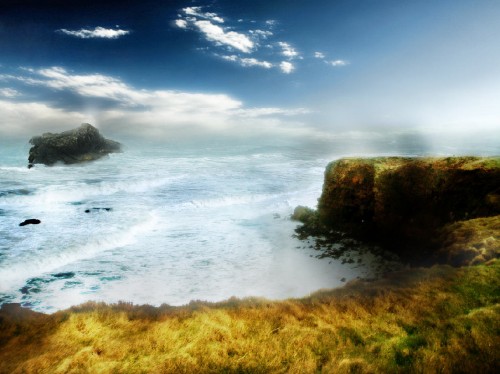
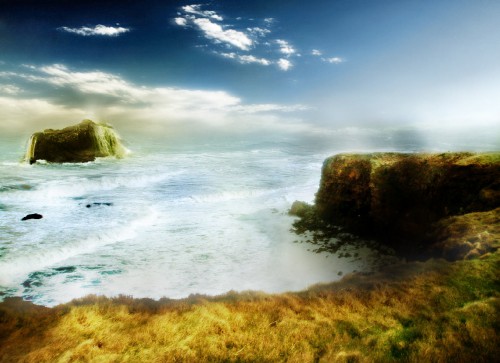
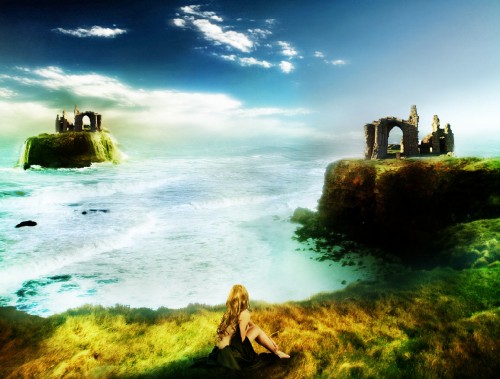
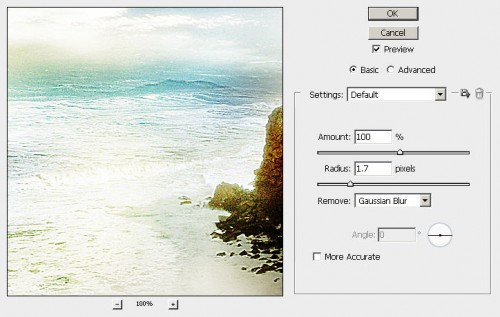
Load the "Coastal Cliff Scene" stock image into Photoshop, we will use this as our starting point. Firstly I'd like to make the overall soften a bit, so I duplicate the background layer, and apply the following Gaussian Blur settings to the duplicated layer:
After apply the Gaussian Blur settings, duplicate this blurred layer once and change the blending mode of the duplicated layer to "Color Burn", you will have the following effect:
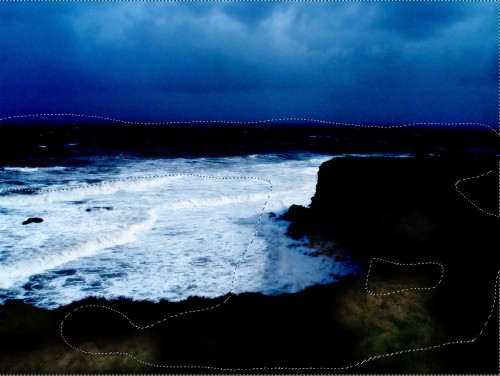
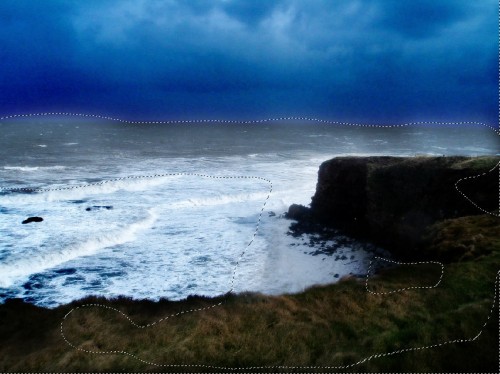
On this colour burn layer, add a layer mask and on the layer mask, erase the area indicated above (within the selection), so that only the colour of the ocean darkened: (Hint: erase using a big, soft brush)
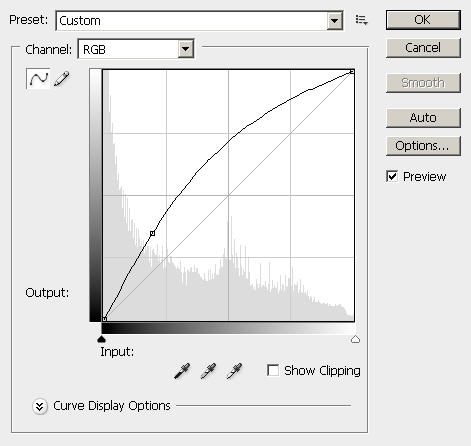
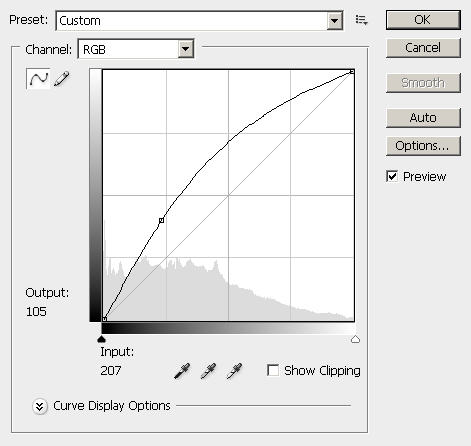
Now add the following adjustments layer on top of all previous layers:
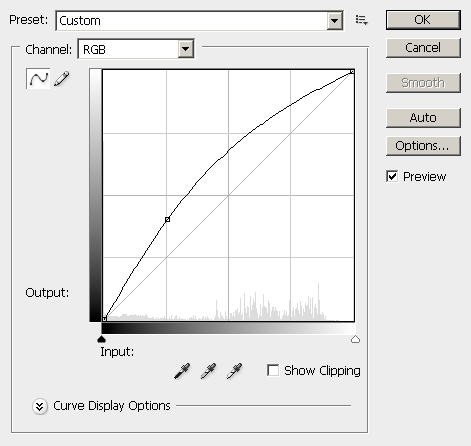
Curves:
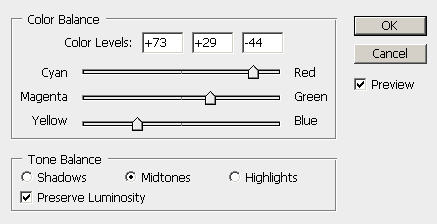
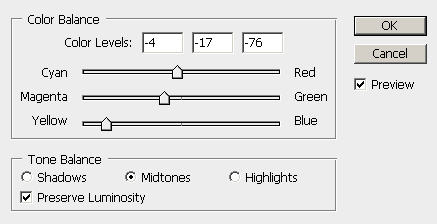
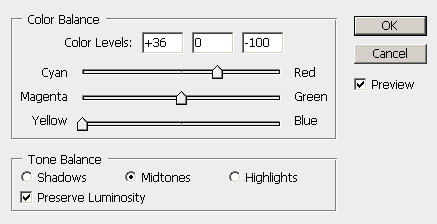
Colour Balance:
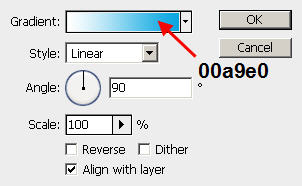
On top of the adjustment layers, add a gradient fill layer as shown below:
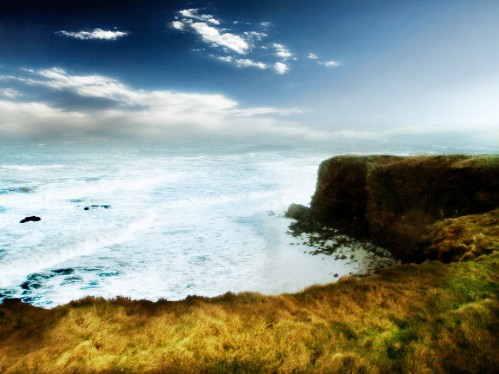
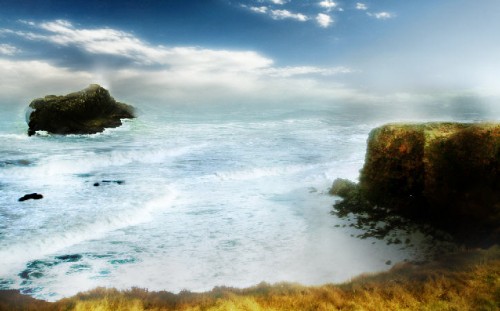
And you will have the following effect so far:

Step 2
Now we have a pretty nice grass on the lower part of our image, but the sky portion is simply a disaster right now. To fix this, simply load the Island Sky image into Photoshop, and drag the entire image onto our document, name this layer as "sky" and position, resize it as shown below:
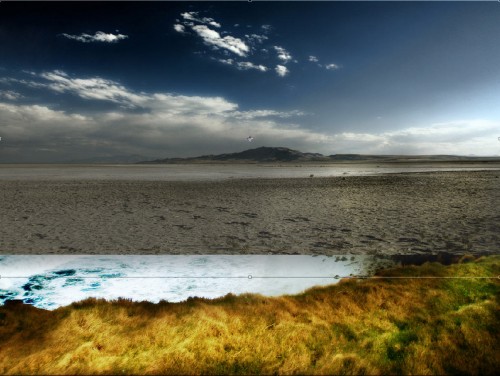
Use a big soft brush to erase the bottom part of the "sky" layer, so we have the sky portion of the image left:
Add the following "Curves" adjustment layer to the "Sky" layer, make sure to tick "use previous layer as clipping mask" option:
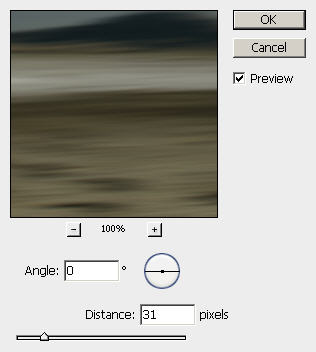
Duplicate the "sky" layer and drag the duplicated layer to the top, apply the following Motion Blur settings to it:
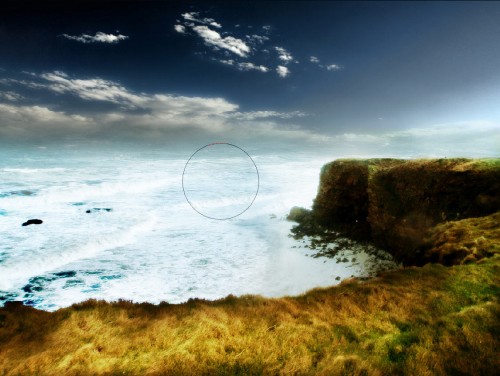
Change the motion blur sky layer's blending mode to "Screen" and opacity to 70%, you will have the following effect:
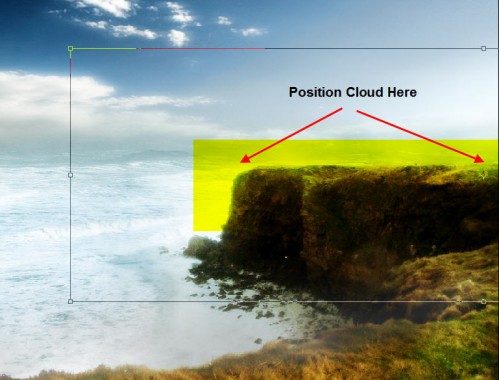
Step 3
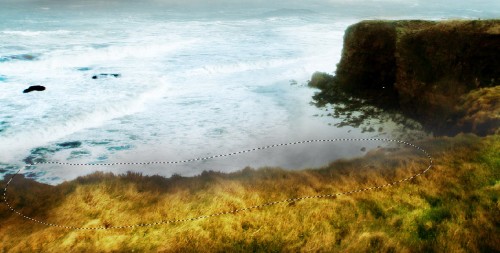
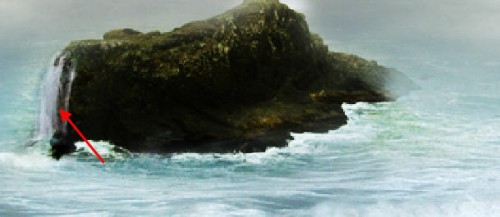
Now we can work on adding some dynamic lighting effect to the edges of the cliff. Let's grab the Lasso Tool (L) and set its feather to 30px, draw a selection around the bottom edge of the cliff, and render some cloud (choose a dark grey as background colour, and white as foreground colour) within it:
Name this layer as "light bottom" and drop its opacity to 70%.
Duplicate the "light bottom" layer once and change the blending mode of the duplicated layer to "overlay".
And on the cliff edge to the right, we use the same method to render some cloud around it. (For quicker result, simply duplicate the original "light bottom" layer and position it as shown below:
and change the layer name to "lighting right", duplicate it once and change the blending mode of the duplicated layer to "overlay", you will have the following effect:
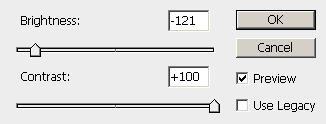
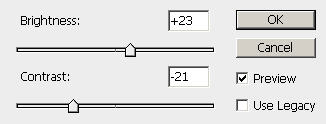
For more lighting variations, we can add a Brightness and Contrast adjustment layer with the following settings and mask:

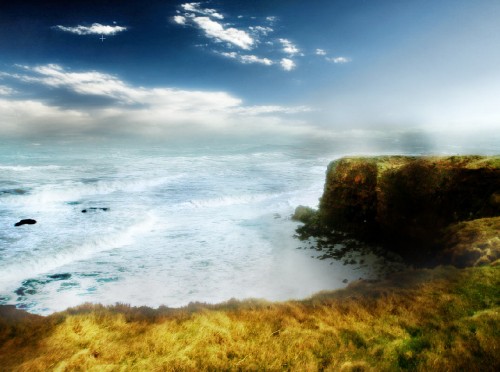
and you will have the following effect:
Step 4
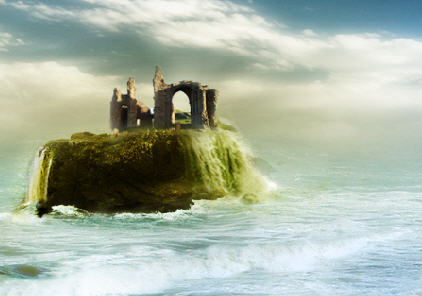
We can now add a far distance island to the ocean. Load the Rock Island image into Photoshop and drag it onto our document. Erase the surrounding and leave only the rock island and name this layer as "island":
Add a colour balance adjustment layer to this "island" layer, make sure to tick "use previous layer as clipping mask" option:
Now duplicate the "island" layer three times and drag them all to the top, change their blending mode as shown below:

And your effect should be similar to the following:
Step 5
Now we can add some waterfall to the island (well, it supposes to be a surreal image!). I decide to add one to each side. So load the Waterfall 1 image into Photoshop and drag it onto our document. Erase all the unnecessary parts only leave the main waterfall scene, resize and position it as shown below:
Name this layer as "waterfall 1″ and duplicate it once to make it bolder. Add the following Colour Balance adjustment layer to the duplicated layer, make sure to tick "use previous layer as clipping mask" option:
and you will have the following effect:
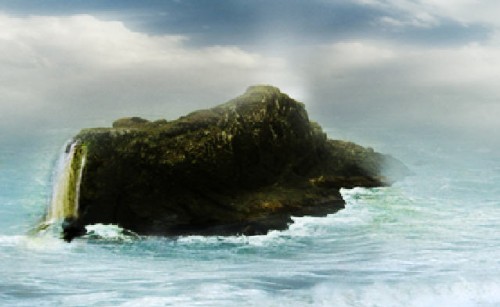
Load the Waterfall 2 image into Photoshop and again drag it to our document. Name this layer as "waterfall 2″ and put it on top of all other layers.
Again we erase all unnecessary parts of the waterfall image, and position it as shown below:
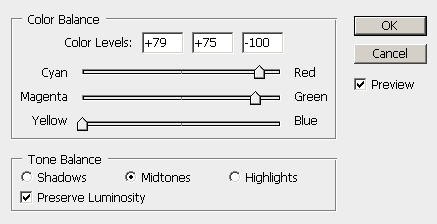
Add the following image adjustment layer to the "waterfall 2″ layer, make sure to tick "use previous layer as clipping mask" option:
Curves

Colour Balance

To highlight the island a bit, we can add a new colour balance adjustment layer without ticking the clipping mask option on top of all other layers, with the following settings and mask:
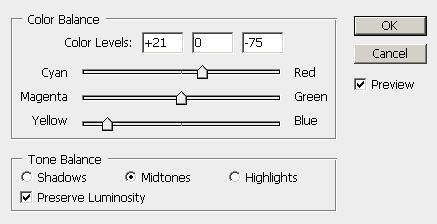
Mask

and you will have the following effect so far:
Step 6
Now we're onto add the Ancinet Ruin part. Simply load the Ancient Ruin image into Photoshop and drag it onto our document, resize and position it as shonw below:
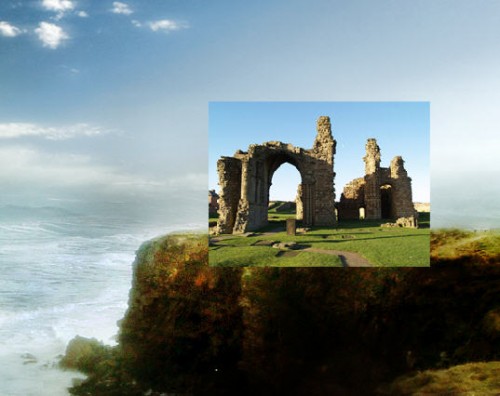
Name this layer as "ruin" Erase the bottom part (use a small soft brush) and the sky portion off the image: (hint: use the magic wand tool to select the sky part, and go to Edit > Clear to get rid of it)
Optional: you can add a colour balance adjustment layer to this ruin layer, however I decide to leave it as it is for now, with the original lighting effect.
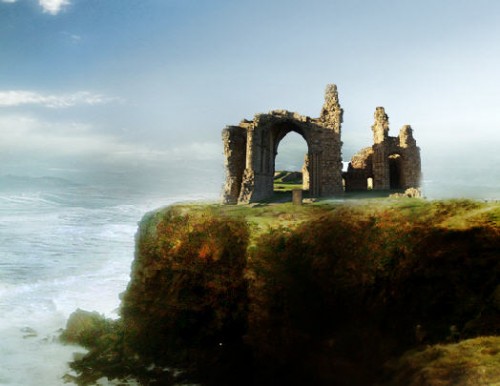
Duplicate this "ruin" layer once, flip it horizontally and rezise a bit, fit it on top of our island as shown below:
Step 7
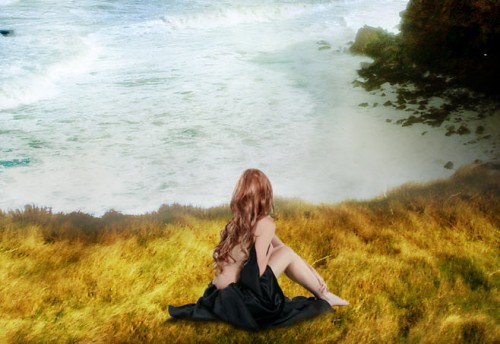
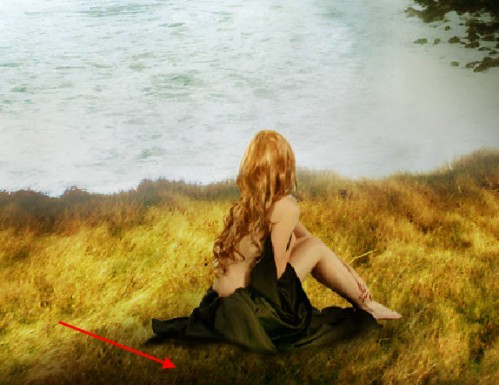
We can now spice up the image a bit by adding the beautiful lady image outlooking the distant sea to our scene. So load the "beautiful sitting lady" image into Photoshop. Cut the lady from the rest of the image and paste it onto our document, name this layer as "lady":
Resize and position it as shown below:
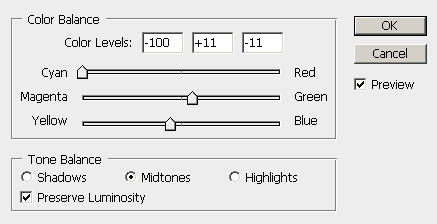
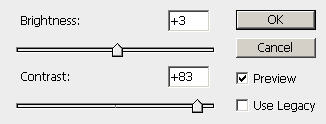
Add the following three adjustment layers to the lady layer, make sure to tick "use previous layer as clipping mask" option:
Curves
Colour Balance
Brightness and Contrast
Duplicate the original "lady" layer once, and put it on top of all other layers, change the blending mode to "multiply", you will have the following effect:

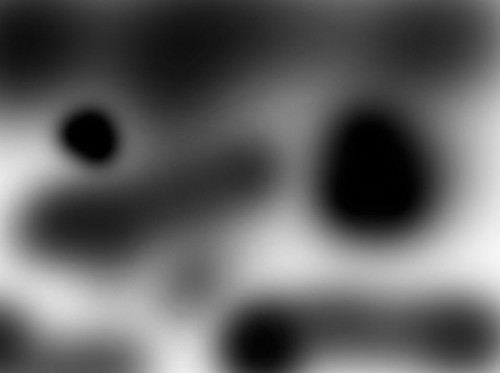
And now we can painting a bit of shadow for the lady. So create a new layer just below the orginal lady layer, use a soft round brush with black colour, set the brush flow and opacity to 50%, and paint in the area as shown below:
Step 8
For some final touchups, we can add two more adjustment layers with the following settings and mask:
Colour Balance
Brightness and Contrast

And you will have the following final effect:
Step 9
To further enhance the image effect, I flatten the image and apply the following smart sharpen settings to the flattened image:
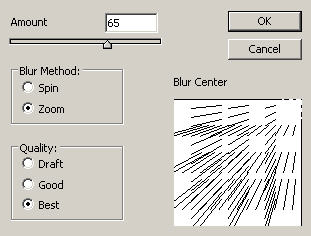
And to add some sunlight, I simply duplicated the background layer, and apply the following radial blur settings:
Change the blending mode to "Screen" for this duplicated layer and drop its opacity to around 40%.
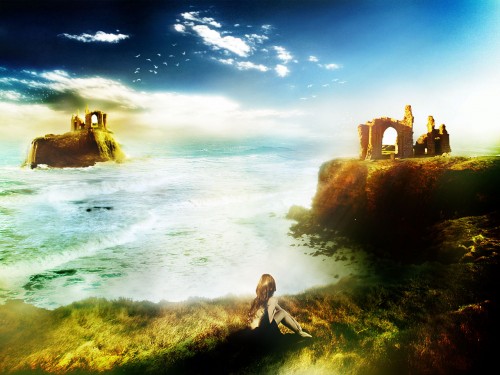
I further alter the colour balance and saturation of the image, and here is my final image result for this tutorial: (click to enlarge)
Hope you enjoy this tutorial. Cheers and have a nice day!