Note: This tutorial is done by Adobe Photoshop 7.0

1. Open a new window with:
Width: 600pixels
Height: 600pixels
Resolution: 72 pixels/inch Mode:
RGB color Contents: White
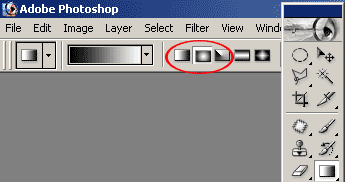
2. Choose Gradient Tool (G) > Radial Gradient
3. Put your mouse on the center of the image and holding Shift make a gradient pull as shown to the left.

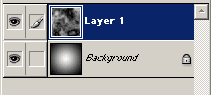
4. Make a new layer Shift+Ctrl+N (
![]() ). Click D to make your Foreground and Background colors to Black and White. Now go to Filter > Render > Clouds and click OK.
). Click D to make your Foreground and Background colors to Black and White. Now go to Filter > Render > Clouds and click OK.
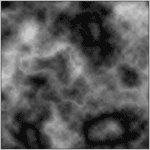
This time apply Filter > Render > Difference Clouds and click OK. Click Ctrl+F to apply one more time Difference Clouds to the layer.
Now you should have an image like shown to the left.
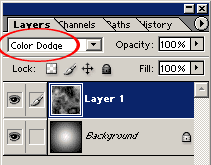
5. Change Layer 1"s Blending Mode to Color Dodge
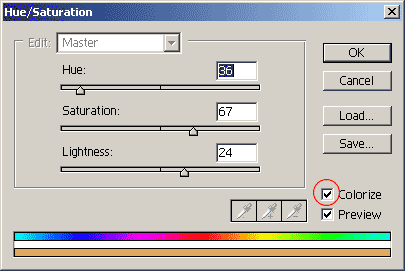
6. Go to Image > Adjustments > Hue/Saturation (Ctrl+U) and insert the values as follows: Hue: 36 Saturation: 67 and Lightness: 24
Don"t forget to select Colorize
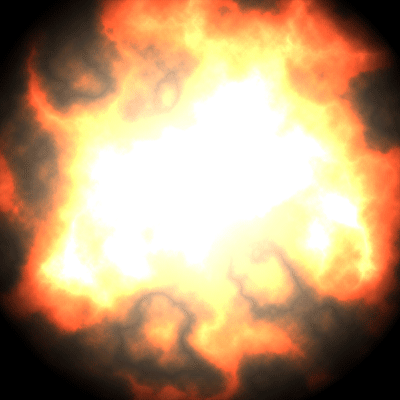
7. Finally you should have your Heat Core like this: