

In this tutorial, you will learn how to create a complete and detailed layout in Photoshop without using mass amounts of blending options.
1. Start out with a new 778x680 px image with a white background. Create a new layer named Black Border by going to Layer > New Layer. Next grab the Rectangular Marquee Tool. In the options bar at the top of the screen, set the style to Fixed Size, the width to 780px, and the height to 600px.
2. Next left-click in the center of the image; a large box with a dotted border should appear. Using the Move Tool, move the box until there are no top and bottom margins and until the left and right margins are equal. Once you are satisfied, fill the box in black.. With the box still selected, go to Select > Modify > Contract and set the contract to 1px. Then fill in the selection in white using the paint bucket tool.

3. Create a new layer just as you did in the previous step, only this time, name the layer Main Beam. Now, using the Polygon Lasso Tool, create a selection like in the image below. (In this tutorial, you can click most images for a larger view.) Then fill the selection in with any color. For this tutorial I'm going to use #FFBC3A. (Choose your color wisely, as you will be using a darker shade of the color you choose now in the step 5.)
4. In the layers palette, click on the little f and go to Drop Shadow. Use the settings in the image below.
5. Let's make some more beams! Create another layer called Right Beam. Using the Polygon Lasso Tool, create another selection like in the image below. Fill in the selection with the same color you use in step 3. Next create another layer called Left Beam . Using the Polygon Lasso Tool, create another selection next to the right beam. Fill this selection in using a darker shade of the color you used in step 3. I'm going to use #FF9F00.
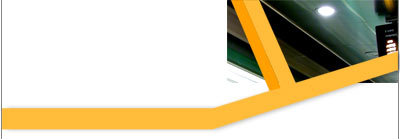
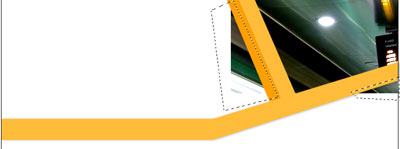
6. In the layers palette, click on the layer titled Black Border. Next, find an image that you would like to add in your layout. (Click here for the image I'm going to use.) Open the image in Photoshop, select the Move Tool , then click and drag the image onto the layout document/image. This will automatically create a new layer above the Black Border layer. In order to better identify the layer later on, right click on the newly created layer and click on Layer Properties. Rename the layer Photograph or Image. Then select the Move Tool and move the image to the location in the image below.
)
7. To remove the image overlap, grab the Polygon Lasso Tool and make a selection around one of the two overlapping corners. Then hold the shift key down and make another selection around the other overlapping corners. See image below. Then press the delete key on your keyboard to remove the selection.
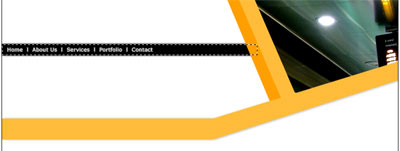
8. Now we are going to add a navigation bar. Click on the Black Border layer then create a new layer named Nav Bar. Next grab the Rectangular Marquee Tool and make a thin selection to the left of the image you just added and about an inch from the top of your document. Fill the selection in black. (You may fill it in with any color, however, black seems to look more professional.) Then in the layers palette, click on the little f and go to Drop Shadow. Then move on to stroke. Finally, add some text.
 |
||
 |
 |
|
9. Click on the Black Border layer again and create a new layer called Top Bg. Using the Rectangular Marquee Tool, make a selection like in the image below. Fill the selection in with color #F0F0F0 using the Paint Bucket Tool.
10. Create another layer called Top Bg stroke. Grab the Pencil Tool and in the options bar, set the brush size to 1px, the mode to normal, and the opacity to 100%. Change the foreground color to #E5E5E5. Now enlarge the image to about 400%, hold down the Shift key on your keyboard, and create a long horizontal line at the bottom of the selection you just made that is long enough that is touches, but does not overlap, the black border on both left and right sides of the layout.
11. Let's make a footer! Since the footer is going to be a replica of what was done in the past two steps we are going to copy and move layers in order to save time. So in the layers palette, click on the Top Bg layer then go to Layer > Duplicate Layer, name the layer Footer, and click ok. Since we don't want the footer to be in the same location as in the original layer, select the Move Tool. Now hold the Shift key and keep pressing the down arrow key until only about a half inch of the box is visible.
Next is the stroke layer. Duplicate the Top Bg stroke layer as you did above with the Top Bg layer, only this time, name it Footer Stroke. Now select the Move Tool, hold the Shift key and keep pressing the down arrow key until the stroke layer is just above the footer. Finally use the text tool to add some text links.
12. To finish the design phase in Photoshop, all that needs to be done now involves adding a logo and a company name and short slogan. I'm not going to explain how to create a logo, since most are rather basic and easy to make. However they do require some thought. Start thinking of ideas for logos that relate to your website and draw them on paper. Once you are satisfied with one, create it in Photoshop in a new document. Once that is done, copy the logo onto a new layer in the layout document. For the sake of this tutorial, I'm just going to use a shape from the Custom Shape Tool and a portion of a circle.
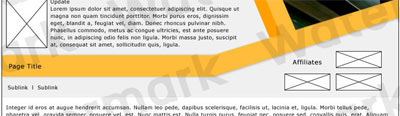
13. Now slice up your layout. You can see the slices I chose in the image below. If you are new to slicing a layout, please read the layout slicing tutorial.
Below is an example showing how the content in this design might be laid out.
That's it! For more practice making layouts in Photoshop, try the Professional Web Host Layout tutorial.