


First, let's just create a few styles using a single layer and a line of type.
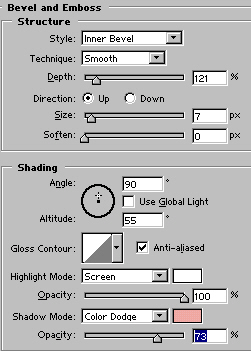
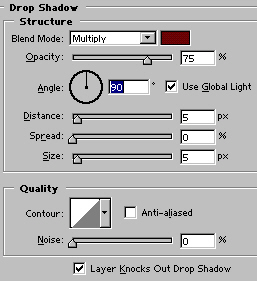
When developing styles, I generally begin with the bevel and build from there. The last style element I apply is the drop shadow, primarily so I can get a feel for the color the shadow should be. I usually don't know this until the majority of the work is done.
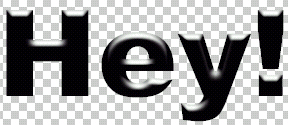
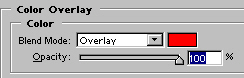
Now we will add a bit of color. I'm going to do this by first adding a gradient overlay, with the blending mode set to Luminosity, and then a color overlay set to Overlay.

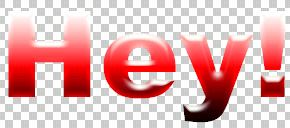
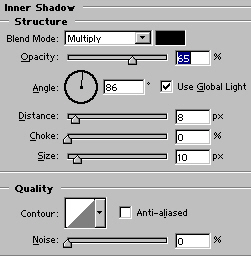
We sort of have a plastic effect going on here, so to increase the illusion of plastic we can apply our good friend Inner Shadow. I'll go ahead and put my drop shadow in now as well.
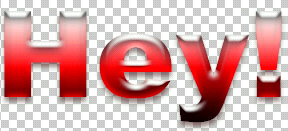
That's not too bad. But we can dress it up quite a bit just by applying a similar style to a layer beneath this one. Case in point: create a new layer beneath the type layer. Command/CTRL+Click the type layer in the Layers Palette to bring up the selection. Go to Select>Modify>Expand, and increse the selection size by a few pixels. In the layer beneath the type layer, fill with your foreground color. Apply the same style to this layer, with mayby just a bit of variation. In this example I've added a pattern overlay to the new Layer, and a Stroke to the original type layer just to give the type some seperation from the new layer. Here's the result:

Now let's clear up the question of type styles on other objects. Don't let the shape the style is applied to confuse you. If you have a type or button style, you can still apply it to another shape or filled are in a layer. For example, using the styles I just created I can create a shape using the Custom Shapes tool, and apply the same styles using the exact process used above. This also works with frames for photos, text styles to buttons, so on and so forth.

 Al Ward, a certified Photoshop Addict and Webmaster of Action FX Photoshop Resources (